DIY Lean-To Shed: Create a Sturdy Outdoor Shed with Easy Plans
Tired of garden clutter? Dreaming of a dedicated space for your tools and equipment? Building your own lean-to shed is a surprisingly achievable project, even for novice DIYers. This guide provides detailed instructions and easy-to-follow plans for constructing a sturdy and practical outdoor storage solution. You'll learn how to choose the right materials, lay a solid foundation, and erect a weather-resistant structure that will last for years. Get ready to transform your outdoor space and reclaim order from chaos!
Planning Your Lean-To Shed
Before you grab your tools, meticulous planning is key. First, decide on the dimensions of your shed. Consider the amount of storage space you need, the available area in your yard, and local building regulations. Sketch a basic design, noting the height, width, and depth. This will help determine the quantity of materials you need to purchase. Next, choose a location that offers good drainage to prevent water damage and easy access for loading and unloading your supplies. Factor in sunlight exposure; a partially shaded area will help protect your stored items from harsh weather.
Choosing the Right Materials
Select durable and weather-resistant materials. Pressure-treated lumber is ideal for the frame due to its resistance to rot and insect damage. For roofing, consider using asphalt shingles or metal roofing for longevity and weather protection. Consider using plywood for the walls, ensuring it's treated for exterior use. Don't forget essential hardware like screws, nails, brackets, and a level to ensure accuracy during construction.
Foundation and Framing
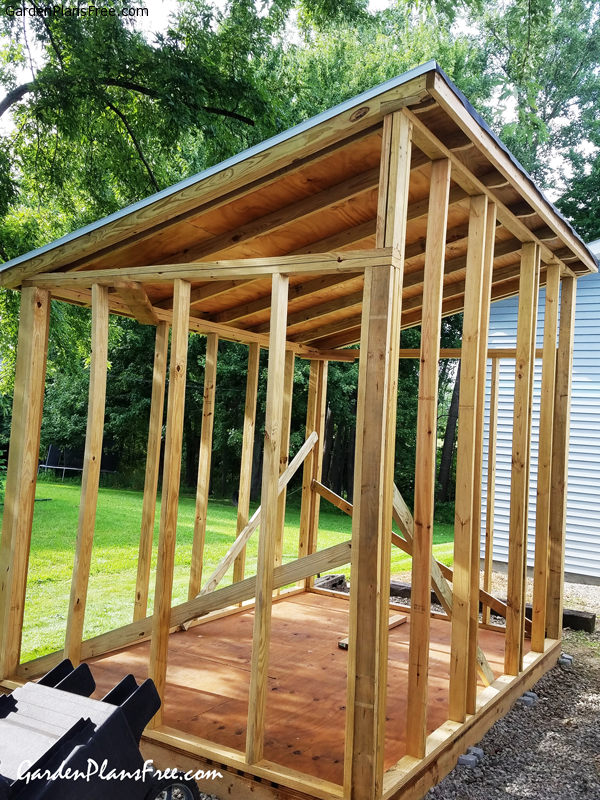
Begin by creating a level foundation. A simple gravel base is sufficient for a lean-to shed, providing excellent drainage. Spread a layer of gravel, compact it thoroughly, and level the surface. Next, build the frame. Using your pre-cut lumber, construct the base frame, ensuring perfect square corners using a speed square. Attach vertical posts to the base frame, ensuring they are plumb and evenly spaced. These posts will support the roof structure.
Erecting the Roof
The roof structure is crucial for a weatherproof shed. Construct the rafters, ensuring they are correctly angled to allow for proper water runoff. Securely attach the rafters to the vertical posts and the back wall. Once the rafter system is in place, lay down your chosen roofing material, following the manufacturer's instructions for overlapping and securing. Ensure proper ventilation to prevent moisture buildup.
Adding the Walls and Finishing Touches
With the roof completed, you can attach the plywood sheathing to the frame. Use appropriate fasteners, ensuring a tight fit to prevent drafts and water penetration. For added protection, apply a weather-resistant sealant to all joints. Finish the exterior with a coat of paint or stain to protect the wood from the elements and enhance its appearance. For increased security and protection, consider adding a simple door and lock. Consider adding shelves or other storage solutions inside your new lean-to shed.
Essential Tools
Before you start, gather the necessary tools:
- Measuring tape
- Level
- Saw (circular saw or hand saw)
- Drill and drill bits
- Hammer
- Screwdriver
- Shovel
- Safety Glasses and Gloves
Building your own lean-to shed is a rewarding experience that brings both functional storage and a sense of accomplishment. Follow these steps, take your time, and you’ll enjoy the benefits of your newly constructed outdoor haven for years to come.
0 comments:
Post a Comment
Note: Only a member of this blog may post a comment.