How to Build a Pole Barn for Large Equipment Storage

How to Build a Pole Barn for Large Equipment Storage


So, you've got some serious machinery â€" tractors, ATVs, maybe even a classic car â€" and they're all crammed into a tiny garage or worse, exposed to the elements. You're tired of the constant battle against rust and the frustration of maneuvering around a cramped space. You need a solution, a place where your precious equipment can live comfortably and safely.

Enter the pole barn.

These sturdy, versatile structures have been a go-to choice for generations of farmers and hobbyists alike, offering a reliable and affordable way to create a spacious haven for your prized possessions. Ready to build your own equipment haven? Let's break down the process step by step.

Step 1: Planning and Design

Before you start digging holes, take some time to map out your vision.

Size matters. Measure your equipment and add some wiggle room. You want enough space to move around comfortably and access every corner. Don't forget to factor in overhead clearance for taller machinery.
Purposeful design. Decide how you'll use the space. Do you need a workshop area? Will you be storing hay or grain? Are you planning on an office or a living area within the barn?
Location, location, location. Choose a spot that's level and easily accessible. Make sure it doesn't interfere with any existing structures or utilities.
The right materials. Think about the climate and your needs. For heavy equipment, you might need heavier-duty materials like steel or concrete.

Step 2: Gathering the Crew and Supplies

Building a pole barn is a team effort.

Get help. Unless you're a seasoned construction pro, it's best to enlist some help from family or friends. Having extra hands makes the process smoother and less stressful.
List out your materials. This will depend on the size and complexity of your barn. You'll need:
Posts: Typically made of pressure-treated wood or steel for durability.
Framing lumber: For the roof and walls.
Sheathing: Plywood or OSB for the roof and walls.
Roofing materials: Metal roofing is a popular and durable option.
Siding: Choose a material that suits your style and budget.
Doors and windows: Select sizes that will accommodate your equipment and provide ample natural light.
Hardware: Nails, screws, bolts, braces â€" you'll need a variety of fasteners to secure the structure.
Concrete: For the foundation and footings.
Protective finishes: Paint or stain to protect the wood from the elements.

Step 3: Foundation and Footing Work

The foundation is the bedrock of your barn.

Dig those holes. Use a post hole digger or a rented auger to create holes for your posts. The depth will depend on your local frost line and the type of soil.
Pour the concrete. Mix your concrete according to the manufacturer's instructions and carefully pour it into the holes. Make sure the posts are level and plumb before the concrete sets.
Let it cure. Give the concrete plenty of time to harden before moving on to the next steps.

Step 4: Erecting the Framework

Time to build the skeleton of your barn.

Post installation. Secure the posts to the concrete footings using galvanized bolts and washers.
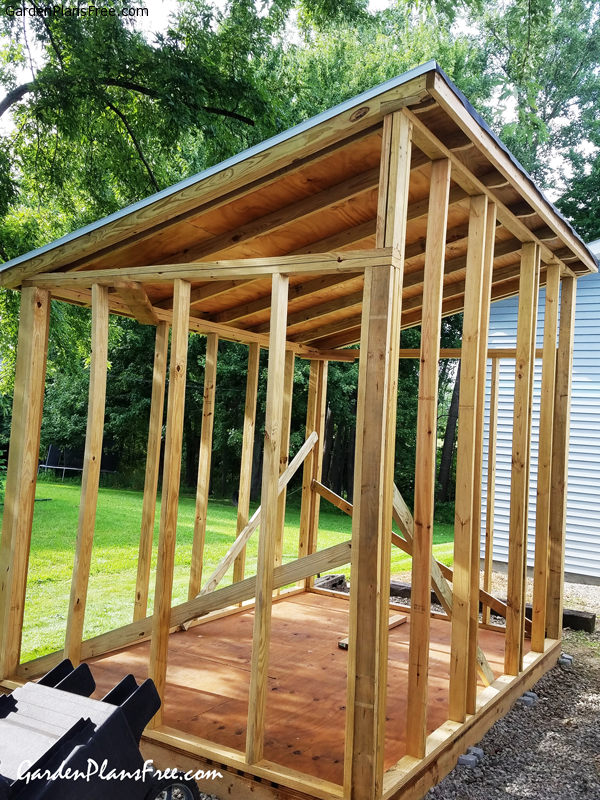
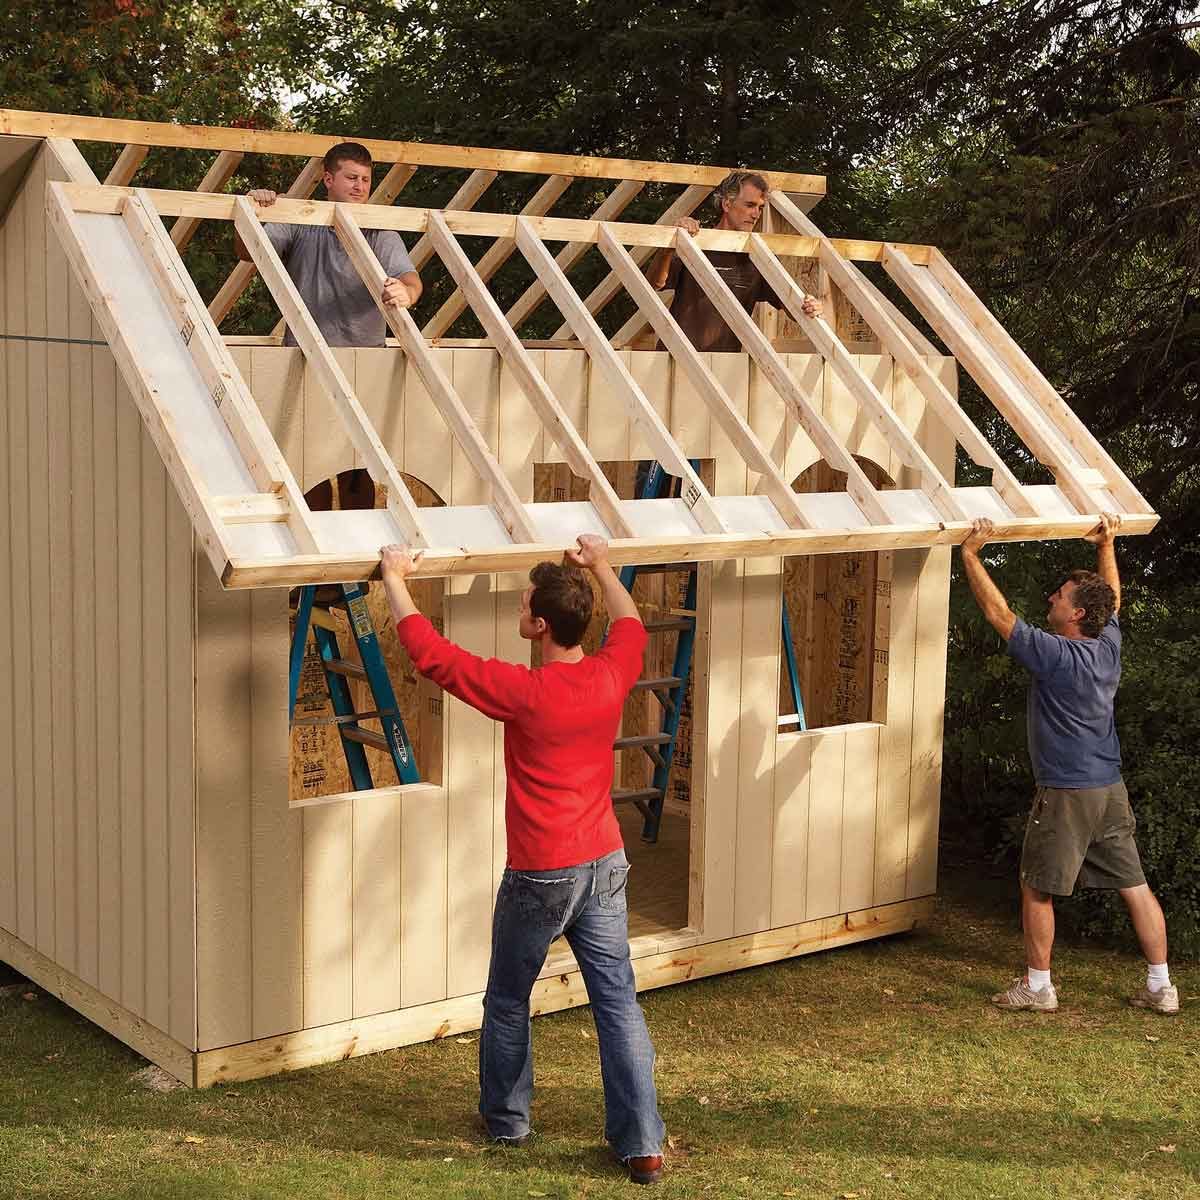
Framing the roof. Cut and install the roof rafters, creating a strong and stable structure.
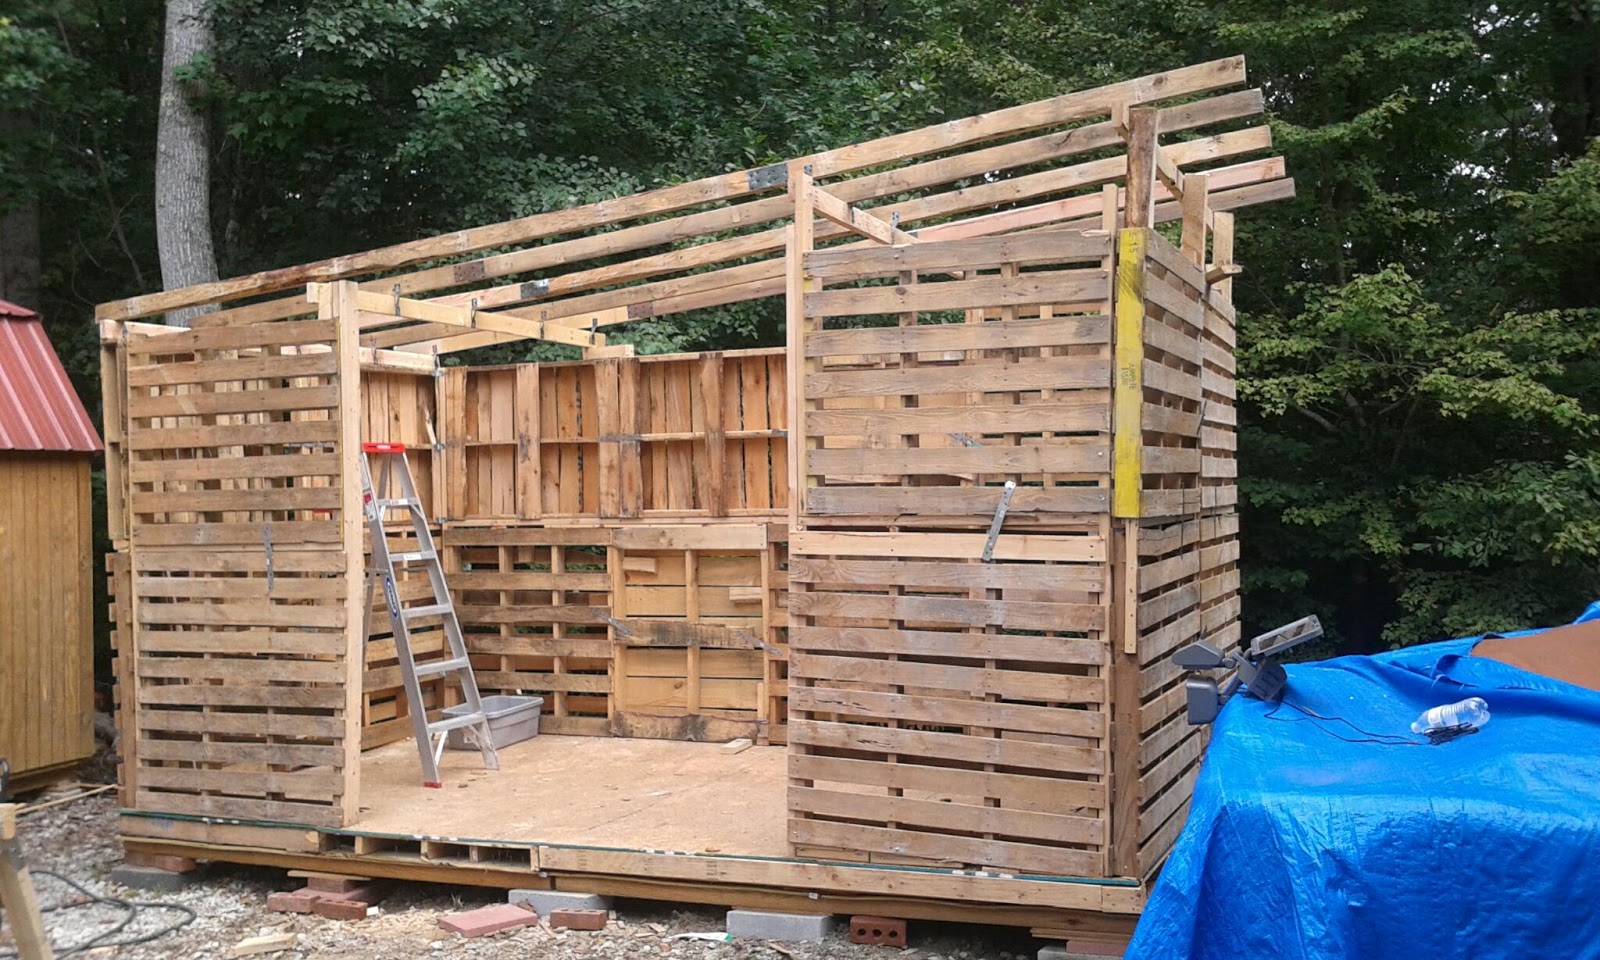
Framing the walls. Attach wall studs to the posts, creating a sturdy frame for your siding.

Step 5: Roofing and Sheathing

Now to cover the roof and walls.

Installing the roof sheathing. Attach plywood or OSB to the rafters, creating a smooth base for your roofing material.
Laying the roofing. Secure your chosen roofing material to the sheathing, using nails, screws, or specialized clips.
Installing the wall sheathing. Attach plywood or OSB to the wall studs, providing a sturdy foundation for the siding.

Step 6: Siding and Finishing Touches

The finishing touches give your barn its personality.

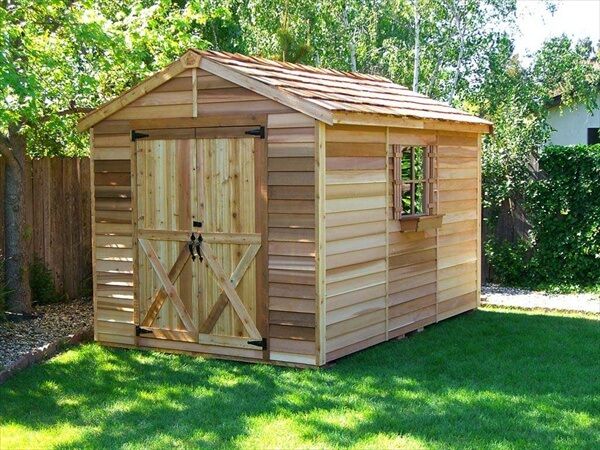
Siding installation. Choose your siding material â€" metal, wood, vinyl, or fiber cement â€" and install it according to the manufacturer's instructions.
Adding doors and windows. Install the doors and windows to provide access and natural light.
Finishing details. Add trim, gutters, and other decorative elements to enhance the look of your barn.

Step 7: The Big Reveal

Congratulations! You've built your own pole barn.

Clean up. Take a moment to tidy up the construction site and admire your handiwork.
Add personal touches. Organize your space, personalize it with your own style, and enjoy the fruits of your labor.

Tips and Tricks for Building a Pole Barn:

Invest in good tools. Having the right tools will make the job easier and faster.
Get proper permits. Check with your local building department to ensure you're following all the necessary regulations.
Stay organized. Keep your materials sorted and accessible to avoid delays.
Safety first. Wear protective gear and follow all safety guidelines.
Don't be afraid to ask for help. If you encounter a problem, don't hesitate to seek advice from a more experienced builder.

Beyond the Basics: Customization and Upgrades

Once the basic structure is in place, the possibilities are endless.

Add a workshop. Create a dedicated space for tools and projects.
Install a concrete floor. This makes the barn more durable and easier to clean.
Add insulation. Keep your equipment protected from extreme temperatures and improve energy efficiency.
Install electricity. Bring in power for lighting, heating, and tools.
Add a loft. Maximize your storage space by adding a loft above the main area.

Building a pole barn is a rewarding experience. It's a chance to create a custom-designed space that perfectly meets your needs. With careful planning, hard work, and a little guidance, you can build a sturdy and functional pole barn that will house your equipment for years to come.

Read More..

How to Build a Pole Barn for Large Equipment Storage

How to Build a Pole Barn for Large Equipment Storage


So, you've got some serious machinery â€" tractors, ATVs, maybe even a classic car â€" and they're all crammed into a tiny garage or worse, exposed to the elements. You're tired of the constant battle against rust and the frustration of maneuvering around a cramped space. You need a solution, a place where your precious equipment can live comfortably and safely.

Enter the pole barn.

These sturdy, versatile structures have been a go-to choice for generations of farmers and hobbyists alike, offering a reliable and affordable way to create a spacious haven for your prized possessions. Ready to build your own equipment haven? Let's break down the process step by step.

Step 1: Planning and Design

Before you start digging holes, take some time to map out your vision.

Size matters. Measure your equipment and add some wiggle room. You want enough space to move around comfortably and access every corner. Don't forget to factor in overhead clearance for taller machinery.
Purposeful design. Decide how you'll use the space. Do you need a workshop area? Will you be storing hay or grain? Are you planning on an office or a living area within the barn?
Location, location, location. Choose a spot that's level and easily accessible. Make sure it doesn't interfere with any existing structures or utilities.
The right materials. Think about the climate and your needs. For heavy equipment, you might need heavier-duty materials like steel or concrete.

Step 2: Gathering the Crew and Supplies

Building a pole barn is a team effort.

Get help. Unless you're a seasoned construction pro, it's best to enlist some help from family or friends. Having extra hands makes the process smoother and less stressful.
List out your materials. This will depend on the size and complexity of your barn. You'll need:
Posts: Typically made of pressure-treated wood or steel for durability.
Framing lumber: For the roof and walls.
Sheathing: Plywood or OSB for the roof and walls.
Roofing materials: Metal roofing is a popular and durable option.
Siding: Choose a material that suits your style and budget.
Doors and windows: Select sizes that will accommodate your equipment and provide ample natural light.
Hardware: Nails, screws, bolts, braces â€" you'll need a variety of fasteners to secure the structure.
Concrete: For the foundation and footings.
Protective finishes: Paint or stain to protect the wood from the elements.

Step 3: Foundation and Footing Work

The foundation is the bedrock of your barn.

Dig those holes. Use a post hole digger or a rented auger to create holes for your posts. The depth will depend on your local frost line and the type of soil.
Pour the concrete. Mix your concrete according to the manufacturer's instructions and carefully pour it into the holes. Make sure the posts are level and plumb before the concrete sets.
Let it cure. Give the concrete plenty of time to harden before moving on to the next steps.

Step 4: Erecting the Framework

Time to build the skeleton of your barn.

Post installation. Secure the posts to the concrete footings using galvanized bolts and washers.
Framing the roof. Cut and install the roof rafters, creating a strong and stable structure.
Framing the walls. Attach wall studs to the posts, creating a sturdy frame for your siding.

Step 5: Roofing and Sheathing

Now to cover the roof and walls.

Installing the roof sheathing. Attach plywood or OSB to the rafters, creating a smooth base for your roofing material.
Laying the roofing. Secure your chosen roofing material to the sheathing, using nails, screws, or specialized clips.
Installing the wall sheathing. Attach plywood or OSB to the wall studs, providing a sturdy foundation for the siding.

Step 6: Siding and Finishing Touches

The finishing touches give your barn its personality.

Siding installation. Choose your siding material â€" metal, wood, vinyl, or fiber cement â€" and install it according to the manufacturer's instructions.
Adding doors and windows. Install the doors and windows to provide access and natural light.
Finishing details. Add trim, gutters, and other decorative elements to enhance the look of your barn.

Step 7: The Big Reveal

Congratulations! You've built your own pole barn.

Clean up. Take a moment to tidy up the construction site and admire your handiwork.
Add personal touches. Organize your space, personalize it with your own style, and enjoy the fruits of your labor.

Tips and Tricks for Building a Pole Barn:

Invest in good tools. Having the right tools will make the job easier and faster.
Get proper permits. Check with your local building department to ensure you're following all the necessary regulations.
Stay organized. Keep your materials sorted and accessible to avoid delays.
Safety first. Wear protective gear and follow all safety guidelines.
Don't be afraid to ask for help. If you encounter a problem, don't hesitate to seek advice from a more experienced builder.

Beyond the Basics: Customization and Upgrades

Once the basic structure is in place, the possibilities are endless.

Add a workshop. Create a dedicated space for tools and projects.
Install a concrete floor. This makes the barn more durable and easier to clean.
Add insulation. Keep your equipment protected from extreme temperatures and improve energy efficiency.
Install electricity. Bring in power for lighting, heating, and tools.
Add a loft. Maximize your storage space by adding a loft above the main area.

Building a pole barn is a rewarding experience. It's a chance to create a custom-designed space that perfectly meets your needs. With careful planning, hard work, and a little guidance, you can build a sturdy and functional pole barn that will house your equipment for years to come.

Read More..

How to Design a Pole Barn with Ample Storage for Seasonal Items

How to Design a Pole Barn with Ample Storage for Seasonal Items


Okay, let's talk pole barns. You know, those sturdy, practical structures that have become synonymous with storage, workshops, and even living space. But we're going to focus on the storage part, specifically for all that seasonal stuff that takes over your garage or basement. Think kayaks, lawnmowers, holiday decorations, winter gear â€" you name it, it's going to have a place in your new pole barn paradise.

Step 1: Dream Big, But Be Realistic

Before you start sketching out your perfect pole barn on a napkin (we've all been there!), let's get real. Think about the space you actually need. How much stuff are we talking about? Are you planning on storing vehicles, too?

Here's a little exercise to get you started:

List everything: Write down every single item you want to store in the barn.
Categorize: Group items into categories (e.g., lawn and garden, sports equipment, holiday décor, etc.)
Measure: Go through your list and actually measure the dimensions of each item. This is crucial for planning your layout.

Step 2: Planning the Layout â€" It's All About Flow

Now that you know what you're working with, you can start to plan the layout. Imagine yourself moving through the barn â€" where will you enter? Where will you store the most-used items? Where can you park a vehicle, if needed?

Think vertical: Utilize vertical space with shelves, racks, and even overhead storage systems. You'd be surprised how much you can store by going up!
Leave room to breathe: Don't cram everything in, leaving no room to move around. Allow for aisles and walkways for easy access.
Consider future needs: Will you need to add more storage in the future? Plan for expansion. Maybe have a small section designated for future additions.

Step 3: Choosing Your Pole Barn Materials â€" The Basics

Pole barns are known for their durability and affordability. But there are a few things to consider when choosing materials:

Posts: Typically made of treated lumber, steel, or concrete. Treated lumber is cost-effective, while steel and concrete offer superior durability.
Roofing: Metal roofing is a popular choice due to its longevity and affordability. It also provides good insulation.
Siding: Vinyl siding is a good option for low maintenance, while metal siding is more durable.
Windows and Doors: Consider adding plenty of windows for natural light and ventilation. Choose a door size that allows you to easily move large items in and out.

Step 4: Beyond the Basics â€" Adding Your Personal Touch

Your pole barn is going to be more than just storage; it's an extension of your home. Think about how you want to use the space and add some personal touches:

Work area: Designate a corner for a workbench, tools, and project supplies.
Lighting: Proper lighting is essential for working and safety. Consider LED lighting for energy efficiency.
Heating and cooling: If you plan to spend time in the barn, consider adding heating and cooling systems.
Flooring: Concrete floors are durable but can be cold. Consider adding a layer of epoxy or adding mats for comfort.

Step 5: The Finishing Touches â€" Making it Your Own

Now for the fun part â€" adding your personal flair to the space.

Wall colors: Choose a neutral color that reflects light, or add pops of color to define different areas.
Organization systems: Invest in storage solutions that fit your needs, such as shelves, bins, and hooks.
Decor: Add a few personal touches, like a vintage sign, a cozy armchair, or even a mini fridge for those long working days.

Here are some ideas for maximizing storage space:

Ceiling Storage: Install overhead storage systems for those items you don't use often, such as holiday decorations or seasonal clothing.
Vertical Storage Racks: Use wall-mounted racks for tools, sporting equipment, and even bikes.
Sliding Doors: Optimize space by installing sliding doors instead of traditional swing doors, especially if you have limited space.
Utilize the Walls: Use pegboards, shelves, and hooks to keep tools and accessories organized and easily accessible.
Go Up! Think about adding a loft for additional storage or even a workspace.

Don't forget the fun part! Remember, this is your space to enjoy. Add some personal touches, make it comfortable, and make it reflect your personality.

Building a pole barn is a great way to gain valuable storage space and add value to your property. By following these tips, you can create a functional and beautiful space that you'll love for years to come.

Read More..

How to Build a Pole Barn for a Cost-Effective Storage Solution

How to Build a Pole Barn for a Cost-Effective Storage Solution


Pole barns, known for their simple construction and affordability, offer an efficient and budget-friendly solution for storage needs. Whether you require space for equipment, vehicles, hay, or other valuable possessions, building a pole barn can be a wise investment. This guide provides a comprehensive overview of the process, from planning to construction, ensuring a successful and cost-effective outcome.

1. Planning and Design:

Define your needs: Determine the size, shape, and features necessary for your specific storage requirements. Consider the dimensions of the items you intend to store, along with potential future growth.
Site assessment: Analyze the chosen location for accessibility, drainage, soil conditions, and proximity to utilities. Ensure compliance with local building codes and zoning regulations.
Budgeting: Establish a realistic budget, factoring in all costs from materials and labor to permits and inspections. Consider the long-term benefits of a well-constructed pole barn, as it can significantly increase property value.
Design and Engineering: Consult with an architect or engineer to create a detailed plan outlining the structure's dimensions, materials, and specifications. This ensures a safe and durable building.
Foundation selection: Decide on the foundation type based on soil conditions and budget. Concrete piers, concrete slabs, or pre-engineered foundation systems are common options.

2. Material Selection and Procurement:

Pole selection: Choose durable and treated wood poles for longevity. Pressure-treated lumber resists rot and insect damage, ensuring long-lasting performance. Consider species like Southern Pine or Douglas Fir for strength.
Roofing and Siding: Select roofing and siding materials that align with your budget and desired aesthetics. Metal roofing offers durability and cost-effectiveness, while wood siding provides a traditional look.
Doors and Windows: Determine the size and type of doors and windows required for access and ventilation. Choose materials that complement the overall design and provide adequate security.
Insulation: Consider adding insulation to the walls and roof for climate control and energy savings. This can significantly impact the cost of heating and cooling, especially in extreme climates.

3. Permitting and Inspections:

Obtain necessary permits: Contact your local building department to obtain the required permits for construction. Ensure your plans comply with all local regulations and safety standards.
Schedule inspections: Follow the local building code requirements for inspections at various stages of construction. This ensures adherence to safety regulations and building codes.

4. Construction Process:

Foundation preparation: Excavate the site and pour the foundation according to the engineer's specifications. Ensure proper drainage and leveling for stability.
Pole erection: Install the treated wooden poles into the prepared foundation. Utilize proper tools and techniques to ensure plumb and level installation.
Framing and Roofing: Install the roof rafters, wall framing, and purlins according to the plan. Ensure proper bracing and connections for stability.
Roofing and Siding Installation: Apply the chosen roofing and siding materials to the completed frame. Follow manufacturer instructions for installation techniques and sealant application.
Finishing touches: Install doors, windows, and any desired accessories. Add finishing touches like paint, trim, and gutters to complete the building's aesthetic.

5. Cost-Saving Tips:

DIY approach: If you possess the skills and tools, consider undertaking some construction tasks yourself to save on labor costs. However, ensure safety and quality are prioritized.
Material sourcing: Explore various suppliers for competitive pricing on materials. Consider using recycled or salvaged materials to reduce costs further.
Seasonal purchases: Take advantage of seasonal sales and discounts on building materials to minimize expenses.
Utilize local resources: Contact local contractors and suppliers for competitive quotes and potentially reduced pricing.
Optimize design: Minimize building size and complexity to reduce material and labor costs.

6. Maintenance and Upkeep:

Regular inspections: Conduct periodic inspections to identify any potential damage or issues. Address these promptly to prevent further deterioration.
Roof maintenance: Maintain the roof's integrity by cleaning debris, inspecting for leaks, and resealing as needed.
Structural integrity: Ensure the pole barn's structural integrity by inspecting the poles, framing, and bracing for any signs of damage or wear.
Pest control: Implement pest control measures to prevent damage from insects and rodents.
Landscaping: Maintain the surrounding area by trimming vegetation and ensuring proper drainage to protect the building.

Conclusion:

Building a pole barn offers a cost-effective and flexible storage solution for various needs. By carefully planning, sourcing materials strategically, and following this comprehensive guide, you can achieve a durable and functional structure that maximizes storage capacity while minimizing expenses. Remember, proper construction techniques, regular maintenance, and a keen eye for detail are essential for ensuring the longevity and value of your pole barn investment.

Read More..

How to Build a Pole Barn with Reinforced Posts and Beams

How to Build a Pole Barn with Reinforced Posts and Beams


A pole barn, also known as a post-frame building, offers a versatile and cost-effective solution for a variety of applications, from agricultural storage to workshops and even residential living. The strength and durability of a pole barn depend heavily on the construction of its supporting structure, particularly the posts and beams. This article will delve into the process of building a pole barn with reinforced posts and beams, ensuring a robust and long-lasting structure.

1. Planning and Design Considerations

Before embarking on the construction, thorough planning and design are crucial. This includes:

Purpose and Usage: Determine the intended use of the pole barn. This will inform the size, height, and other structural requirements.
Local Building Codes: Familiarize yourself with local building codes and regulations pertaining to pole barn construction. These may dictate factors like foundation requirements, wind load resistance, and snow load capacity.
Site Selection and Soil Analysis: Choose a suitable site with good drainage and conduct a soil analysis to determine the bearing capacity. This information is vital for designing the foundation and determining the appropriate post depth.
Materials Selection: Opt for high-quality materials, especially for posts and beams. Pressure-treated lumber is recommended for resistance to moisture and decay. Consider using engineered wood products like laminated veneer lumber (LVL) or glulam beams for increased strength and stability.
Reinforcement Techniques: Choose suitable reinforcement techniques for posts and beams based on the anticipated load and environmental conditions.

2. Foundation Construction

The foundation is the cornerstone of a pole barn. It transmits the building's weight to the soil, ensuring stability and longevity.

Types of Foundations: Common options include concrete piers, concrete footings, and helical piers. The choice depends on the soil conditions, building size, and local codes.
Concrete Piers: These are typically used for heavier structures. They involve pouring concrete into pre-drilled holes, ensuring proper depth and width.
Concrete Footings: Concrete footings are commonly used for lighter structures. They are rectangular or square concrete pads poured at a specific depth.
Helical Piers: These are screw-driven piles that are ideal for unstable or difficult soil conditions. They offer superior load-bearing capacity and minimize disturbance to the site.

3. Post Installation

Posts are the vertical supports of the pole barn structure. Their strength and stability are paramount.

Post Material: Choose pressure-treated lumber, specifically designed for ground contact. Engineered lumber products like laminated veneer lumber (LVL) offer greater strength and stability.
Post Dimensions: The size of the posts depends on the building's size, height, and anticipated load. Consult local building codes and a structural engineer for guidance.
Post Depth: The depth of the posts must be sufficient to transfer the load to the foundation. Soil analysis and building codes will dictate this depth.
Post Reinforcement: Consider reinforcing the posts with steel plates, metal brackets, or concrete collars for added strength and stability. These reinforcements distribute the load and enhance the post's resistance to bending and shearing.

4. Beam Installation and Reinforcement

Beams span the posts and support the roof and walls. They are essential for the building's structural integrity.

Beam Material: Use pressure-treated lumber or engineered wood products like laminated veneer lumber (LVL) or glulam beams. These materials offer superior strength and resistance to warping and bending.
Beam Dimensions: The size of the beams depends on the span, anticipated load, and local building codes. Larger spans necessitate larger beams.
Beam Reinforcement: Consider reinforcing the beams with steel plates, metal brackets, or additional beams for added strength. These reinforcements distribute the load and enhance the beam's resistance to bending and buckling.

5. Roof Construction

The roof of a pole barn needs to be strong and durable to withstand environmental forces.

Roof Truss System: Choose a suitable truss system that can handle the anticipated snow load and wind load. Truss systems offer a lightweight and efficient solution for spanning wide distances.
Roof Sheathing: Utilize plywood or oriented strand board (OSB) for sheathing the roof. This provides a solid surface for the roofing material.
Roofing Material: Select a roofing material that suits the climate and aesthetic preferences. Options include metal roofing, shingles, and membrane roofing.
Roof Ventilation: Ensure adequate ventilation to prevent moisture buildup and maintain a comfortable interior environment.

6. Wall Construction

The walls of a pole barn can be constructed using various materials depending on the intended use.

Wall Framing: Utilize studs, joists, or posts depending on the wall material.
Wall Sheathing: Sheath the walls with plywood, oriented strand board (OSB), or other suitable materials.
Wall Cladding: Select a wall cladding that meets the desired aesthetic and functional requirements. Options include wood siding, metal siding, vinyl siding, and brick veneer.

7. Finishing Touches

Once the primary construction is complete, add finishing touches to ensure a functional and aesthetically pleasing pole barn.

Doors and Windows: Install doors and windows of appropriate size and type.
Electrical and Plumbing: Run electrical wiring and plumbing as needed.
Interior Finishing: Consider adding insulation, drywall, paint, and flooring to create a finished interior space.

Conclusion:

Building a pole barn with reinforced posts and beams is a rewarding project. By carefully planning, utilizing high-quality materials, and implementing effective reinforcement techniques, you can create a robust and durable structure. Consulting a structural engineer can provide valuable guidance on design and material specifications. Remember to always adhere to local building codes and safety regulations to ensure the longevity and safety of your pole barn.

Read More..

Affordable garden shed building plans for diyers

Affordable garden shed building plans for diyers


Hey there, fellow DIY enthusiasts! Tired of your garden tools taking up valuable garage space? Dreaming of a dedicated space for your potting bench and all those crafty projects? Well, you're in luck! Building your own garden shed is easier than you might think, and it's a project that'll give you a real sense of accomplishment.

Let's face it, ready-made sheds can be pricey, especially when you factor in delivery and installation. But with some planning and a few weekends of dedicated effort, you can build a sturdy and stylish shed that fits your needs perfectly, all within a budget you can handle.

### First Things First: Planning Your Dream Shed

Before you start hammering and sawing, take some time to think about your needs and goals. Here's a checklist to get you started:

Size: How much stuff do you need to store? Do you want room for a workbench or potting bench? A basic 8x10 shed is a good starting point for most, but consider your specific needs.
Location: Choose a spot that's level, well-drained, and easily accessible. Remember to consider sunlight exposure if you plan to use the shed for gardening.
Foundation: A concrete slab is the most durable option, but you can also opt for a simple gravel base or even a wooden platform depending on your budget and soil conditions.
Style: Do you want a traditional shed with a gable roof, or something more modern with a flat roof? Consider the overall aesthetic of your garden and your personal style.
Materials: Wood is a classic and versatile material for sheds, but you can also use metal or even recycled materials for a unique look. Think about durability, maintenance, and your budget.

### Where to Find Free Shed Plans

Now that you've got a vision for your dream shed, it's time to find some plans to guide you. The internet is your best friend! There are tons of free shed plans available online, catering to all skill levels and preferences.

Here are some excellent resources to start with:

The Family Handyman: They offer a fantastic collection of free shed plans with detailed instructions and diagrams. You'll find a variety of sizes, styles, and complexities to suit your project.
Ana White: This website is a treasure trove of free woodworking plans, including several excellent shed options. Ana's instructions are detailed and easy to follow, even for beginners.
Woodworking for Mere Mortals: This website features a comprehensive guide to building a basic shed, with clear instructions and detailed illustrations. It's a great option for those who want a step-by-step approach.
Pinterest: Don't underestimate the power of Pinterest for inspiration! You can find countless images of beautiful DIY sheds, along with links to building plans and resources.

### Building Your Shed: A Step-by-Step Guide

Once you've chosen your plans, gather your tools and materials. Here's a general overview of the steps involved in building a shed:

1. Foundation: Prepare your site by leveling the ground and creating your chosen foundation. Whether it's concrete, gravel, or a wooden platform, ensure it's stable and strong enough to support the weight of your shed.
2. Framing: Build the shed's frame using pre-cut lumber, following your plans carefully. Make sure the walls and roof are square and plumb for a sturdy and level structure.
3. Sheathing: Cover the frame with plywood or OSB sheathing to create a solid base for your siding and roofing. Ensure proper fastening and alignment.
4. Siding: Apply your chosen siding material, whether it's wood, metal, or composite. Choose a material that's weather-resistant and aesthetically pleasing.
5. Roofing: Install the roofing, starting with the underlayment and finishing with shingles or metal roofing. Make sure the roof is properly sealed and waterproof.
6. Doors and Windows: Install doors and windows according to your plans, ensuring they fit securely and provide proper ventilation.
7. Finishing Touches: Add trim, paint, and other finishing touches to complete your shed. Consider adding features like a window box or a small porch to personalize your project.

### Tips for Success

Building a shed can be a fun and rewarding project, but it's also important to be prepared. Here are a few tips to help you along the way:

Read the Plans Carefully: Don't rush through the instructions. Take your time to understand each step before you start cutting and assembling.
Measure Twice, Cut Once: Accuracy is crucial in woodworking. Double-check your measurements before making cuts, especially for critical components like door frames and roof rafters.
Don't Be Afraid to Ask for Help: If you're unsure about a step, don't hesitate to ask a friend, family member, or fellow DIY enthusiast for advice. There's no shame in seeking guidance!
Take Breaks: Building a shed is a big project, so take breaks to avoid burnout. Enjoy the process, and don't be afraid to celebrate your progress.

### Building Your Shed is Just the Beginning!

Congratulations! You've built your own garden shed, a testament to your DIY skills and dedication. Now it's time to enjoy the fruits of your labor! Organize your tools, set up your workbench, and start creating in your new space. Whether you're a gardener, crafter, or simply looking for some extra storage, your DIY shed will be a valuable addition to your home and a source of pride for years to come. Happy building!

Read More..

Building a shed on a budget: 10x12 storage shed plans

Building a shed on a budget: 10x12 storage shed plans


Alright, folks, let's talk sheds. You know the feeling: you're staring down a mountain of stuff, and the thought of organizing it all feels like a Sisyphean task. But wait! There's a solution that doesn't involve selling off your prized collection of vintage board games or trading your beloved lawnmower for a new subscription service. I'm talking about a shed!

A 10x12 storage shed is a perfect size for a multitude of needs. It's roomy enough to house your lawn and garden tools, bikes, camping gear, or whatever else you've been using your spare bedroom for. Plus, it's small enough to be manageable for a DIY project. And the best part? Building your own shed can be done on a budget!

Let's break down the process, step by step, so you can transform your messy chaos into a well-organized sanctuary for all your things:

1. Planning Your Shed: It's More Than Just a Box

Before you dive headfirst into the world of lumber and nails, let's lay out a solid foundation.

Location, Location, Location: Choose a spot for your shed with good drainage and easy access. Make sure you're not blocking any utilities or violating local building codes. Don't forget to factor in sunlight!
Building Codes: Check with your local building department to ensure your shed project meets the requirements. They might have stipulations on things like setbacks from property lines and the need for permits.
Drawing Up a Plan: Grab a pencil and paper (or your favorite design software) and sketch out your shed. Consider things like:
Door placement: How will you access the shed? One door? Two? Will it be a sliding door or a traditional hinged door?
Windows: A few windows will add natural light and ventilation.
Interior design: Do you need shelving? Work benches? A place to hang tools?
Roof style: A simple gable roof is easy to build, but you could opt for a more decorative shed roof style.
Choosing Your Materials:
Lumber: Pressure-treated lumber for the foundation and bottom plates is a must, as it resists rot and decay. For the walls and roof, consider using plywood or OSB (oriented strand board).
Siding: Vinyl siding is low-maintenance and affordable, but you can also choose wood siding for a more traditional look.
Roofing: Asphalt shingles are a common and cost-effective option for roofing.
Hardware: Don't forget about the nuts and bolts! You'll need screws, nails, hinges, door handles, and other hardware.

2. Laying the Foundation: A Solid Base for Your Dreams

This is where your shed really starts to take shape. There are a few ways to tackle the foundation, and the best option depends on your budget, soil conditions, and the overall weight of your shed.

Concrete Slab: For a long-lasting and robust foundation, a concrete slab is a solid choice. It's a bit more involved, but it will ensure your shed stands the test of time. You'll need to pour a concrete pad that's a few inches larger than the footprint of your shed.
Concrete Block Foundation: A concrete block foundation is a good compromise between cost and durability. You can get pre-made concrete blocks and lay them out to create a sturdy base.
Pressure-Treated Skirting: For a more budget-friendly option, you can build a foundation using pressure-treated lumber. This method involves creating a frame around the perimeter of your shed and attaching pressure-treated wood to the base.

3. Framing the Walls: Creating a Skeleton

With the foundation in place, you're ready to start framing the walls.

Floor Joists: First, you'll need to lay down the floor joists. These are the horizontal beams that will support the floor of your shed. Make sure to space them evenly and use pressure-treated lumber.
Wall Studs: Now it's time to build your walls. Use 2x4s or 2x6s for the studs, which are the vertical beams that will form the structure of your walls. Remember to use a level to ensure your walls are plumb.
Sheathing: Once the studs are in place, you'll need to sheathe the walls. This means attaching sheets of plywood or OSB to the outside of the walls. This provides additional strength and creates a smooth surface for your siding.

4. Roofing the Shed: Weather Protection

Now you're getting into the final stretch!

Rafters: Start by building the rafters, which are the angled beams that will support the roof. They should be strong enough to handle the weight of the roofing materials and any potential snow load.
Sheathing: Just like with the walls, you'll need to sheathe the roof with plywood or OSB.
Roofing Materials: Now it's time to add your roofing material. Install your chosen shingles according to the manufacturer's instructions.
Flashing: Don't forget the flashing! This is a metal strip that prevents water from seeping under your roofing material.

5. Siding and Finishing Touches: The Beauty is in the Details

With the walls and roof in place, it's time to give your shed a beautiful exterior.

Siding: Attach your chosen siding to the exterior walls. Remember to use a level and measure carefully for a professional finish.
Doors and Windows: Install the doors and windows, making sure they fit securely and operate smoothly.
Trim: Add trim around the windows, doors, and edges of the shed for a clean and polished look.
Paint or Stain: Give your shed a fresh coat of paint or stain to protect it from the elements and add a touch of personality.

6. Interior Finishing: Making it Your Own

Now comes the fun part â€" making your shed a space you actually want to spend time in!

Flooring: Lay down your chosen flooring material. Options range from affordable concrete to more decorative wood flooring.
Shelving and Workbenches: Build some shelving to store your belongings and a workbench for projects.
Lighting: Add some lighting inside the shed, using LED lights for energy efficiency.
Ventilation: Install a vent in the roof to allow for air circulation.

Tips for Keeping Costs Down:

Shop Around: Get quotes from multiple lumber yards and hardware stores to find the best deals on materials.
Consider Used Materials: Don't be afraid to look for used lumber or other building materials. You can often find great deals on salvaged items.
DIY It: Doing as much of the work yourself as possible will save you a lot of money on labor costs.
Keep It Simple: A basic shed design with straightforward features will be less expensive to build than a more complex design.
Get Creative with Storage: Use clever storage solutions to maximize the space you have.

Remember, building a shed is a journey, not a race. Take your time, enjoy the process, and celebrate each milestone! Soon you'll have a well-built and budget-friendly shed that will keep your belongings organized and protected for years to come.

Read More..

Design your own low-cost pole shed with these simple plans

Design your own low-cost pole shed with these simple plans


Alright, folks, let's talk pole barns. You know, those sturdy, versatile structures that can be a garage, workshop, storage space, or even a cozy living area for your furry friends. Now, I know what you're thinking: "Pole barns? Those are expensive!" Well, hold on to your hats because I'm here to tell you, you can build a kick-butt pole barn on a budget with a little elbow grease and some smart planning.

Let's break this down, step by step. I'll guide you through the process, just like I'm right there with you, holding a hammer and a cup of coffee. Ready?

### 1. The Foundation: A Solid Base for Your Barn

First things first, you need a solid foundation. Now, we're talking budget here, so we're going for simplicity. Forget about fancy concrete slabs. We're going for piers and beams. Think of it as building a sturdy platform for your barn to stand on.

Here's the breakdown:

Locate the Piers: You'll need to dig holes, about 3 feet deep, for the pier footings. Think about where your posts will go and space those holes accordingly.
Pour the Concrete: Now, you'll mix and pour concrete into these holes. Make sure you use rebar for reinforcement to keep those piers strong.
Let it Set: Give the concrete at least 24 hours to cure properly before you move on to the next step. Patience is key!

### 2. The Posts: Holding Up Your Dream

Okay, now for the main event - the posts. These are the backbone of your pole barn, so make sure they're strong and sturdy. Here's what you'll need:

Choose Your Wood: Go for pressure-treated lumber, because it's resistant to rot and decay. Plus, you'll want to get the right size for your barn. Remember, you're building a sturdy structure, so don't skimp on the wood!
Pre-Drilling: Before you start attaching your posts to the pier footings, pre-drill holes. This helps prevent the wood from splitting.
Secure the Posts: Use heavy-duty lag screws to secure your posts to the pier footings. Make sure they're tight, but don't go overboard - you don't want to crack the wood.

### 3. The Roof: Shelter From the Elements

Now, let's get that roof on! We're aiming for a simple, cost-effective design. A gable roof is the classic choice.

Rafters: You'll need to install rafters, which are the supporting beams for your roof. You can use pre-made rafters for ease, or get creative and cut your own.
Sheathing: This is the layer that goes on top of the rafters, providing a solid base for your roofing material. Plywood or OSB boards are your go-to options.
Roofing Material: There are lots of choices for roofing, from metal to shingles. Go for a budget-friendly option that suits your needs.

### 4. The Walls: A Protective Barrier

Okay, now for the walls. Remember, we're keeping it simple, so we're going with stud walls. These are vertical wooden frames that create the structure of your walls.

Studs: You'll need to cut and install your studs, spacing them according to your building code.
Sheathing: Once your studs are in place, you'll add sheathing to create a solid surface for your siding.
Siding: Choose your siding based on your budget and style. There are many options available, from vinyl to metal to wood.

### 5. Finishing Touches: Adding the Extras

Okay, your pole barn is starting to take shape. Now, let's add some finishing touches to make it truly your own.

Doors and Windows: Choose doors and windows that fit your budget and style. You can even get creative with recycled windows or salvaged doors for a unique touch.
Insulation: If you want a comfortable and energy-efficient pole barn, consider adding insulation. This will help regulate the temperature and keep your space cozy.
Interior Finish: Think about how you want to finish the interior. Do you want to paint the walls, add drywall, or even create a rustic wood look?
Electrical and Plumbing: If you're planning on using your pole barn for anything besides storage, you'll need to run electrical wiring and plumbing.

### 6. Safety First!

Before you dive into building your dream pole barn, it's important to prioritize safety.

Building Permits: Check with your local building department about permits and building codes.
Safety Gear: Always wear safety gear like gloves, goggles, and a hard hat when working with power tools and heavy materials.
Plan Ahead: Before you start building, think about how you'll lift and move the heavy pieces of lumber. You might need a helper or a construction crane to get those beams into place.

### 7. Building Your Dream

Alright, you've got the plan, you've got the tools, and you're ready to roll up your sleeves and build. Remember, this is a journey, not a race. Take your time, enjoy the process, and don't be afraid to ask for help if you need it.

Building your own pole barn can be a fulfilling experience. You'll be amazed at what you can accomplish with a little hard work and a lot of determination. And in the end, you'll have a beautiful, sturdy structure that you can use and enjoy for years to come.

### Extra Tips:

Secondhand Materials: Keep an eye out for sales, clearance items, and secondhand lumber. You can often find great deals that will help you save money on your project.
Plan Ahead: Make sure you have all the materials you need before you start building. This will save you time and prevent delays.
Don't Skimp on Quality: While it's important to stay within budget, don't skimp on the quality of your materials. This will ensure that your pole barn is strong and durable.

So, there you have it, folks. Your guide to building a budget-friendly pole barn. Ready to get started? I know I am! Let's build something amazing!

Read More..

Affordable diy plans to build a 12x20 storage shed

Affordable diy plans to build a 12x20 storage shed


Hey there, fellow DIY enthusiast! Building a shed is a fantastic way to conquer clutter, store your tools, or even create a little workshop haven. And guess what? You don't need to break the bank to do it.

With some planning, a few basic tools, and a whole lot of DIY spirit, you can build your own 12x20 storage shed for a fraction of the cost of hiring a contractor. We're talking about a project you can tackle over a few weekends, and the satisfaction of creating something with your own hands is priceless!

Let's Talk Plans!

First things first: blueprints! Luckily, there are tons of free and affordable shed plans available online. You can find them on websites like:

The Family Handyman: They have a great selection of shed plans, including some specifically for a 12x20 size.
Ana White: Ana is a DIY queen, and her website offers a wide variety of free plans, including a few shed options.
Pinterest: Searching "12x20 shed plans" on Pinterest will unleash a treasure trove of inspiration and downloadable blueprints.
YouTube: There are tons of tutorial videos that walk you through every step of the process, from planning to building.

Choosing the Right Materials

Now, let's talk materials. This is where you can really save money by being smart.

Pressure-treated lumber: Essential for your foundation, floor joists, and anything that will be in direct contact with the ground. It's a bit more expensive than regular lumber, but it's worth the investment for its rot-resistance.
Framing lumber: Standard 2x4s and 2x6s will form the walls and roof of your shed.
Sheathing: OSB (Oriented Strand Board) or plywood will cover the walls and roof, providing structural strength.
Siding: Vinyl, wood, or metal siding are all great options. Choose what fits your budget and style.
Roofing: Shingles are a classic choice, but you can also consider metal roofing or even a green roof if you're feeling adventurous.
Doors and windows: Don't forget about these! You can find affordable options at home improvement stores.

Tools of the Trade:

Before you start, gather your tools:

Measuring tape: You can't go wrong with a long, sturdy tape measure.
Circular saw: Essential for cutting lumber to size.
Hammer: For nailing everything together.
Level: A must-have for ensuring your shed is perfectly level.
Drill: Make those construction tasks so much easier!
Screwdriver: For fastening screws.
Safety gear: Don't forget your safety glasses, work gloves, and hearing protection.

Building Your Dream Shed

Okay, let's get building! The process will vary depending on your chosen plans, but here's a general overview:

1. Foundation: This is the starting point. You can choose a concrete slab, a pier foundation, or even a simple gravel base.
2. Floor Framing: Lay down your floor joists, making sure they're properly spaced and supported.
3. Wall Framing: Cut and assemble your wall frames. Use a stud finder to ensure they're aligned correctly.
4. Sheathing and Siding: Attach your sheathing to the walls, followed by the siding of your choice.
5. Roof Framing: Build your roof trusses or rafters, then attach them to the walls.
6. Roof Sheathing and Roofing: Sheathe the roof and then install your chosen roofing material.
7. Doors and Windows: Install your doors and windows, making sure they're properly sealed and secure.

Finishing Touches

Once your basic structure is complete, it's time to personalize your shed!

Paint or stain: Give your shed a fresh coat of paint or stain to protect the wood and add curb appeal.
Shelving and storage: Install shelves, cabinets, or hooks to maximize storage space.
Electrical wiring: If you plan on using your shed for a workshop or other activities that require electricity, be sure to run wiring properly.
Landscaping: Add some landscaping around your shed to enhance the look and provide a little privacy.

A Final Word of Encouragement:

Building a shed might seem daunting at first, but trust me, it's a rewarding experience. You'll gain valuable skills, save money, and create a space you can truly be proud of. Remember, it doesn't have to be perfect, and there's always room for improvement! So, gather your tools, grab those plans, and get ready to build your own little piece of heaven.

Happy building!

Read More..

How to build a 12x16 shed in easy-to-follow steps

How to build a 12x16 shed in easy-to-follow steps


Hey there, aspiring shed-builders! So you’ve decided to take on the exciting (and slightly daunting) task of building your own 12x16 shed. Don't worry, you've got this! It's a great way to add some extra space to your property, and building it yourself will give you a real sense of accomplishment.

This guide will walk you through the process step-by-step, making it as easy as possible. We'll cover everything from planning and materials to actually putting the thing together. Think of it as a "build it with me" experience, except I'll be doing the building part and you'll be reading along!

### Step 1: The Planning Phase - More Important Than You Think

Before you start hammering nails, it's crucial to do some serious planning. We're talking blueprints, material lists, and maybe even some tasty snacks to keep you going.

Decide on the location: Where’s your shed going to live? Consider access, sunlight, and drainage. Don't forget to check local building codes - you might need a permit depending on where you live.
Choose your shed style: Do you want a simple gable roof, a more complex hip roof, or maybe a fancy Dutch style? Pick a design that fits your needs and your budget.
Make a detailed blueprint: A proper blueprint isn’t just for architects. It’ll help you visualize the shed and create a cutting list for your materials. You can find free shed plans online, or use a CAD software if you're feeling fancy.
Create a materials list: This is where the real work begins. You'll need to determine the type and amount of lumber, roofing, siding, windows, doors, and all the other components. Don't forget things like fasteners, screws, and paint!

### Step 2: Gathering the Tools & Materials

With your plans in hand, it’s time to get your hands dirty - or rather, get your tools ready. You'll need a basic set of carpentry tools, including:

A circular saw: For cutting lumber to size.
A jigsaw: For cutting curves and intricate shapes.
A drill: Essential for drilling pilot holes and fastening.
A hammer: You know, for hammering things.
A level: For making sure everything is straight and plumb.
A tape measure: For measuring accurately.
Safety gear: Always wear safety glasses, gloves, and ear protection.

Once you’ve got your tools ready, it’s time to hit the hardware store and get your materials. Remember to double-check your material list and buy enough for the job. It's always better to have a little extra than to run out halfway through!

### Step 3: Foundation Time - Building a Solid Base

Now that you have your tools and materials, it's time to lay the groundwork for your shed. There are a few foundation options:

Concrete slab: This is the most durable and permanent option. It requires a bit more effort, but will provide a rock-solid base for your shed.
Concrete blocks: A good alternative to a slab, concrete blocks are relatively easy to install. Make sure you have proper drainage to prevent water buildup.
Pressure-treated wood: This option is cheaper and quicker to install, but it’s less durable than concrete. It's best suited for smaller, lighter sheds.

Choose the foundation option that suits your needs and budget, and follow the instructions carefully. You want to make sure it’s level and sturdy.

### Step 4: Framing the Floor - The Bones of Your Shed

With your foundation in place, it’s time to start building the floor joists. This is where you'll use your lumber skills!

Layout the joists: Use your blueprint to determine the spacing for your floor joists. They typically need to be 16 inches apart.
Cut and install the joists: Make sure to use pressure-treated lumber for the joists that will be in contact with the foundation. Secure them to the foundation using joist hangers or other fastening methods.
Install subfloor plywood: Lay down sheets of plywood to create the subfloor. Make sure the sheets are properly aligned and fastened to the joists.

### Step 5: Building the Walls - Time to Get Vertical

Now it’s time to raise the walls of your shed. This is where you’ll start to see your structure come to life.

Cut and assemble the wall panels: Using your blueprint, cut and assemble the wall panels with studs and plates. Make sure to include openings for doors and windows.
Erect the walls: Use your level to ensure the walls are plumb and straight as you raise them.
Secure the walls to the floor: Use brackets or nails to connect the walls to the floor joists.

### Step 6: Roof Framing - Putting a Roof Over Your Head

The roof is the final piece of the framing puzzle. This is where you'll create the structure to protect your shed from the elements.

Cut and install the rafters: Determine the spacing of your rafters, typically 16 inches, and use your blueprint to cut and install them.
Attach the rafter tails: The ends of the rafters are attached to the wall plates, creating a sturdy roofline.
Add a roof sheathing: Lay down plywood sheathing over the rafters to create a solid base for your roofing material.

### Step 7: Sheathing and Siding - Giving Your Shed Some Skin

With the framing complete, it's time to add the skin of your shed - sheathing and siding.

Install sheathing: Attach sheets of plywood or OSB sheathing to the walls and roof for insulation and support for the siding.
Install siding: You can choose from various siding options like vinyl, wood, or fiber cement. Follow the manufacturer’s instructions for proper installation.

### Step 8: Roofing Time - Keeping Things Dry

Time to tackle the roof! You'll need to choose a roofing material that suits your budget and style:

Asphalt shingles: The most common and affordable option, offering decent durability and aesthetic appeal.
Metal roofing: A durable and long-lasting option, often used for its low maintenance and fire resistance.
Wood shingles: A traditional option, offering a charming look but requiring more maintenance.

Follow the manufacturer’s instructions for proper installation, and make sure you have the necessary safety gear.

### Step 9: Adding Doors and Windows - Let the Light In

The final steps in building your shed are adding the doors and windows.

Install the door: This might require some extra precision to ensure it fits properly and opens and closes smoothly.
Install the windows: You can choose from various window styles and sizes. Ensure they are properly installed and secured to the wall framing.

### Step 10: Finishing Touches - The Details Make the Difference

Now for the fun part - the finishing touches!

Paint or stain: Choose a color that complements your house and landscape.
Install gutters: These will help to direct rainwater away from the shed, preventing water damage.
Add landscaping: Plant flowers or shrubs around your shed to create a visually appealing setting.

### Congratulations, Shed Builder!

There you have it! You've successfully built a 12x16 shed. It may have taken some time and effort, but the feeling of accomplishment is well worth it. Now go forth and enjoy your new space!

Remember, safety should always be your top priority when building. If you're not comfortable with a particular step, don't hesitate to ask for help from a professional. And most importantly, have fun with the process!

Read More..

Building a 10x12 garden shed: tips for diy beginners

Building a 10x12 garden shed: tips for diy beginners

Alright, you're ready to build a garden shed! That's awesome. It's a great project for a beginner, and it's a super satisfying feeling to see it come together. But before you jump in headfirst and start cutting wood, let's talk about some things to make your life easier (and maybe even save you a little frustration).

1. Choosing the Right Shed Design:

Keep it simple, my friend. You're a beginner, so don't get carried away with fancy designs. Go for a basic, rectangular shed. You'll thank me later when you're not trying to figure out how to cut a complex roof.
Think about what you'll store: Are you planning on storing a lot of tools, or maybe a lawnmower? Consider the size and shape of what you'll be storing to make sure your shed is big enough. Don't worry, 10x12 gives you plenty of space.
Find plans you understand: The internet is your friend here. There are tons of free shed plans available online. Find some that look doable to you, and make sure you understand the instructions before you start. You can even get plans that are specifically for beginners, which is a good idea!

2. The All-Important Foundation:

Don't skip this step! A solid foundation is the key to a stable shed. You've got a few options here:
Concrete: It's strong, but it's a little more work and involves some concrete mixing.
Pressure-Treated Lumber: This is a good option for beginners because it's relatively easy to put together. Just make sure to use pressure-treated wood for anything that will be in contact with the ground.
Concrete Blocks: An affordable and easy option, just make sure they're level!
Level, level, level: I can't stress this enough. Your shed will look crooked and might even start to lean if the foundation isn't level. Invest in a level and check it multiple times.

3. Gather Your Materials:

Get a good lumber list: Your plans should have a detailed lumber list. Make sure you know exactly what you need, and get a little extra for any mistakes or cuts that go awry.
Don't forget the hardware: You'll need screws, nails, hinges, a door handle, a latch, and probably some flashing for the roof. Make sure you have everything on hand before you start building.
Think about the roof: You can go with a simple gable roof, or a more complex shed roof. Consider the climate where you live, and how much snow you might get. You may want to go with a steeper roof angle to handle snow better.

4. Power Tools - Your New Best Friends:

A circular saw is a must: You'll be cutting a lot of lumber, so a circular saw will be your go-to tool.
A drill/driver is super helpful: You'll be drilling a lot of holes for screws and nails, so a drill/driver with a good set of bits is a smart investment.
Consider a jigsaw: A jigsaw is good for making curved cuts for things like the roof overhang.
Safety first: Always wear safety glasses and hearing protection when working with power tools!

5. Don't Be Afraid to Ask for Help:

Friends and family are your allies: If you're unsure about something, don't hesitate to ask for help. You can find tons of resources online, too. Check out YouTube for tutorials on specific tasks, and don't be afraid to ask for tips on forums or in DIY communities.
The internet is your friend: YouTube, Reddit, and DIY forums are all great places to get advice and inspiration.
Don't be afraid to make mistakes: We all make mistakes! The key is to learn from them.

6. Start With the Framing:

Build the walls: Once your foundation is in place, start building the walls. Make sure to square them up properly as you go.
The roof is the next step: Once the walls are built, you can start framing the roof. Again, check your plans carefully and make sure everything is square and level.
Sheathing is important: The sheathing provides a solid base for the roof shingles. It's usually made of plywood or OSB.

7. Roofing, Siding, and Finishing Touches:

Choose your roof shingles: You've got a lot of choices here, from asphalt shingles to metal roofing. Consider your budget and the look you want to achieve.
Side your shed: You can use wood siding, vinyl siding, or even corrugated metal. It's up to you!
Don't forget the door: Hang the door and install the latch. You might want to add some trim around the door and windows for a finished look.
Paint it up: If you want, give your shed a fresh coat of paint to protect it from the elements and add some color to your yard.

8. Enjoy Your New Shed!

Take your time: Building a shed is a project that takes time, so don't rush it. Take your time, and enjoy the process.
Take lots of photos: Document your progress and share your project with others.
Celebrate your accomplishment: Once you're finished, take a moment to admire your work. You've built something awesome!

Here are some bonus tips for building a garden shed:

Use weatherproof lumber: You'll want your shed to last, so use treated lumber for the foundation and any parts of the shed that will be in contact with the ground.
Ventilate the shed: Add some vents to the roof or walls to help keep the inside of the shed dry and well-ventilated.
Add some storage: Build some shelves or a workbench inside the shed to help keep things organized.
Make it your own: There are lots of ways to personalize your shed. Add a window, a porch, or even a solar panel.

Building your own shed is a fantastic way to learn some new skills and build something useful for your yard. With a little planning and a positive attitude, you'll be enjoying your new shed in no time!

Read More..

How to design and build a 10x12 shed with cheap materials

How to design and build a 10x12 shed with cheap materials

Alright, let's talk sheds! You want to build a 10x12 shed, and you're on a budget? I hear you! That's a pretty standard size, perfect for storing tools, bikes, or maybe even that vintage lawnmower you're holding onto. But we gotta keep it affordable, right?

Step 1: Planning is Key (And Saves Money!)

Before you even think about lumber, grab a notebook and pencil. We're gonna plan this baby out. First things first, where is this shed going? Is it on level ground? What kind of soil do you have? This impacts your foundation. If it's on a slope, you'll need to do some leveling.

Next, what are you storing in this shed? This will determine how tall you need it to be. You can go with a standard 8ft tall shed, or bump it up to 9ft if you need some extra headroom for taller items.

Step 2: Foundation - The Groundwork for Your Success

Alright, let's talk foundation. The simplest and cheapest option for a 10x12 shed is a concrete slab foundation. You'll need to dig a hole about 6 inches deep and fill it with gravel for drainage. Then, pour concrete over the gravel, making sure it's level.

Pro tip: If you're not a concrete whiz, you can use pre-made concrete blocks. They're easier to work with, but make sure you have a level foundation.

Step 3: Framing - The Skeleton of Your Shed

Now, let's get to the framing. This is where the "cheap materials" part really comes into play. You'll need pressure-treated lumber for the foundation posts and the sill plate, which sits on the foundation and supports the walls.

Here's what you'll need (approximately):

Pressure-treated 4x4s: About 8 for the foundation posts, plus a few extra for the sill plate.
2x4s: A lot! About 40-50 will be needed for the walls and roof framing.
2x6s: You'll need about 6-8 for the rafters.
Plywood: 4x8 sheets, you'll need about 10-12 depending on wall height and roof pitch.

Building the frame:

Foundation posts: Dig holes for the foundation posts, making sure they're level and plumb. Secure them with concrete or quick-setting concrete mix.
Sill plate: Attach the pressure-treated sill plate to the foundation posts with lag screws.
Wall framing: Cut the 2x4s to create wall studs. You'll need to attach these to the sill plate and top plate, which is the top piece of the wall frame.
Roof framing: This gets a bit trickier. You'll need to build the rafters to form the roof's pitch. You can choose a simple gable roof for easier construction.

Step 4: Sheathing - The Skin of Your Shed

Now, let's start covering that frame. You'll need sheets of plywood for sheathing the walls and roof. This provides a solid surface for the siding and roofing. You'll want to use OSB (oriented strand board) for the walls and roof sheathing. It's generally cheaper than plywood, and works just fine.

Step 5: Siding - The Look of Your Shed

Time for siding! There are tons of options out there, but we're aiming for cheap, so let's consider these:

Vinyl siding: It's affordable, low maintenance, and comes in various colors.
Cedar shingles: They're more expensive, but they give a nice, rustic look.
Painted plywood: If you're on a really tight budget, you can simply paint the plywood sheathing.

Step 6: Roofing - Keeping It Dry

Roofing is a key part of any shed. You've got a few options:

Shingles: Asphalt shingles are a good, affordable choice.
Metal roofing: It's durable, fire-resistant, and can last for decades.
Roll roofing: This is a cheaper option, but it's not as durable.

Step 7: Doors and Windows

Don't forget the doors and windows! You can find decent pre-made doors and windows at home improvement stores. If you want to get even more creative, you could build your own from salvaged materials.

Step 8: Finishing Touches - Making It Your Own

Now it's time to personalize your shed. You can add trim, paint the exterior, and even install a small porch. You can also add some storage shelves inside, making the shed even more functional.

Remember:

Safety first: Always wear safety glasses, gloves, and sturdy shoes when working with power tools.
Check your local building codes: Make sure your shed complies with local regulations.
Ask for help: Don't be afraid to ask for help from friends, family, or a local contractor.

Building a shed on a budget is all about planning, resourcefulness, and a little bit of elbow grease. With some smart choices and a little creativity, you can create a functional and stylish shed that you'll love for years to come.

Read More..

How to build a 10x12 shed: storage shed plans you’ll love

How to build a 10x12 shed: storage shed plans you’ll love


Okay, let's get down to business. You're ready to build a shed. Maybe you're tired of tripping over tools in the garage, or maybe you're just itching to flex those DIY muscles. Whatever your reason, a 10x12 shed is a fantastic choice â€" it's big enough for all your stuff but not so large it becomes a major construction project.

This guide is your roadmap to building that perfect shed. We'll walk through every step, from choosing the right materials to nailing down the finishing touches.

Step 1: Planning and Permits

Before you get your hands dirty, take some time to plan. This is like the foundation of your shed, and a good plan will save you headaches later on. Here's what to consider:

Location, Location, Location: Choose your shed site carefully. Think about sunlight, access, and proximity to your house. Make sure you have enough room for the shed itself and for comfortable movement around it.
Foundation: A concrete slab is the most robust foundation, but you can also use a gravel base or pressure-treated wood. The best choice depends on your budget and the soil conditions.
Materials: You've got options! Pressure-treated lumber is a good choice for the frame, but consider using cedar or redwood for a more natural look. Choose a durable roofing material like asphalt shingles or metal.
Style: Do you want a simple shed or something with a more stylish design? There are endless possibilities, from traditional shed designs to more modern styles.
Permits: Before you even think about breaking ground, check your local building codes. You might need a permit for your shed, depending on its size and location.

Step 2: Foundation and Framing

Let's start with the groundwork. A solid foundation is essential for a sturdy shed.

Concrete Slab: This is the most durable option. You'll need to hire a concrete contractor or rent a concrete mixer. Be sure to pour a smooth, level slab.
Gravel Base: A gravel base is a budget-friendly option, especially if you have good drainage. Simply excavate your site, lay down a layer of gravel, and compact it firmly.
Pressure-Treated Wood: A wood foundation is a good choice if you're working with soft soil. Use pressure-treated lumber for posts and beams, and make sure they're buried below the frost line.

Now, let's frame that shed!

Walls: Start by building the wall frames. Use 2x4 lumber for the studs and plates, and make sure the corners are square.
Roof: The roof can be a simple gable design or something more elaborate. Frame the rafters, and make sure they are properly supported with joists.
Floor: You'll need to build the floor frame on top of the foundation. Use 2x8 or 2x10 lumber for joists, spaced 16 inches apart.

Step 3: Sheathing and Roofing

Now it's time to cover the walls and roof.

Sheathing: Use plywood or OSB sheathing to cover the wall and roof frames. This will give you a smooth surface for siding and roofing.
Roofing: Choose your roofing material wisely. Asphalt shingles are affordable and easy to install, while metal roofing is more durable and energy-efficient.
Siding: Your siding options are endless! You can choose from wood, vinyl, metal, or even composite materials. Consider your budget and the style you're going for.

Step 4: Doors and Windows

Now for the fun part â€" adding doors and windows.

Doors: Choose a door that's the right size for your needs. You can opt for a single door, double doors, or even a sliding door.
Windows: Windows can add light and ventilation to your shed. Consider the size and style you want, and make sure they're properly framed and installed.

Step 5: Finishing Touches

Now, let's make your shed shine!

Trim: Add some trim to the exterior of your shed for a polished look. You can use wood trim, vinyl trim, or even metal flashing.
Paint or Stain: Give your shed a fresh coat of paint or stain to protect it from the elements. Consider a color that complements your home and yard.
Interior: If you're going to use your shed for more than just storage, you may want to add some finishing touches to the interior. You can paint the walls, add insulation, and even install electrical outlets.

Step 6: Finishing Touches

And there you have it â€" your brand-new shed, ready for all your belongings!

Organization: Don't let your shed become a cluttered mess. Add shelving, hooks, and storage bins to keep everything organized.
Maintenance: Keep your shed in good shape by regularly cleaning it and repairing any damage.

Building a shed is a rewarding project. It's a chance to get your hands dirty, learn some new skills, and create a valuable addition to your property. Don't be afraid to experiment and add your own personal touch. Your shed is an expression of your style and creativity!

Read More..

Cheap and easy 8x12 shed plans for your backyard

Cheap and easy 8x12 shed plans for your backyard


Hey there, fellow DIY enthusiast! Are you tired of that cluttered garage or the piles of stuff taking over your backyard? Ever dream of having a dedicated space for your tools, bikes, or even a cozy little workshop? Well, good news! You don't need to break the bank or be a construction whiz to build your own 8x12 shed. It's a surprisingly achievable project that'll give you a sense of accomplishment and a whole lot of extra storage space.

Now, let's get real. Building a shed can feel daunting, especially if you're a novice DIYer. But trust me, it's much simpler than you think. We'll tackle this step-by-step, making sure you understand each part of the process. Plus, we'll keep it affordable â€" after all, who wants to spend a fortune on a shed?

Let's break down the essentials:

1. The Blueprint: Planning is Key

First things first, you need a plan. This doesn't have to be a fancy, architectural drawing. A simple sketch with measurements is more than enough to get you started. Decide on the layout you want, whether it's a basic storage shed or something a little more elaborate. Consider these crucial aspects:

The Size: An 8x12 shed is a great size for most backyard needs, offering ample storage space without being overwhelming.
The Door: Do you need a single door or a double door for easy access? Think about what you'll be storing and how you'll move things in and out.
The Roof: Will it be a simple gable roof or something a bit more complex? Consider your local climate and the amount of snow you'll need to accommodate.
Windows: Want to add some natural light? Windows can make your shed feel more inviting and useful.
Flooring: Will it be a simple concrete slab, wood floor, or something else? Decide what's best for your needs and budget.

2. The Materials: Keeping it Affordable

Now, let's get down to the nitty-gritty: materials. You'll want to choose affordable options without sacrificing quality. Here's a breakdown:

Framing: Pressure-treated lumber is a must for the foundation and floor joists, ensuring durability and moisture resistance. You can use regular framing lumber for the walls and roof.
Sheathing: Plywood is an economical and sturdy option for the walls and roof. Consider using OSB (Oriented Strand Board) as it's often more affordable.
Roofing: Asphalt shingles are a classic and budget-friendly choice for the roof. Consider metal roofing if you want something more durable and low-maintenance.
Siding: Vinyl siding is a popular choice for its low-maintenance and budget-friendly qualities. Wood siding can also be a beautiful option, but it requires more upkeep.
Doors and Windows: Shop around for good deals on pre-made doors and windows. You can even find deals on used ones!

3. The Tools: Essentials for Success

Don't worry, you don't need a professional arsenal of tools to build your shed. Here's a list of essentials:

Measuring tape: You'll be using this extensively, so get a good quality one.
Level: A level is crucial for ensuring your shed is straight and stable.
Circular saw: This is essential for cutting lumber to size. Consider renting one if you don't own one.
Hammer: You'll be driving nails a lot, so a sturdy hammer is key.
Screwdriver: For securing screws, a cordless drill is a huge time saver.
Safety glasses: Protect your eyes from sawdust and debris.
Work gloves: Keep your hands safe from splinters and rough edges.

4. Building the Foundation: The Cornerstone of Your Shed

The foundation is the backbone of your shed, ensuring it stands strong and level. Here's a simple and affordable option:

Concrete Blocks: Use concrete blocks to create a sturdy and level foundation. Make sure they're spaced correctly and leveled using a level.
Pressure-treated Lumber: Place pressure-treated lumber on top of the concrete blocks to create the base for your floor joists.
Floor Joists: Attach pressure-treated floor joists to the lumber on the blocks, ensuring they are spaced evenly and secured with joist hangers.

5. Framing the Walls and Roof: Putting Up the Skeleton

Now it's time to create the structure of your shed. This is where the framing comes in:

Wall Framing: Cut the wall studs to the correct height and attach them to the floor joists. Make sure they're spaced correctly and plumbed using a level.
Roof Framing: Build the roof rafters and attach them to the top plates of the walls. Remember to use the correct angle and pitch for your roof.
Sheathing: Attach the plywood or OSB sheathing to the walls and roof framing, creating a solid surface for the siding and roofing.

6. The Exterior: Giving Your Shed a Facelift

With the framing in place, it's time to give your shed its exterior look:

Siding: Install the siding of your choice, whether it's vinyl, wood, or another material. Make sure it's securely attached and properly overlapped.
Roofing: Lay down the roofing shingles or metal panels according to the manufacturer's instructions. Secure them with nails or screws.

7. The Interior: Creating a Functional Space

Now comes the fun part: finishing the inside of your shed!

Flooring: Install your chosen flooring, whether it's concrete, wood, or a different material. Make sure it's level and securely attached.
Insulation: If you want to make your shed more comfortable and energy-efficient, add insulation to the walls and roof. Fiberglass batt insulation is a common and budget-friendly option.
Drywall: For a more finished look, you can add drywall to the interior walls. You'll need to tape and mud it, then paint it for a clean finish.

8. Doors and Windows: Creating Access and Light

Finally, let's add the finishing touches:

Doors: Install the door(s) you've chosen, making sure they're properly hung and secured.
Windows: Install the windows you've selected, ensuring they're level and sealed properly.

9. The Finishing Touches: Adding the Personal Flair

Your shed is almost complete! Now's the time to personalize it:

Paint or Stain: Give your shed a fresh coat of paint or stain to protect it and add some personality.
Hardware: Install the door handles, hinges, and any other hardware you need.
Decorations: Add some decorative touches to make your shed feel more inviting, like hanging plants, adding a welcome sign, or creating a small garden.

Congratulations! You've now built a stunning and affordable shed. Enjoy the extra storage space and the sense of accomplishment that comes with completing a DIY project.

Bonus Tips:

Plan Ahead: Take your time to plan everything before you start building. This will help avoid mistakes and ensure the project runs smoothly.
Seek Help When Needed: Don't be afraid to ask for help from friends or family if you need it. There's no shame in asking for a helping hand!
Have Fun: Building a shed should be an enjoyable experience. Take breaks, listen to music, and enjoy the process!

So there you have it â€" your guide to building a cheap and easy 8x12 shed for your backyard! Don't let the thought of construction scare you off. With a little planning, effort, and these tips, you can create a valuable and functional addition to your property. Happy building!

Read More..

Building a 10x12 shed for less: diy tips and plans

Building a 10x12 shed for less: diy tips and plans


Hey there, fellow shed enthusiasts! Building your own shed can be a really rewarding experience, and it doesn't have to break the bank. A 10x12 shed is a great size for most needs â€" perfect for storing tools, bikes, gardening supplies, or even setting up a small workshop. Let's dive into how to make it happen on a budget!

1. Planning is Key: Laying the Foundation for Savings

Before you even start thinking about lumber, take some time to really nail down your plans. This will help you make smart decisions and avoid costly mistakes later on. Here’s what to think about:

Decide on Your Shed's Purpose: What will you store in it? Knowing what you'll be using it for will help you determine the best size, layout, and features. For example, if you're storing bikes, you might need a taller shed to accommodate them.
Choose Your Materials: Wood is the most common building material for sheds, but you can also consider using metal or even recycled materials. Shop around and compare prices.
Draw Up a Plan: A simple sketch of your shed will help you visualize the structure and calculate the amount of materials you'll need. There are plenty of free shed plans available online â€" you can even find some specific to 10x12 sheds!
Get the Right Permits: Check with your local building department about permit requirements for sheds. Some areas might require permits for any structure over a certain size. This might seem like a hassle, but it's worth it to avoid any legal trouble down the road.

2. Finding Bargains: Where to Score Great Deals on Materials

Now comes the fun part: hunting down the best deals on materials! Here are some tips:

Check Your Local Habitat for Humanity ReStore: These stores are overflowing with salvaged and donated building materials â€" often at a fraction of the cost of new stuff. You might be surprised at the quality of materials you can find there.
Scour Craigslist and Facebook Marketplace: These sites are great for finding people selling used building materials, often at bargain prices. Just make sure you carefully inspect everything before you buy it.
Think about Salvage Yards: Don't overlook the possibility of finding good quality lumber at a salvage yard. They might even offer delivery!
Check Out Online Retailers: While you might not find the lowest prices on materials at big box stores, they can offer convenient delivery and price matching on competitor prices.

3. Building Your Shed: Cost-Saving Tips and Techniques

Alright, you've got your plans and materials â€" now it's time to start building! Here's how to save money during construction:

DIY is Your Friend: The more you can do yourself, the less you'll have to pay for labor. Many people are surprised at how much they can accomplish with a little research and practice.
Borrow Tools: You don't need to buy every tool under the sun for this project. See if you can borrow tools from friends, family, or your local library.
Go for Simpler Designs: Opt for a simple shed design with fewer frills. You can always add more features later, like a window or a porch, as your budget allows.
Consider a Metal Roof: Metal roofs can be more expensive upfront, but they last longer and are less prone to leaks than asphalt shingles. This can save you money in the long run.
Use Recycled Materials: Think outside the box! You can use repurposed materials like old windows, doors, or even pallet wood to add character to your shed and save money.

4. Building the Foundation: Choosing the Right Option for Your Budget

The foundation is the base of your shed, so it's important to choose the right type for your needs and budget. Here are a few options to consider:

Concrete Slab: This is the most durable and long-lasting option, but it can also be the most expensive.
Concrete Block Foundation: Slightly less expensive than a concrete slab, this foundation is still very sturdy.
Pier Foundation: This is a cost-effective option, especially if you are building on uneven ground.
Timber Frame Foundation: This is a quick and easy option for those with basic carpentry skills. It’s often the most budget-friendly, but might not be as long-lasting as concrete.

5. Framing the Shed: Putting Up Walls with Confidence

The framing is the skeleton of your shed, so it's important to do it right. Here are some tips to keep in mind:

Use Pressure-Treated Lumber for the Bottom Plates: This will help prevent rot and decay.
Use Studs That Are the Correct Size: Follow the specifications of your plans to ensure the walls are strong and stable.
Check Your Walls for Plumb: Make sure all the walls are straight and level using a level or plumb bob.
Use Bracing: This will help to strengthen the walls and prevent them from bowing or buckling.

6. Roofing and Siding: Finishing Touches for a Budget-Friendly Shed

With the framing complete, it's time to add the roof and siding. Here's how to save money:

Choose a Metal Roof: As mentioned before, metal roofs are more expensive upfront but can save you money in the long run.
Use Simple Siding: You can use plywood or OSB for siding, and paint it to match your shed's aesthetic.
Consider Using Recycled Materials: Think creatively about how you can use salvaged materials for siding, like corrugated metal or reclaimed barnwood.
Install the Roof and Siding Yourself: This is a great way to save on labor costs. Just make sure you follow the instructions in your plans carefully.

7. Finishing Touches: Adding Personality and Functionality

Finally, you're ready to add the finishing touches! This is where you can really personalize your shed:

Install a Door and Windows: Make sure you choose the right size and style for your needs and budget.
Paint or Stain the Exterior: This will protect your shed from the elements and give it a more polished look.
Add Shelving and Storage: Build some simple shelves or install pre-made units to make the most of your space.
Add a Workbench or Lighting: These are great additions if you plan to use your shed as a workshop.

Conclusion: Building a Shed for Less is Achievable!

Building a 10x12 shed on a budget is definitely possible with a bit of planning and some creativity. By following these tips, you can save money on materials, labor, and design. Remember, the journey is part of the fun â€" enjoy the process and take pride in your accomplishment! You'll have a beautiful, functional shed that you can enjoy for years to come, and it'll be something you built with your own two hands! Let me know if you have any more questions. Happy building!

Read More..
Powered by Blogger.