Maximize Small Outdoor Spaces with These 8x6 Shed Plans

Maximize Small Outdoor Spaces with These 8x6 Shed Plans

Maximize Small Outdoor Spaces with These 8x6 Shed Plans

The inherent limitations of small outdoor spaces often present a significant challenge for homeowners seeking additional storage or a dedicated workspace. However, with careful planning and the strategic utilization of space, even the most compact areas can be transformed into functional and aesthetically pleasing environments. This article explores the versatile potential of 8x6 shed plans, detailing design considerations, construction techniques, and practical applications to optimize limited outdoor areas.

Understanding the Advantages of an 8x6 Shed

An 8x6 shed, measuring 8 feet in length and 6 feet in width, represents a remarkably efficient footprint for maximizing storage and functionality within a confined space. Its compact dimensions allow for placement in even the smallest of yards or gardens without overwhelming the surrounding landscape. This size offers a practical balance between storage capacity and overall footprint, making it an ideal choice for a wide range of applications.

Space Optimization Techniques

Optimizing space within an 8x6 shed requires a meticulous approach to design and organization. Careful consideration of storage solutions, shelving configurations, and the placement of workbenches or other fixtures is crucial for achieving maximum efficiency. Vertical space should be fully utilized through the implementation of multi-tiered shelving units, overhead storage racks, and wall-mounted organizers. This maximizes the usable volume within the shed, preventing wasted space.

Aesthetic Considerations for Small Spaces

The aesthetic integration of an 8x6 shed within a small outdoor space is paramount. The shed's exterior should complement the overall style of the property, avoiding visual clashes that might detract from the cohesive design. The selection of appropriate siding materials, color schemes, and roofing styles can significantly impact the visual harmony. Consider using materials and colors that blend seamlessly with the existing landscape, minimizing the shed's visual impact.

Detailed 8x6 Shed Plans: Design and Construction

The construction of an 8x6 shed can be undertaken through various methods, ranging from DIY projects to professional installations. Detailed plans are essential for a successful build, outlining the necessary materials, construction techniques, and assembly procedures. These plans should encompass every aspect of the shed's construction, from the foundation to the roofing system.

Foundation Considerations

The choice of foundation is dependent on various factors, including soil conditions, budget constraints, and the overall weight of the shed. Options include concrete slabs, gravel bases, and pressure-treated wooden platforms. A concrete slab provides a robust and level foundation, ensuring stability and longevity. However, it requires more significant excavation and construction efforts. Gravel bases offer a more economical alternative, while wooden platforms are relatively simple to construct but might require more maintenance.

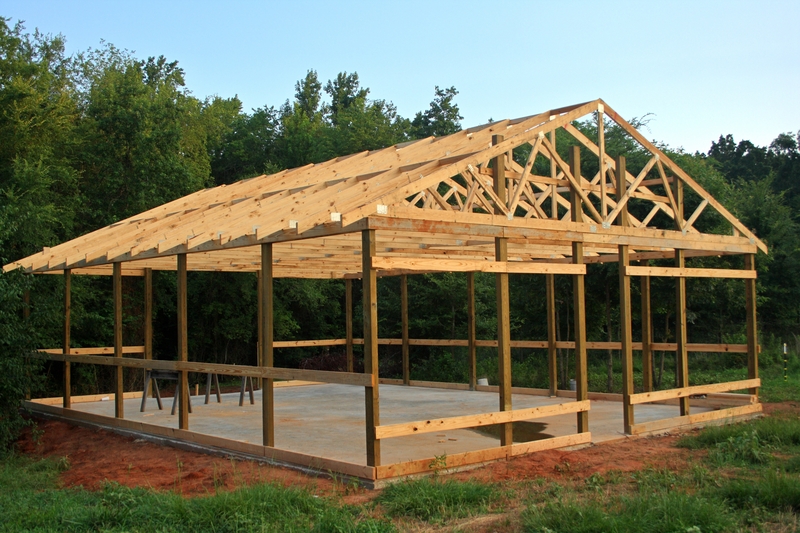
Framing and Sheathing

The framing of the shed constitutes the structural backbone of the building. Pressure-treated lumber is commonly used for its resistance to decay and insect infestation. The framing should adhere to local building codes and regulations, ensuring the structural integrity and safety of the shed. Appropriate bracing and reinforcement are essential, particularly in areas prone to high winds or heavy snow loads. The sheathing, typically plywood or OSB, provides a solid surface for the exterior cladding.

Roofing and Siding Options

The roofing system should be chosen based on factors such as climate conditions, budget, and aesthetic preferences. Asphalt shingles are a popular and cost-effective choice, offering good durability and water resistance. Metal roofing provides superior longevity and weather resistance but often comes with a higher initial cost. Siding materials include vinyl, wood, and metal, each offering distinct advantages in terms of durability, maintenance, and aesthetic appeal.

Doors and Windows

The inclusion of a robust door and appropriately sized windows is crucial for both functionality and aesthetics. The door should be of sufficient size to allow easy access to the shed's interior. Windows not only enhance natural light but also aid in ventilation, preventing moisture buildup and maintaining a comfortable interior environment. Consider the placement of doors and windows for optimal sunlight and ventilation.

Versatile Applications for an 8x6 Shed

The compact dimensions of an 8x6 shed do not limit its versatility. Its adaptable nature allows it to serve a multitude of purposes, catering to diverse needs and preferences. This adaptability makes it an excellent choice for homeowners seeking to maximize their limited outdoor spaces.

Storage Solutions

Perhaps the most common application is as a storage shed, providing a dedicated space for garden tools, outdoor equipment, and other items. Shelving units, hanging organizers, and vertical storage solutions can significantly increase storage capacity within the limited space.

Workspace and Hobby Room

With appropriate customization, an 8x6 shed can easily transition into a functional workspace or hobby room. A workbench, adequate lighting, and efficient storage solutions transform the shed into a dedicated area for various activities such as woodworking, painting, or gardening tasks. This allows for a productive space separate from the main house.

Outdoor Office or Studio

For those seeking a quiet and secluded workspace, an 8x6 shed can provide an ideal outdoor office or studio. Insulation and climate control can further enhance the functionality of this space, providing a comfortable environment for work or creative pursuits.

Planning for Success: Essential Considerations

Before embarking on the construction of an 8x6 shed, careful planning is essential to ensure a successful outcome. This involves several key aspects that require thorough consideration.

Local Building Codes and Regulations

It is crucial to review and comply with all local building codes and regulations regarding shed construction. These regulations typically cover aspects such as foundation requirements, structural integrity, and safety standards. Failure to comply with these codes can result in penalties or even demolition of the structure.

Budgeting and Material Selection

Developing a detailed budget is vital for managing expenses effectively. This involves estimating the cost of materials, labor, and any necessary permits. Carefully selecting cost-effective materials without compromising quality is essential for staying within budget.

Site Preparation and Access

Thorough site preparation is critical for ensuring a level and stable foundation. This might involve excavation, leveling the ground, and ensuring adequate access for the delivery of materials and the construction process itself.

In conclusion, an 8x6 shed offers a remarkable opportunity to maximize the potential of small outdoor spaces. Through careful planning, thoughtful design, and efficient construction techniques, this compact structure can provide valuable storage, a dedicated workspace, or a tranquil retreat, enhancing the functionality and aesthetic appeal of even the most limited outdoor areas. By following these guidelines and adhering to best practices, homeowners can successfully transform their small outdoor spaces into versatile and productive environments.

Read More..

Your Guide to 6x8 Shed Plans and the True Cost of Building

Your Guide to 6x8 Shed Plans and the True Cost of Building

Your Guide to 6x8 Shed Plans and the True Cost of Building

Constructing a 6x8 shed offers a practical solution for various storage needs, from gardening equipment to outdoor recreational gear. However, the seemingly straightforward project involves careful planning and budgeting to ensure a successful outcome. This comprehensive guide delves into the intricacies of 6x8 shed plans and provides a realistic assessment of the associated costs, empowering you to make informed decisions before embarking on your construction project.

Planning Your 6x8 Shed: Beyond the Dimensions

While the dimensions of your shed are a crucial starting point, successful shed construction demands meticulous planning that extends far beyond simply choosing a 6x8 footprint. Several key factors must be considered to ensure the structure is functional, durable, and compliant with local regulations.

Site Selection and Preparation:

Choosing the right location is paramount. Consider factors such as:

  • Accessibility: Ensure easy access for delivery of materials and future use of the shed.
  • Level Ground: A level foundation is crucial for structural integrity. Uneven ground will require additional levelling work.
  • Drainage: Proper drainage is essential to prevent water damage and foundation issues. Consider the surrounding terrain and potential runoff.
  • Sunlight and Shade: Depending on your intended use, consider the amount of sunlight and shade the location receives.
  • Local Regulations: Check with your local authorities for any building permits, zoning regulations, or setbacks required for shed construction.

Shed Design and Functionality:

A well-designed 6x8 shed maximizes storage space and usability. Consider the following:

  • Door Placement and Size: Optimize door placement for easy access and consider the size needed for your largest items.
  • Window Placement and Size: Windows provide natural light and ventilation. Carefully plan their placement and size.
  • Shelving and Storage Solutions: Incorporate built-in shelving or plan for future additions to maximize storage capacity.
  • Material Selection: Choose materials that are durable, weather-resistant, and aesthetically pleasing. Consider treated lumber for longevity.
  • Foundation Type: Decide on a suitable foundation type: concrete slab, gravel base, or wooden sleepers. This choice significantly impacts the overall cost and durability.

Detailed Breakdown of Costs: Building a 6x8 Shed

The true cost of building a 6x8 shed varies significantly depending on several factors, including material choices, labor costs, and the complexity of the design. However, a comprehensive cost breakdown can provide a realistic estimate.

Materials Costs:

This is often the largest component of your budget. Consider the following materials and their approximate costs (prices may vary regionally):

  • Lumber: Pressure-treated lumber for the frame, floor, and roof. Expect to spend between $300-$600.
  • Sheathing: Plywood or OSB for walls and roof. This can range from $100-$200.
  • Roofing: Asphalt shingles, metal roofing, or other options. Costs can range from $150-$400.
  • Siding: Vinyl, wood, or metal siding. Prices vary widely depending on material selection, from $100-$500.
  • Doors and Windows: Pre-hung doors and windows are typically more convenient but costlier. Expect to pay $150-$400.
  • Hardware: Nails, screws, hinges, handles, and other hardware. Budget around $50-$100.
  • Foundation Materials: Concrete, gravel, or wood sleepers, depending on your chosen foundation type. Costs range widely from $100-$500+.

Labor Costs:

Labor costs can significantly impact the overall budget. Consider the following:

  • DIY Approach: The most cost-effective option, but requires time, skills, and access to tools.
  • Hiring a Contractor: More expensive, but ensures professional workmanship and adherence to building codes. Expect to pay $2000-$5000 or more depending on the contractor and the complexity of the build.
  • Hiring Help for Specific Tasks: If you are capable of handling parts of the project yourself, you could hire help for specific tasks that require specialized skills or equipment (e.g., pouring the concrete foundation).

Permits and Inspections:

Building permits are required in most jurisdictions. The cost of permits varies widely depending on location and the specific requirements. Budget at least $100-$500 for permits and inspections.

Contingency Budget:

It is crucial to include a contingency budget to account for unexpected costs or material shortages. A 10-20% contingency is recommended (i.e., $300-$600 on a $3000 project).

Total Estimated Cost and Considerations

Based on the above breakdown, a reasonable estimate for the total cost of building a 6x8 shed ranges from $1500 to $6000 or more. The lower end reflects a DIY approach with careful material sourcing and a simpler design. The higher end represents a professionally constructed shed with premium materials and a more complex design. This estimate does not include land preparation beyond basic levelling.

Remember to factor in the cost of tools if you are undertaking the project yourself. Consider renting specialized tools instead of purchasing them, especially if this is a one-time project. Thorough planning and a realistic budget are essential for a successful 6x8 shed construction project. Always obtain multiple quotes from contractors if you're not undertaking the construction yourself and compare materials costs from various suppliers.

Read More..

How to Build a Pole Barn for Large Equipment Storage

How to Build a Pole Barn for Large Equipment Storage


So, you've got some serious machinery â€" tractors, ATVs, maybe even a classic car â€" and they're all crammed into a tiny garage or worse, exposed to the elements. You're tired of the constant battle against rust and the frustration of maneuvering around a cramped space. You need a solution, a place where your precious equipment can live comfortably and safely.

Enter the pole barn.

These sturdy, versatile structures have been a go-to choice for generations of farmers and hobbyists alike, offering a reliable and affordable way to create a spacious haven for your prized possessions. Ready to build your own equipment haven? Let's break down the process step by step.

Step 1: Planning and Design

Before you start digging holes, take some time to map out your vision.

Size matters. Measure your equipment and add some wiggle room. You want enough space to move around comfortably and access every corner. Don't forget to factor in overhead clearance for taller machinery.
Purposeful design. Decide how you'll use the space. Do you need a workshop area? Will you be storing hay or grain? Are you planning on an office or a living area within the barn?
Location, location, location. Choose a spot that's level and easily accessible. Make sure it doesn't interfere with any existing structures or utilities.
The right materials. Think about the climate and your needs. For heavy equipment, you might need heavier-duty materials like steel or concrete.

Step 2: Gathering the Crew and Supplies

Building a pole barn is a team effort.

Get help. Unless you're a seasoned construction pro, it's best to enlist some help from family or friends. Having extra hands makes the process smoother and less stressful.
List out your materials. This will depend on the size and complexity of your barn. You'll need:
Posts: Typically made of pressure-treated wood or steel for durability.
Framing lumber: For the roof and walls.
Sheathing: Plywood or OSB for the roof and walls.
Roofing materials: Metal roofing is a popular and durable option.
Siding: Choose a material that suits your style and budget.
Doors and windows: Select sizes that will accommodate your equipment and provide ample natural light.
Hardware: Nails, screws, bolts, braces â€" you'll need a variety of fasteners to secure the structure.
Concrete: For the foundation and footings.
Protective finishes: Paint or stain to protect the wood from the elements.

Step 3: Foundation and Footing Work

The foundation is the bedrock of your barn.

Dig those holes. Use a post hole digger or a rented auger to create holes for your posts. The depth will depend on your local frost line and the type of soil.
Pour the concrete. Mix your concrete according to the manufacturer's instructions and carefully pour it into the holes. Make sure the posts are level and plumb before the concrete sets.
Let it cure. Give the concrete plenty of time to harden before moving on to the next steps.

Step 4: Erecting the Framework

Time to build the skeleton of your barn.

Post installation. Secure the posts to the concrete footings using galvanized bolts and washers.
Framing the roof. Cut and install the roof rafters, creating a strong and stable structure.
Framing the walls. Attach wall studs to the posts, creating a sturdy frame for your siding.

Step 5: Roofing and Sheathing

Now to cover the roof and walls.

Installing the roof sheathing. Attach plywood or OSB to the rafters, creating a smooth base for your roofing material.
Laying the roofing. Secure your chosen roofing material to the sheathing, using nails, screws, or specialized clips.
Installing the wall sheathing. Attach plywood or OSB to the wall studs, providing a sturdy foundation for the siding.

Step 6: Siding and Finishing Touches

The finishing touches give your barn its personality.

Siding installation. Choose your siding material â€" metal, wood, vinyl, or fiber cement â€" and install it according to the manufacturer's instructions.
Adding doors and windows. Install the doors and windows to provide access and natural light.
Finishing details. Add trim, gutters, and other decorative elements to enhance the look of your barn.

Step 7: The Big Reveal

Congratulations! You've built your own pole barn.

Clean up. Take a moment to tidy up the construction site and admire your handiwork.
Add personal touches. Organize your space, personalize it with your own style, and enjoy the fruits of your labor.

Tips and Tricks for Building a Pole Barn:

Invest in good tools. Having the right tools will make the job easier and faster.
Get proper permits. Check with your local building department to ensure you're following all the necessary regulations.
Stay organized. Keep your materials sorted and accessible to avoid delays.
Safety first. Wear protective gear and follow all safety guidelines.
Don't be afraid to ask for help. If you encounter a problem, don't hesitate to seek advice from a more experienced builder.

Beyond the Basics: Customization and Upgrades

Once the basic structure is in place, the possibilities are endless.

Add a workshop. Create a dedicated space for tools and projects.
Install a concrete floor. This makes the barn more durable and easier to clean.
Add insulation. Keep your equipment protected from extreme temperatures and improve energy efficiency.
Install electricity. Bring in power for lighting, heating, and tools.
Add a loft. Maximize your storage space by adding a loft above the main area.

Building a pole barn is a rewarding experience. It's a chance to create a custom-designed space that perfectly meets your needs. With careful planning, hard work, and a little guidance, you can build a sturdy and functional pole barn that will house your equipment for years to come.

Read More..

How to Design a Pole Barn with Ample Storage for Seasonal Items

How to Design a Pole Barn with Ample Storage for Seasonal Items


Okay, let's talk pole barns. You know, those sturdy, practical structures that have become synonymous with storage, workshops, and even living space. But we're going to focus on the storage part, specifically for all that seasonal stuff that takes over your garage or basement. Think kayaks, lawnmowers, holiday decorations, winter gear â€" you name it, it's going to have a place in your new pole barn paradise.

Step 1: Dream Big, But Be Realistic

Before you start sketching out your perfect pole barn on a napkin (we've all been there!), let's get real. Think about the space you actually need. How much stuff are we talking about? Are you planning on storing vehicles, too?

Here's a little exercise to get you started:

List everything: Write down every single item you want to store in the barn.
Categorize: Group items into categories (e.g., lawn and garden, sports equipment, holiday décor, etc.)
Measure: Go through your list and actually measure the dimensions of each item. This is crucial for planning your layout.

Step 2: Planning the Layout â€" It's All About Flow

Now that you know what you're working with, you can start to plan the layout. Imagine yourself moving through the barn â€" where will you enter? Where will you store the most-used items? Where can you park a vehicle, if needed?

Think vertical: Utilize vertical space with shelves, racks, and even overhead storage systems. You'd be surprised how much you can store by going up!
Leave room to breathe: Don't cram everything in, leaving no room to move around. Allow for aisles and walkways for easy access.
Consider future needs: Will you need to add more storage in the future? Plan for expansion. Maybe have a small section designated for future additions.

Step 3: Choosing Your Pole Barn Materials â€" The Basics

Pole barns are known for their durability and affordability. But there are a few things to consider when choosing materials:

Posts: Typically made of treated lumber, steel, or concrete. Treated lumber is cost-effective, while steel and concrete offer superior durability.
Roofing: Metal roofing is a popular choice due to its longevity and affordability. It also provides good insulation.
Siding: Vinyl siding is a good option for low maintenance, while metal siding is more durable.
Windows and Doors: Consider adding plenty of windows for natural light and ventilation. Choose a door size that allows you to easily move large items in and out.

Step 4: Beyond the Basics â€" Adding Your Personal Touch

Your pole barn is going to be more than just storage; it's an extension of your home. Think about how you want to use the space and add some personal touches:

Work area: Designate a corner for a workbench, tools, and project supplies.
Lighting: Proper lighting is essential for working and safety. Consider LED lighting for energy efficiency.
Heating and cooling: If you plan to spend time in the barn, consider adding heating and cooling systems.
Flooring: Concrete floors are durable but can be cold. Consider adding a layer of epoxy or adding mats for comfort.

Step 5: The Finishing Touches â€" Making it Your Own

Now for the fun part â€" adding your personal flair to the space.

Wall colors: Choose a neutral color that reflects light, or add pops of color to define different areas.
Organization systems: Invest in storage solutions that fit your needs, such as shelves, bins, and hooks.
Decor: Add a few personal touches, like a vintage sign, a cozy armchair, or even a mini fridge for those long working days.

Here are some ideas for maximizing storage space:

Ceiling Storage: Install overhead storage systems for those items you don't use often, such as holiday decorations or seasonal clothing.
Vertical Storage Racks: Use wall-mounted racks for tools, sporting equipment, and even bikes.
Sliding Doors: Optimize space by installing sliding doors instead of traditional swing doors, especially if you have limited space.
Utilize the Walls: Use pegboards, shelves, and hooks to keep tools and accessories organized and easily accessible.
Go Up! Think about adding a loft for additional storage or even a workspace.

Don't forget the fun part! Remember, this is your space to enjoy. Add some personal touches, make it comfortable, and make it reflect your personality.

Building a pole barn is a great way to gain valuable storage space and add value to your property. By following these tips, you can create a functional and beautiful space that you'll love for years to come.

Read More..

How to Build a Pole Barn for a Cost-Effective Storage Solution

How to Build a Pole Barn for a Cost-Effective Storage Solution


Pole barns, known for their simple construction and affordability, offer an efficient and budget-friendly solution for storage needs. Whether you require space for equipment, vehicles, hay, or other valuable possessions, building a pole barn can be a wise investment. This guide provides a comprehensive overview of the process, from planning to construction, ensuring a successful and cost-effective outcome.

1. Planning and Design:

Define your needs: Determine the size, shape, and features necessary for your specific storage requirements. Consider the dimensions of the items you intend to store, along with potential future growth.
Site assessment: Analyze the chosen location for accessibility, drainage, soil conditions, and proximity to utilities. Ensure compliance with local building codes and zoning regulations.
Budgeting: Establish a realistic budget, factoring in all costs from materials and labor to permits and inspections. Consider the long-term benefits of a well-constructed pole barn, as it can significantly increase property value.
Design and Engineering: Consult with an architect or engineer to create a detailed plan outlining the structure's dimensions, materials, and specifications. This ensures a safe and durable building.
Foundation selection: Decide on the foundation type based on soil conditions and budget. Concrete piers, concrete slabs, or pre-engineered foundation systems are common options.

2. Material Selection and Procurement:

Pole selection: Choose durable and treated wood poles for longevity. Pressure-treated lumber resists rot and insect damage, ensuring long-lasting performance. Consider species like Southern Pine or Douglas Fir for strength.
Roofing and Siding: Select roofing and siding materials that align with your budget and desired aesthetics. Metal roofing offers durability and cost-effectiveness, while wood siding provides a traditional look.
Doors and Windows: Determine the size and type of doors and windows required for access and ventilation. Choose materials that complement the overall design and provide adequate security.
Insulation: Consider adding insulation to the walls and roof for climate control and energy savings. This can significantly impact the cost of heating and cooling, especially in extreme climates.

3. Permitting and Inspections:

Obtain necessary permits: Contact your local building department to obtain the required permits for construction. Ensure your plans comply with all local regulations and safety standards.
Schedule inspections: Follow the local building code requirements for inspections at various stages of construction. This ensures adherence to safety regulations and building codes.

4. Construction Process:

Foundation preparation: Excavate the site and pour the foundation according to the engineer's specifications. Ensure proper drainage and leveling for stability.
Pole erection: Install the treated wooden poles into the prepared foundation. Utilize proper tools and techniques to ensure plumb and level installation.
Framing and Roofing: Install the roof rafters, wall framing, and purlins according to the plan. Ensure proper bracing and connections for stability.
Roofing and Siding Installation: Apply the chosen roofing and siding materials to the completed frame. Follow manufacturer instructions for installation techniques and sealant application.
Finishing touches: Install doors, windows, and any desired accessories. Add finishing touches like paint, trim, and gutters to complete the building's aesthetic.

5. Cost-Saving Tips:

DIY approach: If you possess the skills and tools, consider undertaking some construction tasks yourself to save on labor costs. However, ensure safety and quality are prioritized.
Material sourcing: Explore various suppliers for competitive pricing on materials. Consider using recycled or salvaged materials to reduce costs further.
Seasonal purchases: Take advantage of seasonal sales and discounts on building materials to minimize expenses.
Utilize local resources: Contact local contractors and suppliers for competitive quotes and potentially reduced pricing.
Optimize design: Minimize building size and complexity to reduce material and labor costs.

6. Maintenance and Upkeep:

Regular inspections: Conduct periodic inspections to identify any potential damage or issues. Address these promptly to prevent further deterioration.
Roof maintenance: Maintain the roof's integrity by cleaning debris, inspecting for leaks, and resealing as needed.
Structural integrity: Ensure the pole barn's structural integrity by inspecting the poles, framing, and bracing for any signs of damage or wear.
Pest control: Implement pest control measures to prevent damage from insects and rodents.
Landscaping: Maintain the surrounding area by trimming vegetation and ensuring proper drainage to protect the building.

Conclusion:

Building a pole barn offers a cost-effective and flexible storage solution for various needs. By carefully planning, sourcing materials strategically, and following this comprehensive guide, you can achieve a durable and functional structure that maximizes storage capacity while minimizing expenses. Remember, proper construction techniques, regular maintenance, and a keen eye for detail are essential for ensuring the longevity and value of your pole barn investment.

Read More..

How to Build a Pole Barn with Reinforced Posts and Beams

How to Build a Pole Barn with Reinforced Posts and Beams


A pole barn, also known as a post-frame building, offers a versatile and cost-effective solution for a variety of applications, from agricultural storage to workshops and even residential living. The strength and durability of a pole barn depend heavily on the construction of its supporting structure, particularly the posts and beams. This article will delve into the process of building a pole barn with reinforced posts and beams, ensuring a robust and long-lasting structure.

1. Planning and Design Considerations

Before embarking on the construction, thorough planning and design are crucial. This includes:

Purpose and Usage: Determine the intended use of the pole barn. This will inform the size, height, and other structural requirements.
Local Building Codes: Familiarize yourself with local building codes and regulations pertaining to pole barn construction. These may dictate factors like foundation requirements, wind load resistance, and snow load capacity.
Site Selection and Soil Analysis: Choose a suitable site with good drainage and conduct a soil analysis to determine the bearing capacity. This information is vital for designing the foundation and determining the appropriate post depth.
Materials Selection: Opt for high-quality materials, especially for posts and beams. Pressure-treated lumber is recommended for resistance to moisture and decay. Consider using engineered wood products like laminated veneer lumber (LVL) or glulam beams for increased strength and stability.
Reinforcement Techniques: Choose suitable reinforcement techniques for posts and beams based on the anticipated load and environmental conditions.

2. Foundation Construction

The foundation is the cornerstone of a pole barn. It transmits the building's weight to the soil, ensuring stability and longevity.

Types of Foundations: Common options include concrete piers, concrete footings, and helical piers. The choice depends on the soil conditions, building size, and local codes.
Concrete Piers: These are typically used for heavier structures. They involve pouring concrete into pre-drilled holes, ensuring proper depth and width.
Concrete Footings: Concrete footings are commonly used for lighter structures. They are rectangular or square concrete pads poured at a specific depth.
Helical Piers: These are screw-driven piles that are ideal for unstable or difficult soil conditions. They offer superior load-bearing capacity and minimize disturbance to the site.

3. Post Installation

Posts are the vertical supports of the pole barn structure. Their strength and stability are paramount.

Post Material: Choose pressure-treated lumber, specifically designed for ground contact. Engineered lumber products like laminated veneer lumber (LVL) offer greater strength and stability.
Post Dimensions: The size of the posts depends on the building's size, height, and anticipated load. Consult local building codes and a structural engineer for guidance.
Post Depth: The depth of the posts must be sufficient to transfer the load to the foundation. Soil analysis and building codes will dictate this depth.
Post Reinforcement: Consider reinforcing the posts with steel plates, metal brackets, or concrete collars for added strength and stability. These reinforcements distribute the load and enhance the post's resistance to bending and shearing.

4. Beam Installation and Reinforcement

Beams span the posts and support the roof and walls. They are essential for the building's structural integrity.

Beam Material: Use pressure-treated lumber or engineered wood products like laminated veneer lumber (LVL) or glulam beams. These materials offer superior strength and resistance to warping and bending.
Beam Dimensions: The size of the beams depends on the span, anticipated load, and local building codes. Larger spans necessitate larger beams.
Beam Reinforcement: Consider reinforcing the beams with steel plates, metal brackets, or additional beams for added strength. These reinforcements distribute the load and enhance the beam's resistance to bending and buckling.

5. Roof Construction

The roof of a pole barn needs to be strong and durable to withstand environmental forces.

Roof Truss System: Choose a suitable truss system that can handle the anticipated snow load and wind load. Truss systems offer a lightweight and efficient solution for spanning wide distances.
Roof Sheathing: Utilize plywood or oriented strand board (OSB) for sheathing the roof. This provides a solid surface for the roofing material.
Roofing Material: Select a roofing material that suits the climate and aesthetic preferences. Options include metal roofing, shingles, and membrane roofing.
Roof Ventilation: Ensure adequate ventilation to prevent moisture buildup and maintain a comfortable interior environment.

6. Wall Construction

The walls of a pole barn can be constructed using various materials depending on the intended use.

Wall Framing: Utilize studs, joists, or posts depending on the wall material.
Wall Sheathing: Sheath the walls with plywood, oriented strand board (OSB), or other suitable materials.
Wall Cladding: Select a wall cladding that meets the desired aesthetic and functional requirements. Options include wood siding, metal siding, vinyl siding, and brick veneer.

7. Finishing Touches

Once the primary construction is complete, add finishing touches to ensure a functional and aesthetically pleasing pole barn.

Doors and Windows: Install doors and windows of appropriate size and type.
Electrical and Plumbing: Run electrical wiring and plumbing as needed.
Interior Finishing: Consider adding insulation, drywall, paint, and flooring to create a finished interior space.

Conclusion:

Building a pole barn with reinforced posts and beams is a rewarding project. By carefully planning, utilizing high-quality materials, and implementing effective reinforcement techniques, you can create a robust and durable structure. Consulting a structural engineer can provide valuable guidance on design and material specifications. Remember to always adhere to local building codes and safety regulations to ensure the longevity and safety of your pole barn.

Read More..
Powered by Blogger.