Building a 10x12 shed for less: diy tips and plans

Building a 10x12 shed for less: diy tips and plans


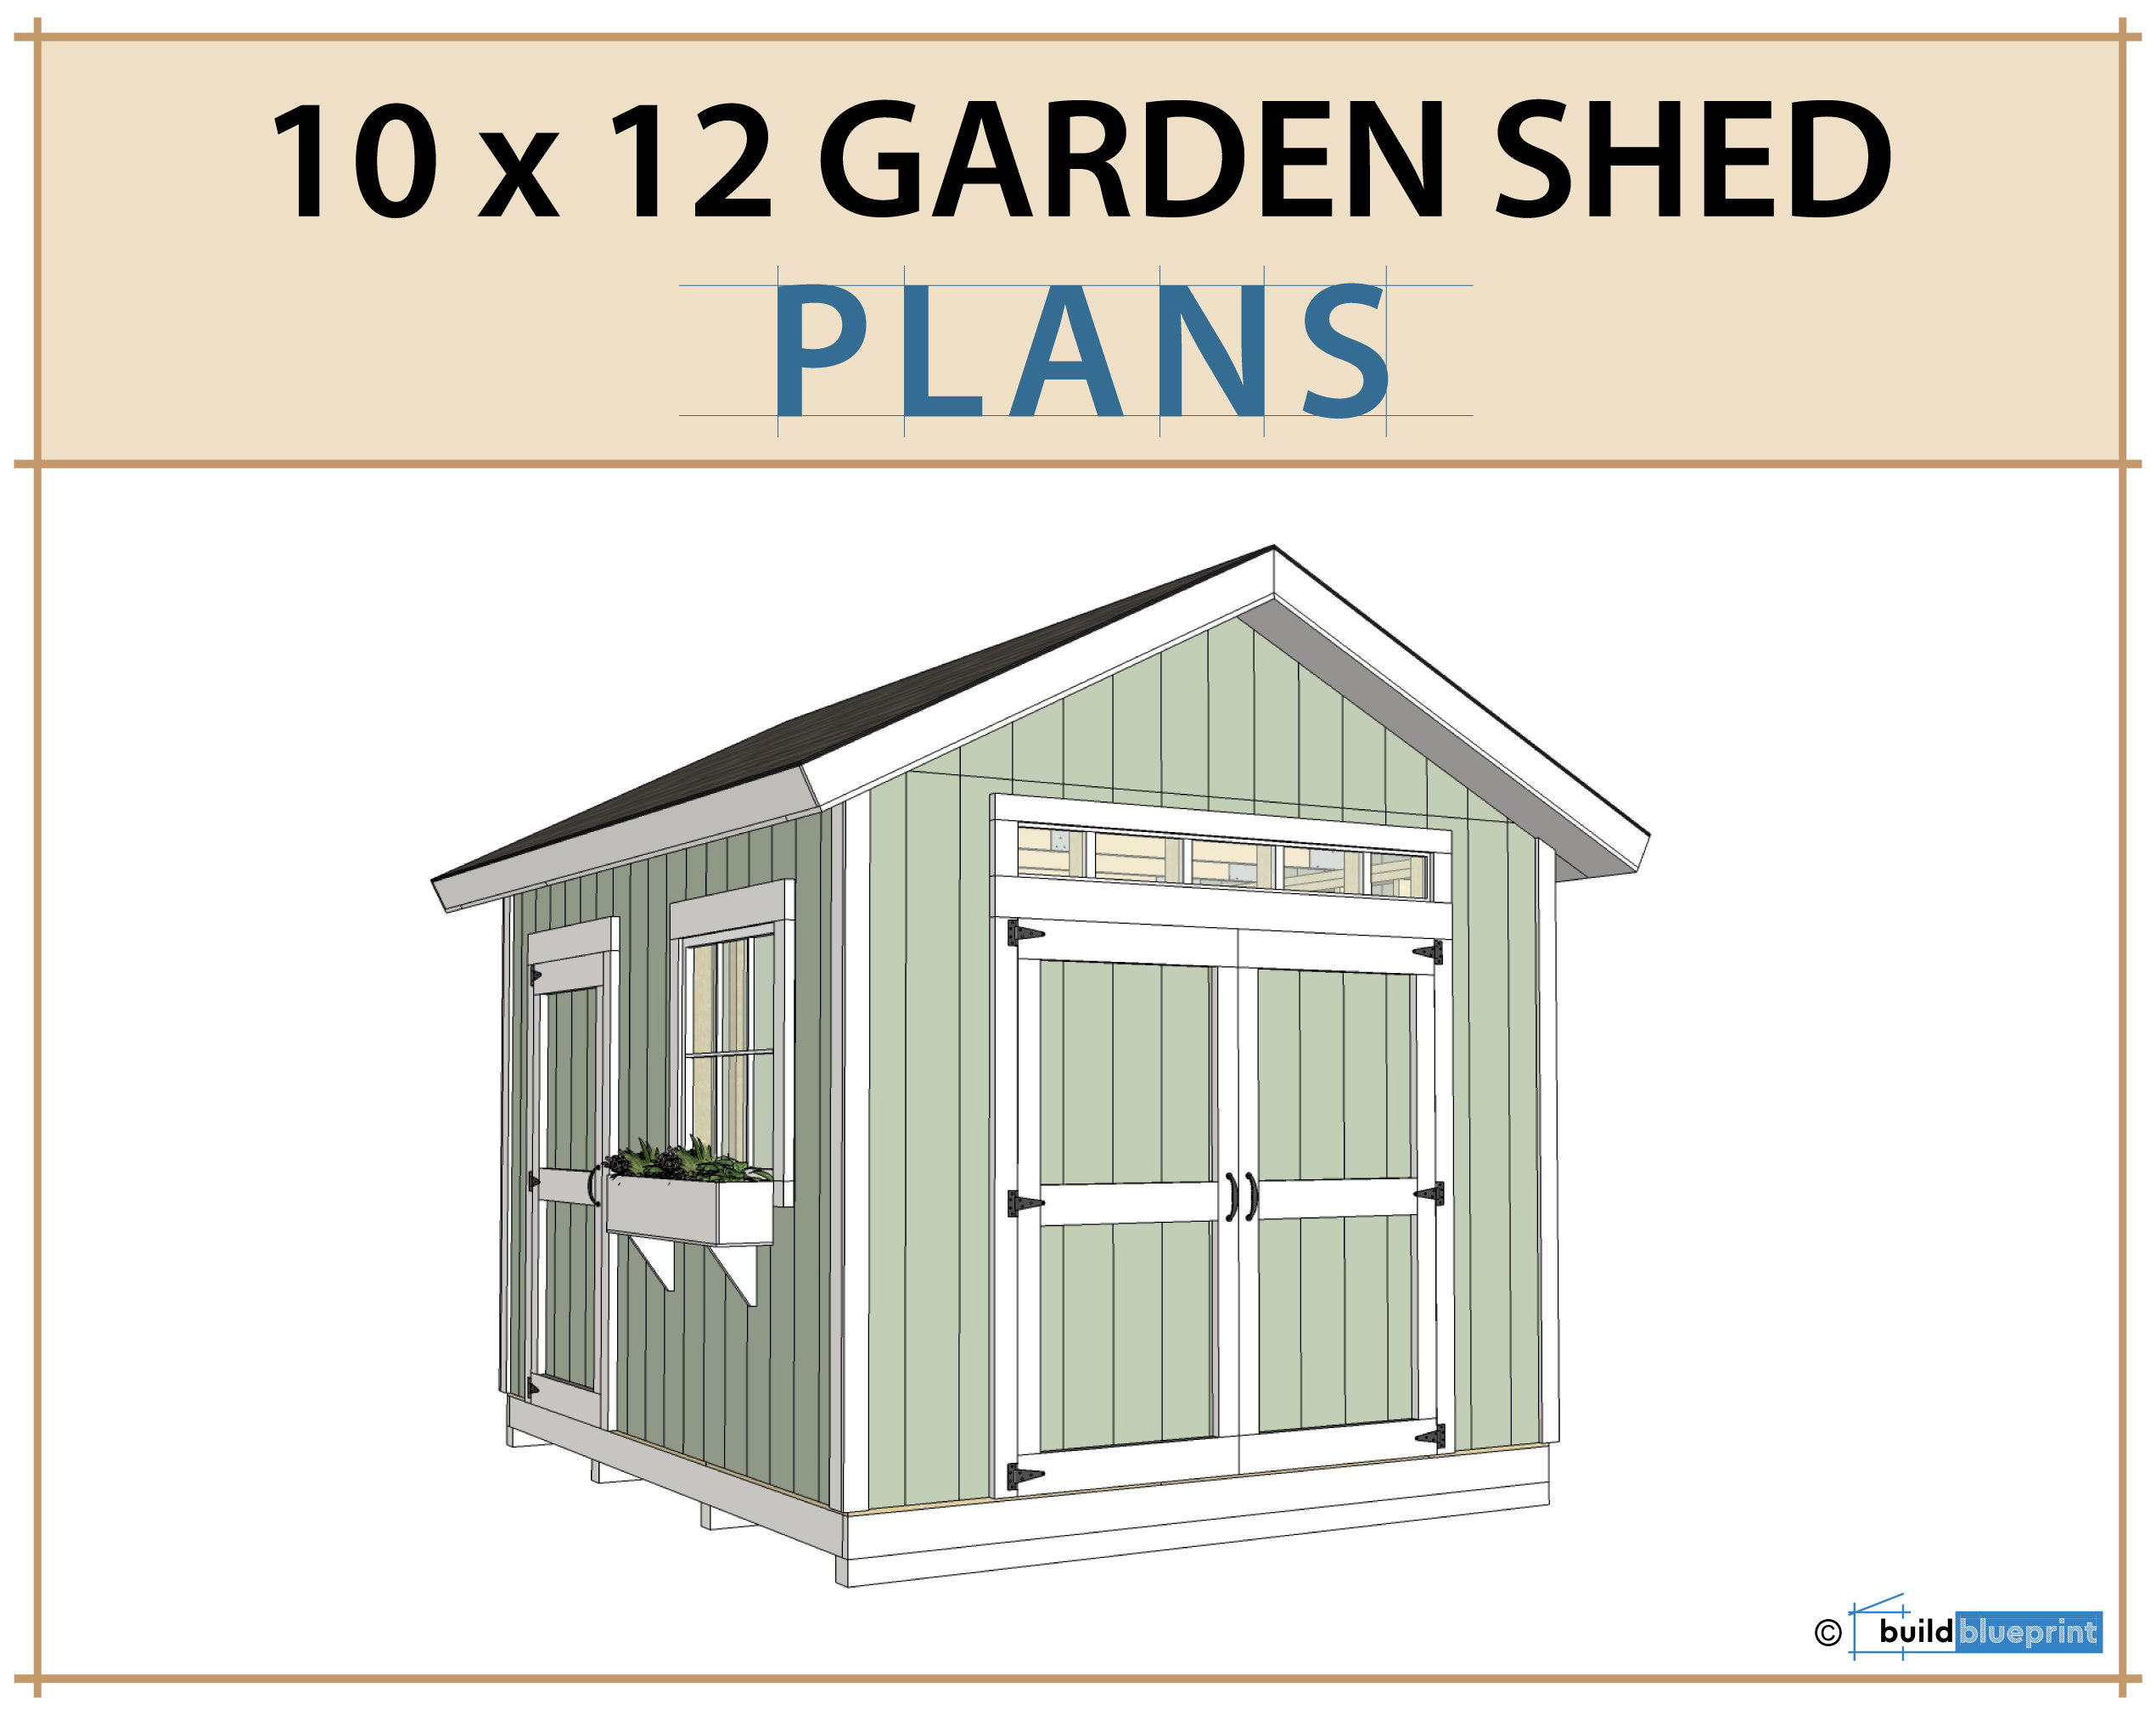
Hey there, fellow shed enthusiasts! Building your own shed can be a really rewarding experience, and it doesn't have to break the bank. A 10x12 shed is a great size for most needs â€" perfect for storing tools, bikes, gardening supplies, or even setting up a small workshop. Let's dive into how to make it happen on a budget!

1. Planning is Key: Laying the Foundation for Savings

Before you even start thinking about lumber, take some time to really nail down your plans. This will help you make smart decisions and avoid costly mistakes later on. Here’s what to think about:

Decide on Your Shed's Purpose: What will you store in it? Knowing what you'll be using it for will help you determine the best size, layout, and features. For example, if you're storing bikes, you might need a taller shed to accommodate them.
Choose Your Materials: Wood is the most common building material for sheds, but you can also consider using metal or even recycled materials. Shop around and compare prices.
Draw Up a Plan: A simple sketch of your shed will help you visualize the structure and calculate the amount of materials you'll need. There are plenty of free shed plans available online â€" you can even find some specific to 10x12 sheds!
Get the Right Permits: Check with your local building department about permit requirements for sheds. Some areas might require permits for any structure over a certain size. This might seem like a hassle, but it's worth it to avoid any legal trouble down the road.

2. Finding Bargains: Where to Score Great Deals on Materials

Now comes the fun part: hunting down the best deals on materials! Here are some tips:

Check Your Local Habitat for Humanity ReStore: These stores are overflowing with salvaged and donated building materials â€" often at a fraction of the cost of new stuff. You might be surprised at the quality of materials you can find there.
Scour Craigslist and Facebook Marketplace: These sites are great for finding people selling used building materials, often at bargain prices. Just make sure you carefully inspect everything before you buy it.
Think about Salvage Yards: Don't overlook the possibility of finding good quality lumber at a salvage yard. They might even offer delivery!
Check Out Online Retailers: While you might not find the lowest prices on materials at big box stores, they can offer convenient delivery and price matching on competitor prices.

3. Building Your Shed: Cost-Saving Tips and Techniques

Alright, you've got your plans and materials â€" now it's time to start building! Here's how to save money during construction:

DIY is Your Friend: The more you can do yourself, the less you'll have to pay for labor. Many people are surprised at how much they can accomplish with a little research and practice.
Borrow Tools: You don't need to buy every tool under the sun for this project. See if you can borrow tools from friends, family, or your local library.
Go for Simpler Designs: Opt for a simple shed design with fewer frills. You can always add more features later, like a window or a porch, as your budget allows.
Consider a Metal Roof: Metal roofs can be more expensive upfront, but they last longer and are less prone to leaks than asphalt shingles. This can save you money in the long run.
Use Recycled Materials: Think outside the box! You can use repurposed materials like old windows, doors, or even pallet wood to add character to your shed and save money.

4. Building the Foundation: Choosing the Right Option for Your Budget

The foundation is the base of your shed, so it's important to choose the right type for your needs and budget. Here are a few options to consider:

Concrete Slab: This is the most durable and long-lasting option, but it can also be the most expensive.
Concrete Block Foundation: Slightly less expensive than a concrete slab, this foundation is still very sturdy.
Pier Foundation: This is a cost-effective option, especially if you are building on uneven ground.
Timber Frame Foundation: This is a quick and easy option for those with basic carpentry skills. It’s often the most budget-friendly, but might not be as long-lasting as concrete.

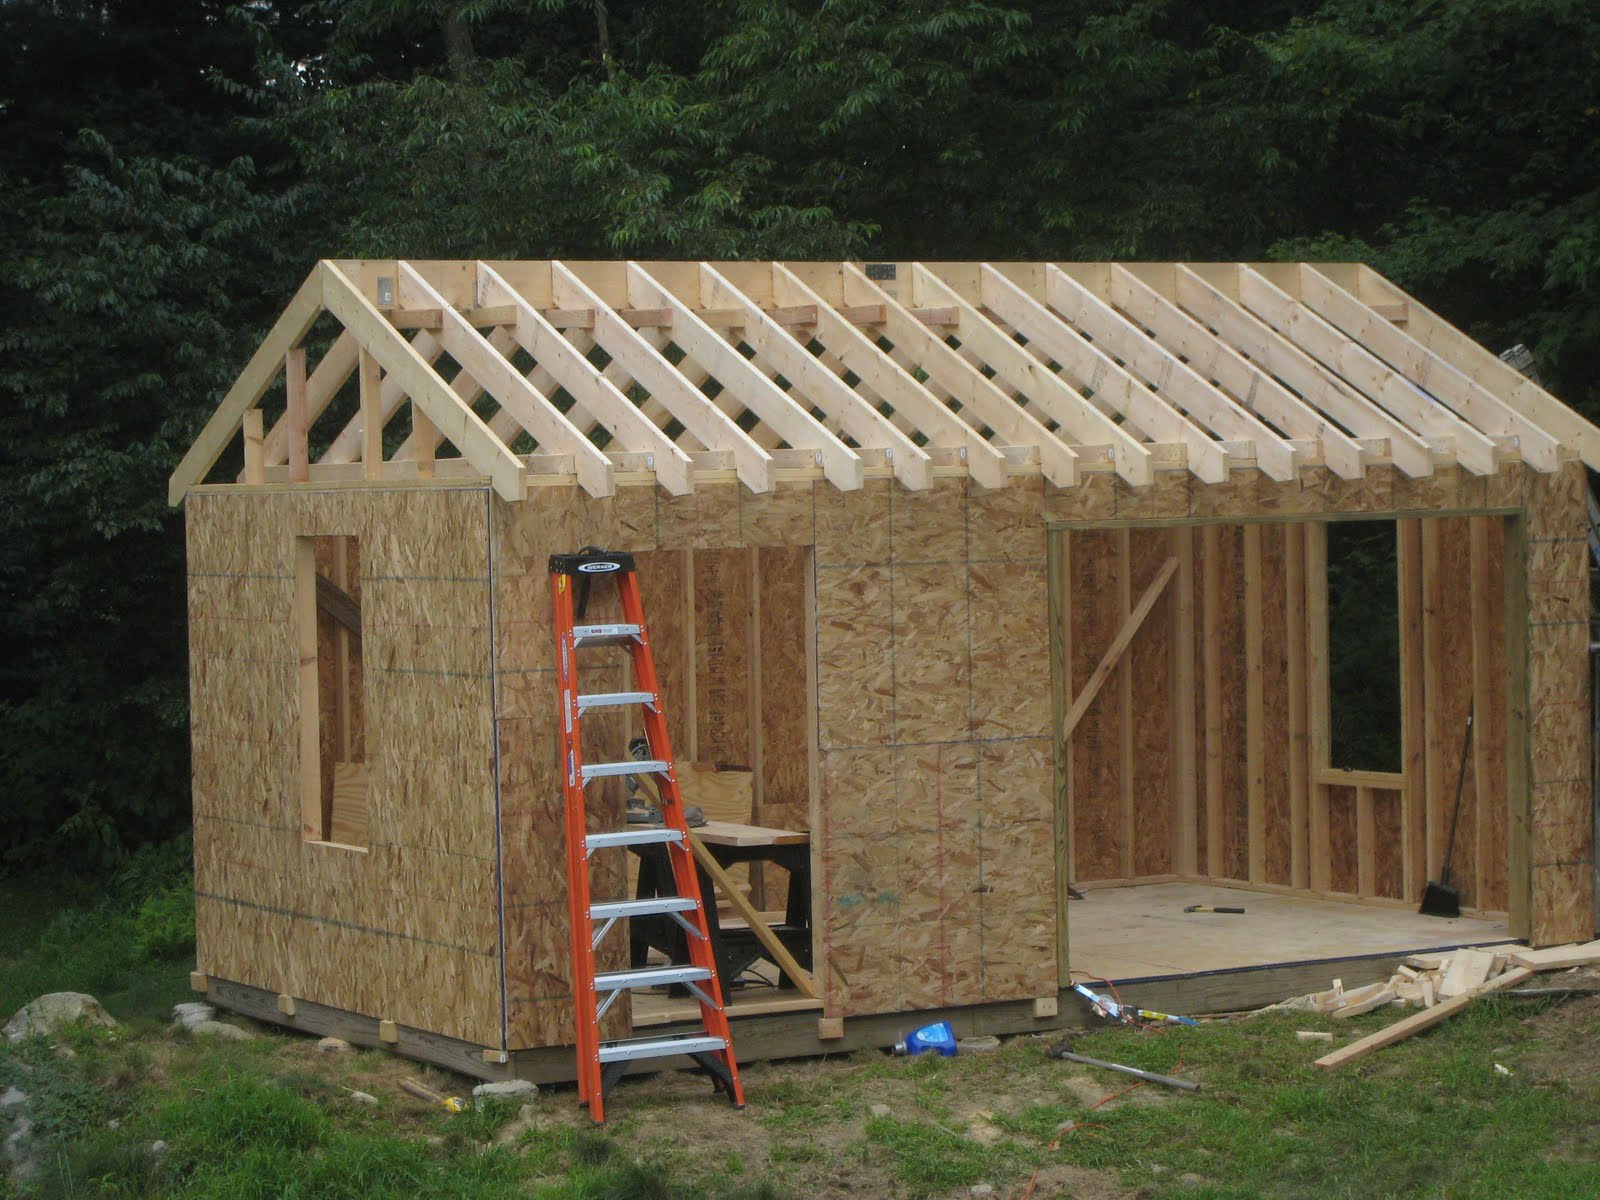
5. Framing the Shed: Putting Up Walls with Confidence

The framing is the skeleton of your shed, so it's important to do it right. Here are some tips to keep in mind:

Use Pressure-Treated Lumber for the Bottom Plates: This will help prevent rot and decay.
Use Studs That Are the Correct Size: Follow the specifications of your plans to ensure the walls are strong and stable.
Check Your Walls for Plumb: Make sure all the walls are straight and level using a level or plumb bob.
Use Bracing: This will help to strengthen the walls and prevent them from bowing or buckling.

6. Roofing and Siding: Finishing Touches for a Budget-Friendly Shed

With the framing complete, it's time to add the roof and siding. Here's how to save money:

Choose a Metal Roof: As mentioned before, metal roofs are more expensive upfront but can save you money in the long run.
Use Simple Siding: You can use plywood or OSB for siding, and paint it to match your shed's aesthetic.
Consider Using Recycled Materials: Think creatively about how you can use salvaged materials for siding, like corrugated metal or reclaimed barnwood.
Install the Roof and Siding Yourself: This is a great way to save on labor costs. Just make sure you follow the instructions in your plans carefully.

7. Finishing Touches: Adding Personality and Functionality

Finally, you're ready to add the finishing touches! This is where you can really personalize your shed:

Install a Door and Windows: Make sure you choose the right size and style for your needs and budget.
Paint or Stain the Exterior: This will protect your shed from the elements and give it a more polished look.
Add Shelving and Storage: Build some simple shelves or install pre-made units to make the most of your space.
Add a Workbench or Lighting: These are great additions if you plan to use your shed as a workshop.

Conclusion: Building a Shed for Less is Achievable!

Building a 10x12 shed on a budget is definitely possible with a bit of planning and some creativity. By following these tips, you can save money on materials, labor, and design. Remember, the journey is part of the fun â€" enjoy the process and take pride in your accomplishment! You'll have a beautiful, functional shed that you can enjoy for years to come, and it'll be something you built with your own two hands! Let me know if you have any more questions. Happy building!

Read More..

8x12 shed plans that will save you money without compromising quality

8x12 shed plans that will save you money without compromising quality


Hey there, shed-building enthusiast! You've probably already done your research and realized that building a shed can be a great way to add extra storage space and value to your property. But you're also on a budget, right? Don't worry, building an 8x12 shed doesn't have to break the bank.

This article is all about making that dream a reality without sacrificing quality. We're going to dive into some smart choices, creative solutions, and a sprinkle of DIY magic to help you build a sturdy, beautiful shed without emptying your wallet.

First Things First: The Foundation

The foundation is the bedrock of your shed, literally! A solid foundation is essential to keep your shed level and stable for years to come. There are a few options to consider, each with its own advantages:

Concrete Slab: The most durable option, concrete slabs are incredibly strong and resistant to weather. They're also relatively easy to build, especially for a small shed like an 8x12. However, concrete can be pricey, so if you're on a tight budget, explore other options.
Pressure-Treated Skirts: These wooden planks are specifically treated to withstand rot and insect damage, making them ideal for contact with the ground. They're cheaper than concrete, but they might require more maintenance down the line.
Concrete Blocks: An affordable and straightforward option, concrete blocks are readily available and easy to work with. You can use them to create a raised foundation that provides good drainage and protects your shed from moisture.

The Framing: The Bones of Your Shed

Now, let's talk about the framing. This is where you'll choose the wood that makes up the walls, roof, and floor of your shed.

Consider Using Reclaimed Lumber: Look around! Local construction sites, salvage yards, and even online marketplaces can be treasure troves of reclaimed lumber. This can be a massive cost-saver, and you'll be contributing to a more sustainable project. Just make sure the wood is structurally sound and free from rot or insect damage.
Opt for Pressure-Treated Lumber for the Floor: You want your floor to withstand moisture and potential rot. Investing in pressure-treated lumber for your floor joists and subfloor is a smart move.
Go for Affordable Framing Lumber for the Walls and Roof: Look for standard framing lumber like 2x4s and 2x6s for the walls and roof. Don't be tempted to skimp on thickness, as this can affect the strength of your shed.
Consider a Simpler Roof Design: A basic gable roof is strong, affordable, and easy to build. Skip the fancy angles or complicated designs to save time and money.

Siding and Roofing: The Finishing Touches

Now comes the fun part: choosing the exterior look of your shed.

Explore Affordable Siding Options: Instead of fancy cedar shakes or expensive vinyl, consider using plywood sheathing as siding. It's affordable, readily available, and can be painted to match your style. You can even use corrugated metal for a modern industrial look!
Choose a Durable and Affordable Roof: Asphalt shingles are a classic choice for sheds. They're durable, affordable, and come in a variety of colors. You can also consider metal roofing for a more modern and low-maintenance option.

Don't Forget the Extras!

Windows and Doors: Shop around for affordable windows and doors. Consider using salvaged windows for a unique and eco-friendly touch. For doors, opt for a simple single door rather than a double door.
Insulation: If you're planning to use your shed year-round, consider adding insulation to your walls and roof. This will keep your shed comfortable and help reduce energy costs.
Lighting and Electrical: While it's tempting to go all out with fancy electrical wiring, you can save money by using simple LED lights and extension cords. If you need to use power tools regularly, then you might want to install a basic electrical outlet.

Building Your Shed: DIY or Hire Help?

The decision of whether to DIY or hire help is a personal one. If you're comfortable with carpentry and have the time and resources, building your own shed can be a rewarding experience. However, if you're not confident in your skills or don't have the time, hiring a contractor might be the better option.

Here's a Budget-Conscious Approach:

Start with a Detailed Plan: A well-thought-out plan will help you visualize the entire process and avoid costly mistakes. There are countless free shed plans available online, or you can even design your own!
Shop Smart: Compare prices from different suppliers, take advantage of sales, and don't be afraid to negotiate.
Utilize Your Skills: If you're handy with tools, you can save money by doing as much of the work yourself as possible.
Don't Rush: Take your time and avoid rushing into decisions. It's better to spend a little extra time planning and researching than to make costly mistakes.

Remember, building a shed is a journey, not a race!

Building your own 8x12 shed can be a fulfilling and rewarding experience. With a little planning, smart choices, and a dash of DIY enthusiasm, you can build a sturdy, beautiful shed without breaking the bank.

Good luck! And happy building!

Read More..

Building a 12x20 storage shed for extra gear

Building a 12x20 storage shed for extra gear


Alright, so you've got stuff. A lot of stuff. You're tired of tripping over boxes in the garage and the attic is overflowing. Sound familiar? Yeah, me too. That's why I decided to build a shed. A big, beautiful, 12x20 storage shed to be exact.

Now, I'm no professional builder, just a weekend warrior with a drill and a dream. But, I figured if I could do it, anyone could! So, I'm sharing my experience, the good, the bad, and the unexpected, because let's be honest, building a shed isn't always a smooth ride.

First Things First: The Planning Stage

You can't just jump right into building without a plan, right? That's where the magic of the internet comes in. I spent hours browsing online shed plans, comparing prices, and trying to figure out what would work best for me.

Remember, 12x20 is a pretty good-sized shed, so make sure you have enough space in your yard. Also, check your local building codes! You don't want to be halfway through construction and find out you need permits or special approvals.

The Foundation: Where it All Begins

I chose a concrete foundation for my shed. It's sturdy, durable, and gives you a level surface to work with. Of course, you could go for a gravel foundation or even wooden piers, depending on your budget and the soil in your area.

Building a concrete foundation is a bit of a process. You need to dig trenches, pour gravel, then pour concrete into forms. It's a lot of work, but totally worth it in the end. I enlisted the help of a friend who's a bit more of a pro than me, which definitely made the process go smoother.

The Framing: Building the Skeleton

Once the foundation was set, it was time to start framing the walls and roof. This is where those pre-cut lumber kits come in handy! They saved me a lot of time and frustration.

Of course, I still had to cut and assemble the pieces, but it was much easier than trying to figure out all the angles and measurements myself. Remember to double-check everything! You don't want to discover a mistake halfway through.

The Roof: Sheltering Your Stuff

The roof is the crowning glory of any shed. I went with a standard gable roof, which is a classic and easy-to-build design. You can choose from shingles, metal roofing, or even a green roof depending on your preference and budget.

I opted for asphalt shingles because they're affordable and relatively easy to install. It took some time, but it was rewarding to see the roof come together. Plus, I had plenty of help from my wife, who, despite having zero experience, was a surprisingly efficient roofer!

The Siding: Putting on the Finishing Touches

After the roof was on, I moved on to the siding. I went with vinyl siding because it's low-maintenance and comes in a variety of colors. I chose a light grey that complements my house.

Remember, you can get creative with the siding. You can use wood, metal, or even composite materials. Just make sure you choose something that suits your style and your budget.

The Doors and Windows: Letting the Light In

I installed a double door in the front of the shed for easy access. It's really important to make sure your doors are sturdy and secure! I also added a small window on the side for some natural light.

You can choose from a variety of doors and windows depending on your needs and style. There are even automatic door openers for sheds now!

The Finishing Touches: Making it Your Own

Once the walls, roof, doors, and windows were installed, it was time for the finishing touches. I added a porch light, a weatherproof outlet, and a small shelf inside for tools.

You can also add things like insulation, a floor, and even a paint job to personalize your shed. The possibilities are endless!

The Challenges and Triumphs

Let's be real, building a shed isn't all sunshine and rainbows. There were definitely some challenges along the way. I made a few mistakes, got frustrated, and even had a couple of days where I just wanted to give up.

But, I learned a lot! I learned how to read plans, use power tools, and most importantly, I learned how to overcome obstacles. And, the sense of accomplishment when I finally finished was indescribable.

Beyond the Basics: Additional Considerations

Electricity: If you plan on using your shed for more than just storage, you'll need to add electricity. This means running wires from your house to the shed. Make sure to get permits and follow all safety regulations.
Ventilation: To prevent moisture buildup, make sure your shed has adequate ventilation. You can install vents in the roof or walls, or even use a small fan.
Insulation: If you want to use your shed year-round, consider adding insulation to the walls and roof. This will help keep the temperature inside comfortable.
Security: Keep your belongings safe with a strong lock on the door. You can also consider adding a security system or even a motion-activated light.

The Verdict: Worth Every Drop of Sweat

Building a shed is a lot of work, but it's also incredibly rewarding. You'll learn new skills, have a sense of accomplishment, and, most importantly, you'll gain valuable storage space.

So, if you're thinking about building a shed, I say go for it! Just remember to do your research, plan carefully, and don't be afraid to ask for help when you need it. You might even find yourself enjoying the process as much as the finished product.

Read More..

Simple and affordable diy plans for your 8x10 shed build

Simple and affordable diy plans for your 8x10 shed build


Hey there, fellow DIYer! Building your own shed might seem daunting, but trust me, it's totally doable and way more rewarding than just buying one. You'll save a ton of cash, learn some valuable skills, and have a sense of accomplishment that'll make you beam with pride.

So, you're ready to tackle an 8x10 shed project? Awesome! Let's break it down into manageable steps, keeping things simple and affordable.

1. Planning is Key (and Fun!)

First things first, let's get organized. Before we start swinging hammers, we need a solid plan. This is like the blueprint of your shed, the foundation for success. Here's what to consider:

Location, Location, Location: Where will your shed live? Think about access, sunlight, and whether it needs to be near an outlet or water source.
Foundation Choice: This depends on your budget and soil type. A simple gravel pad is budget-friendly, while concrete offers more durability.
Shed Style: Do you want a traditional gable roof or something a bit more contemporary with a shed roof? Consider what suits your taste and the surrounding landscape.
Doors and Windows: How many do you need? What size? Remember, more light and air flow means a happier shed!
Building Materials: Wood is classic, but pressure-treated lumber for the foundation and floor is a must for longevity. Think about using recycled materials to save money and be eco-friendly.

2. Gathering Your Tools and Materials

Now for the fun part - shopping! You'll need a few basic tools and materials. Here's a list to get you started:

Tools:

Measuring Tape: Accuracy is key! Get a long one for those big measurements.
Level: Make sure your shed sits straight and true.
Circular Saw: For cutting lumber to size.
Hammer: You'll be doing a lot of nailing!
Drill: For fastening screws and making pilot holes.
Safety Glasses: Always protect your eyes!
Work Gloves: Keep your hands safe from splinters.
Tape Measure: For precise measurements.
Saw Horses: To support your lumber during cutting.
Utility Knife: For cutting shingles and other materials.
Screwdriver: For fastening screws.
Pencil: For marking cuts.

Materials:

Lumber: Pressure-treated for the foundation, floor, and any exterior walls that will be in contact with the ground. Regular lumber for walls, roof, and interior.
Sheathing: Plywood or OSB for covering the walls and roof.
Shingles: Asphalt shingles are affordable and easy to install.
Roofing Felt: Goes under the shingles for extra waterproofing.
Doors and Windows: Choose the right size and style for your shed.
Hardware: Nails, screws, hinges, door handles, etc.
Paint or Stain: To protect your shed and give it a personal touch.

3. Building the Foundation: Your Shed's Bedrock

The foundation is the backbone of your shed, so get it right!

Level the Ground: Use a level to ensure your base is perfectly level, especially if you're using a gravel pad.
Prepare the Gravel Pad: Lay down a layer of gravel, compact it well, and make sure it's flush with the surrounding ground.
Concrete Foundation: If going with concrete, hire a professional for pouring, or use precast concrete blocks for a DIY option.

4. Framing: Building the Skeleton

Now it's time to build the framework of your shed.

Cut and Assemble the Walls: Use pressure-treated lumber for the bottom plate, then construct the wall frames using regular lumber.
Erect the Walls: Carefully lift and place the walls onto the foundation, ensuring they are plumb and level.
Install the Roof Trusses: Use a level to ensure the roof is pitched correctly, then secure the trusses to the walls.
Add Sheathing: Cover the walls and roof with plywood or OSB for a solid surface.

5. Roofing: Keeping the Elements Out

The roof is crucial for keeping your shed dry and safe.

Install Roofing Felt: Cover the roof with a layer of roofing felt to create a water-resistant barrier.
Shingle Installation: Start at the bottom and work your way up, ensuring each shingle overlaps correctly.
Flashing: Install flashing around the chimney, vents, and edges of the roof to prevent leaks.

6. Adding Doors and Windows: Access and Light

Now it's time to make your shed functional and inviting!

Install the Doors: Hang the doors on the hinges, make sure they open and close smoothly, and add a handle and latch.
Install the Windows: Follow the manufacturer's instructions for installation, and make sure they are properly sealed.

7. Finishing Touches: Your Shed's Personality

Now for the finishing touches that will make your shed truly shine!

Paint or Stain: Give your shed a fresh coat of paint or stain to protect the wood and add your personal style.
Interior Finishing: Add shelves, hooks, or a workbench to personalize your shed's interior.
Optional Features: Think about adding lighting, ventilation, or even insulation for a more comfortable space.

8. The Big Reveal: Your Shed is Complete!

Congratulations! You've successfully built your own 8x10 shed! Take a step back and admire your creation.

A Few Tips for Success:

Don't Be Afraid to Ask for Help: If you need assistance, don't hesitate to call upon a friend or neighbor.
Take Your Time: Quality over speed! Be patient and take your time to do things right.
Celebrate Your Achievements: Enjoy the process and celebrate your accomplishment!

Building your own shed is a rewarding experience that will leave you with a sense of pride and a new space to enjoy! Remember, this is just a basic guide, so do your research and adapt it to your specific needs and preferences. Have fun with it, and let your creativity shine!

Read More..

Building a shed: step-by-step from storage shed plans

Building a shed: step-by-step from storage shed plans


Okay, so you've finally decided to build a shed. You're tired of the clutter, the overflowing garage, or maybe you just want a cozy little space to escape the chaos. Whatever your reason, building a shed is a fun and rewarding project. It's also a great way to learn some new skills and maybe even impress your neighbors (especially if you're the one they come to for advice when their lawnmower breaks!).

But before we jump into the fun stuff (like hammering and sawing!), let's talk about your shed plans. Having a good set of plans is crucial. They'll guide you through every step of the process, from choosing the right materials to figuring out how to build those tricky roof rafters. Don't worry if you're not a seasoned builder, there are tons of pre-designed shed plans available online and at home improvement stores. Some even come with handy videos to help you visualize the process.

Now, let's get started on our shed-building adventure!

Step 1: Site Preparation

First things first, you need to find the perfect spot for your shed. Consider things like sunlight, drainage, and proximity to your house. You'll also want to make sure you have enough space to work comfortably.

Once you've chosen your location, you'll need to level the ground. This is super important because a level base will prevent your shed from sinking or tilting over time. You can use a level, a string line, and some sand or gravel to get the base perfectly level.

Step 2: Framing the Floor

Time to get your hands dirty! This is where the plans really come in handy. They'll tell you exactly how to lay out the floor joists, the beams that support the floor of your shed. Use a circular saw to cut the joists to the right length and then use screws or nails to attach them to the foundation.

Step 3: Building the Walls

With the floor in place, it's time to start building the walls. Again, your plans will be your best friend here, showing you how to assemble the wall panels. You'll be working with studs, which are the vertical supports that hold up the walls. Use a framing square and level to make sure everything is square and plumb (straight up and down).

Step 4: Adding the Roof

Now for some roof-raising action! The roof is often the most challenging part of shed construction, so pay close attention to your plans. They'll tell you how to create the roof trusses (those triangles that form the basic structure of your roof). Use a nail gun to attach the trusses to the walls and then install the roof sheathing, which acts as a base for the roof shingles.

Step 5: Siding and Shingles

Time to add some personality to your shed! Choose your siding material, whether it's wood, vinyl, or metal. Attach the siding to the walls, starting at the bottom and working your way up. Then, install your shingles to protect the roof from the elements.

Step 6: Doors and Windows

Now it's time to create the entrances and windows of your shed. Again, your plans will guide you on how to install the doors and windows, including measuring, framing, and securing them.

Step 7: Finishing Touches

The fun part is almost here! You've built the structure, now it's time to personalize your shed. This could include painting the exterior, adding trim, or even installing a porch. You can also think about adding features like electrical outlets, a workbench, or shelving.

Step 8: The Grand Opening!

Congratulations! You've successfully built your own shed. Take a moment to admire your handiwork and celebrate your accomplishment. Now you can finally enjoy the fruits of your laborâ€"whether it's organizing your tools, relaxing with a cup of coffee, or just having a little extra space to call your own.

Tips for Success:

Take your time and don't rush the process. This is a project that requires attention to detail.
Read the plans carefully and ask for help when you need it. Don't be afraid to reach out to your local hardware store or a friend who's experienced in building.
Use quality materials and tools. This will make the building process easier and ensure your shed lasts for years to come.
Take breaks when you need them. Building a shed is hard work, so don't be afraid to step away and recharge when you need a break.

Beyond the Basics:

Once you've got the basic shed structure down, you can start thinking about customizing it for your needs. Here are a few ideas:

Insulation: Make your shed cozy and comfortable by adding insulation to the walls and ceiling.
Electricity: Add electrical outlets and lighting for better functionality.
Floor covering: Give your shed a polished look with a floor covering, such as linoleum or vinyl tiles.
Painting: Choose a color that complements your home or reflects your personal style.
Storage solutions: Maximize your storage space with shelving, pegboards, and hanging systems.

Remember, building a shed is a journey, not a destination. Enjoy the process, learn from your mistakes, and take pride in your accomplishment. And when your shed is finally finished, invite your friends and neighbors over for a grand opening party! You've earned it.

Read More..

Choosing the perfect storage shed plans for your home

Choosing the perfect storage shed plans for your home


Okay, let's talk sheds! We all need a little extra space, right? Whether you're a DIY enthusiast with a workshop dream or a gardener with a surplus of tools, a storage shed is a lifesaver. But with so many options out there, choosing the right shed plans can feel overwhelming. Don't worry, I'm here to break it down, shed-by-shed (pun intended!).

Step 1: Get Real About Your Needs

First things first, what exactly are you storing? Are we talking tools, lawn equipment, bicycles, or maybe a small car? Are you planning to use it as a workshop? Knowing what you'll be using the shed for will determine the size, features, and even the style you need.

Size Matters:

Small (6x8 ft): Perfect for basic storage of tools, gardening supplies, or a small collection.
Medium (8x10 ft or 10x12 ft): Offers more space for bikes, lawnmowers, or a small workshop.
Large (12x16 ft or larger): Ideal for storing larger items like ATVs, motorcycles, or even a small car.

Features:

Windows: Do you want natural light for a workshop or hobby space? Or are you going for a more secure, dark storage option?
Doors: A single door might suffice for smaller sheds, but a double door is essential for larger items or frequent access. Consider the height of the door for taller items.
Flooring: Concrete is sturdy and long-lasting, but wood is more affordable. Think about the types of items you're storing and the weight they'll put on the floor.
Roof: A gable roof allows for good ventilation and snow shedding. A shed roof is simpler and less expensive.
Ventilation: Proper ventilation is crucial to prevent moisture buildup, especially if you're storing wood or sensitive items.

Step 2: Location, Location, Location!

Where will your shed live? This will impact the size and style you choose.

Space: How much room do you have in your yard? Consider clearances for walkways and future landscaping.
Access: Can you easily reach the shed with your car or truck? Think about the placement in relation to your driveway or garage.
Sunlight: Do you want your shed in direct sunlight, partial shade, or full shade? This can affect your choice of materials and the need for ventilation.
Setback requirements: Check with your local building codes for any setback requirements or permitting procedures.

Step 3: Choose a Style That Fits Your Home

Now for the fun part â€" picking the perfect shed style!

Traditional: A classic gable roof with a simple design that blends well with most homes.
Modern: Think clean lines, flat roofs, and a more contemporary feel.
Rustic: Use natural wood and a weathered look for a charming, farmhouse aesthetic.
Dutch: The distinctive flared roof adds character and allows for additional headroom.
Barn Style: Perfect for those who want a large, open space with plenty of natural light.

Step 4: DIY vs. Pre-built

Now, the big question: build it yourself or buy a pre-built shed?

DIY: The freedom to customize is a huge plus. You can choose the materials and the specific features that you want. You'll also save money, but consider the time and skill required.
Pre-built: Saves time and effort. You can get it delivered and installed quickly, often with a warranty. However, you may have less customization options.

Step 5: Research and Compare

Once you have a good idea of your needs and preferences, start researching shed plans and pre-built options.

Online resources: Many websites offer free or paid shed plans. Some even offer 3D models to help visualize your choices.
Home improvement stores: Stores like Home Depot and Lowe's offer pre-built sheds and plans.
Local shed builders: Check with local contractors who specialize in shed construction.

Step 6: Material Matters

The materials you choose will affect both the look and the longevity of your shed.

Wood: A classic choice that's affordable and easy to work with. Consider pressure-treated wood for durability.
Metal: Low maintenance and durable, but can be expensive and prone to rust.
Vinyl: Long-lasting, low-maintenance, and available in various colors. However, it can be more expensive than wood.

Step 7: Don't Forget the Details

Foundation: A solid foundation is essential for a long-lasting shed. Consider concrete, wood, or a combination of both.
Roofing: Shingles, metal, or even a simple membrane can be used for roofing. Choose an option that's durable and complements the overall design.
Doors and Windows: Choose the right size and style to fit your needs. Consider adding locks for security.
Electrical: If you need electricity in your shed, plan for wiring and outlets.
Insulation: If you're planning to use the shed year-round or as a workshop, consider insulation to keep the temperature comfortable.

Step 8: Let's Get Building (or Buying!)

Once you've chosen your plans and materials, it's time to start building (or have it built)! If you're DIY-ing, take your time and follow the instructions carefully. If you're buying a pre-built shed, make sure to choose a reputable company and get everything in writing.

Finally, a little reminder: Building a shed is an investment! Take the time to plan carefully, choose the right materials, and ensure your shed is built to last. Now, go forth and create your own little slice of organized heaven!

Read More..

How to design a custom 12x16 garden shed for your yard

How to design a custom 12x16 garden shed for your yard

Alright, so you're thinking about building a garden shed, huh? A 12x16, you say? That's a great size! It's big enough to be useful but not so big that it'll dominate your yard.

Let's dive into this project, shall we? Designing a custom shed is like building a mini-house for your tools and gardening goodies. It's all about making sure it fits your needs perfectly, like a comfy pair of gardening gloves!

First things first, the basics:

What will you use it for? Think about what you'll be storing in your shed. Tools, lawnmowers, bikes, gardening supplies, maybe even a small workbench? Knowing this will help you decide on the layout.
Where will it go? Consider the location in your yard. Is it near a water source? Is it close to your house for easy access? Remember to check for any utility lines or trees that might be in the way.
Budget: How much are you willing to spend? It's a good idea to set a budget at the beginning to guide your choices. Don't forget to factor in the cost of materials, tools, permits, and labor (if you're not doing it yourself).
Style: Do you want a classic shed with a gable roof, a modern shed with a flat roof, or something completely unique? Think about the style of your house and the overall look of your yard.

Now let's get into the details:

1. The Foundation:

Concrete Slab: A solid and durable option, perfect for heavy loads. Just make sure the ground is properly prepared and leveled.
Concrete Blocks: Affordable and easy to install. You can even get decorative blocks to match your shed.
Wooden Skids: A simple and budget-friendly option. Just make sure they're treated lumber to withstand moisture.

2. The Walls:

Wood Framing: The most common and versatile option. You can use pre-cut framing lumber or cut it yourself.
Metal Siding: Durable and low-maintenance. It comes in a variety of colors and styles.
Composite Siding: Offers the look of wood with the durability of metal. It's also resistant to pests and moisture.

3. The Roof:

Gable Roof: The classic shed roof. It offers good drainage and ventilation.
Hip Roof: More complex but aesthetically pleasing. It's also more wind-resistant.
Flat Roof: A modern option that can be used for a rooftop garden. It requires proper waterproofing and drainage.

4. The Doors:

Single Door: The standard option. Choose a size that's wide enough to fit your largest items.
Double Doors: Great for easy access and moving large items.
Sliding Doors: Space-saving and convenient. They're especially useful if your shed is located in a tight space.

5. The Windows:

Small Windows: Provide natural light and ventilation. They're usually placed high on the walls to prevent drafts.
Large Windows: Great for showcasing the interior and making the shed feel brighter.
Skylights: Add extra light and ventilation to the roof.

6. The Interior:

Shelving: Essential for organizing and storing tools and supplies.
Workbenches: Provide a dedicated space for working on projects.
Electrical Outlets: Add convenience and functionality.
Lighting: Make sure your shed is well-lit for evening use.

7. Don't Forget the Extras!

Paint or Stain: Protect your shed from the elements and give it a personalized look.
Weatherstripping: Prevent drafts and keep your shed cozy.
Vents: Ensure proper ventilation to prevent moisture build-up.
Gutter System: Collect rainwater and prevent water damage.

Now that you have a basic understanding of the different elements of your shed, it's time to get creative!

Draw a Floor Plan: Start by sketching out the layout of your shed. Consider the placement of doors, windows, shelving, and any other features you want to include.
Visualize It: Use online shed design tools or a simple drawing app to get a visual representation of your design.
Make Adjustments: Don't be afraid to tweak your design as you go along. The goal is to create a shed that perfectly meets your needs.

And finally, remember these key tips:

Consider the local building codes: Make sure your shed design complies with all local regulations.
Think about safety: Use sturdy materials and secure connections.
Plan for maintenance: Choose materials that are easy to clean and maintain.
Have fun with it! Your shed is a blank canvas for your creativity.

Building a custom shed is a rewarding project that adds value to your property and provides a practical storage space for all your gardening essentials. With some planning and a little creativity, you can create a shed that perfectly complements your style and needs. Happy building!

Read More..
Powered by Blogger.