Step-by-step backyard loft shed plans

Building Your Dream Backyard Loft Shed: A Step-by-Step Guide

So, you're dreaming of a backyard loft shed? Fantastic! Whether you envision a cozy writer's retreat, a super-organized workshop, or just extra storage space, building your own loft shed is a rewarding project. It might seem daunting, but with a little planning and these step-by-step instructions, you'll be sipping coffee on your new loft's balcony in no time (okay, maybe a little longer, but you get the idea!). This guide aims to be your friendly companion throughout the entire process, from initial planning to the final touches.

Phase 1: Planning and Preparation â€" The Foundation of Success

Before you even think about grabbing a hammer, thorough planning is key. This phase is all about making sure you're building the right shed, in the right place, and with the right materials. Trust me, skipping this step will only lead to headaches later on.

1.1 Choosing Your Shed’s Location and Dimensions

First things first: where will your magnificent creation reside? Consider factors like sunlight, access to utilities (if needed), proximity to your house, and local building codes. You'll need enough space for the shed itself, plus room to work around it during construction. Then, decide on the dimensions. Think about how much space you actually need. Bigger isn't always better â€" a smaller, well-designed shed is easier to build and maintain.

1.2 Obtaining Necessary Permits and Approvals

This is crucial! Check with your local council or homeowner's association about building permits and regulations. Ignoring this step can result in hefty fines or even having to demolish your hard work. It's always better to be safe than sorry! This usually involves submitting plans outlining the dimensions, materials, and location of your shed.

1.3 Gathering Your Materials and Tools

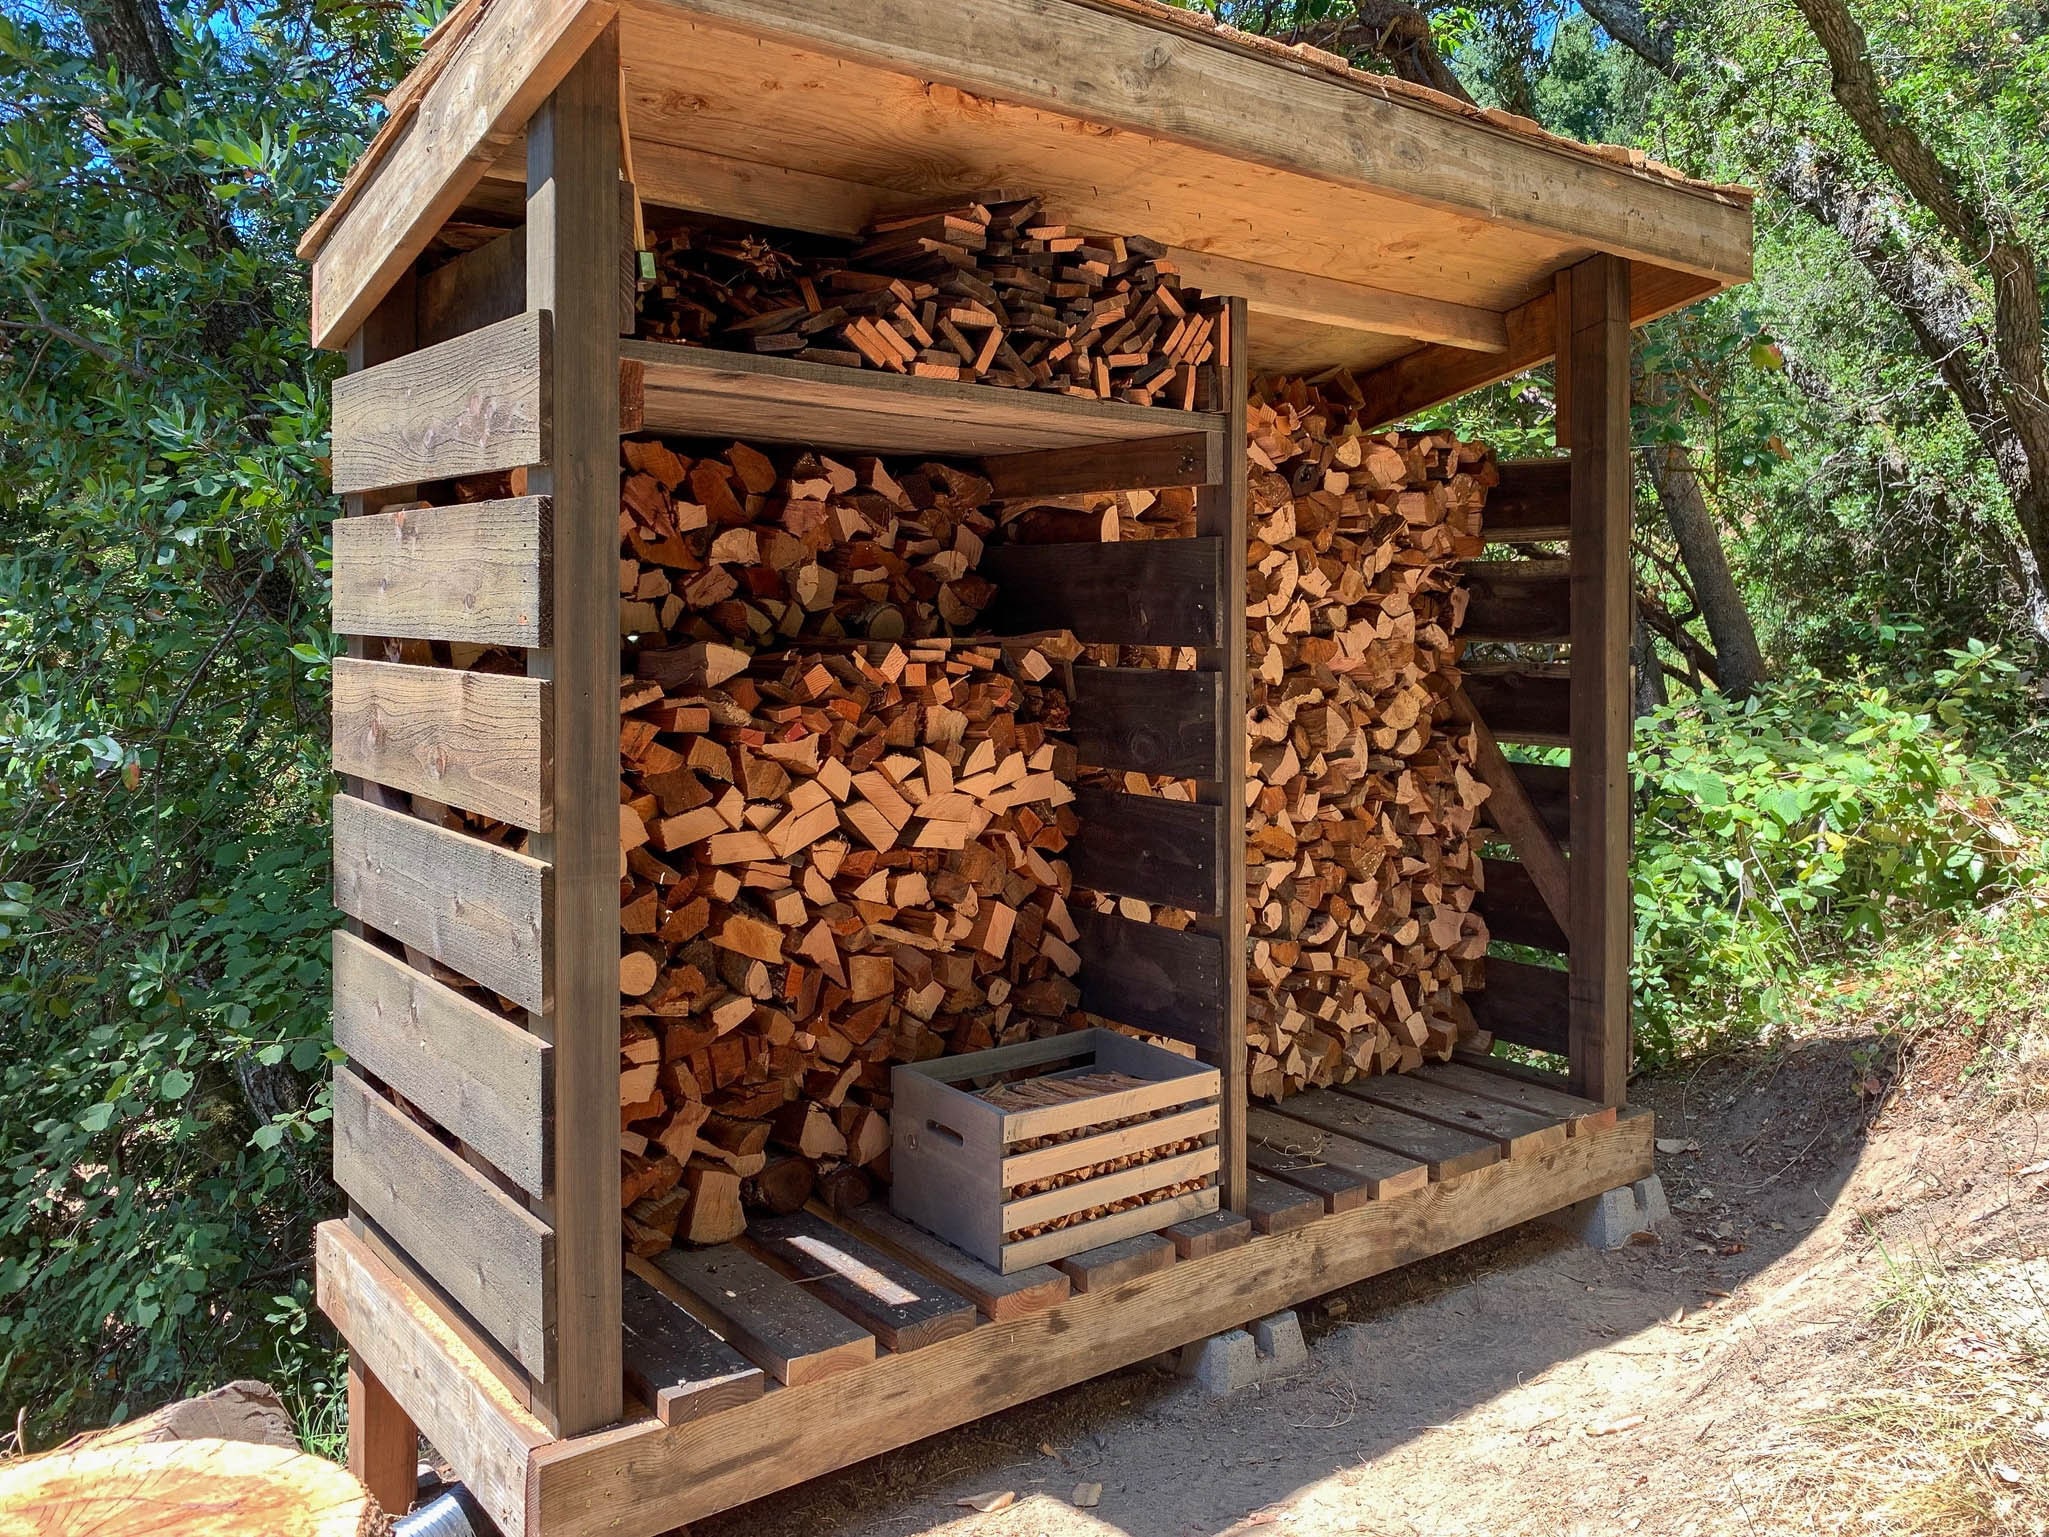
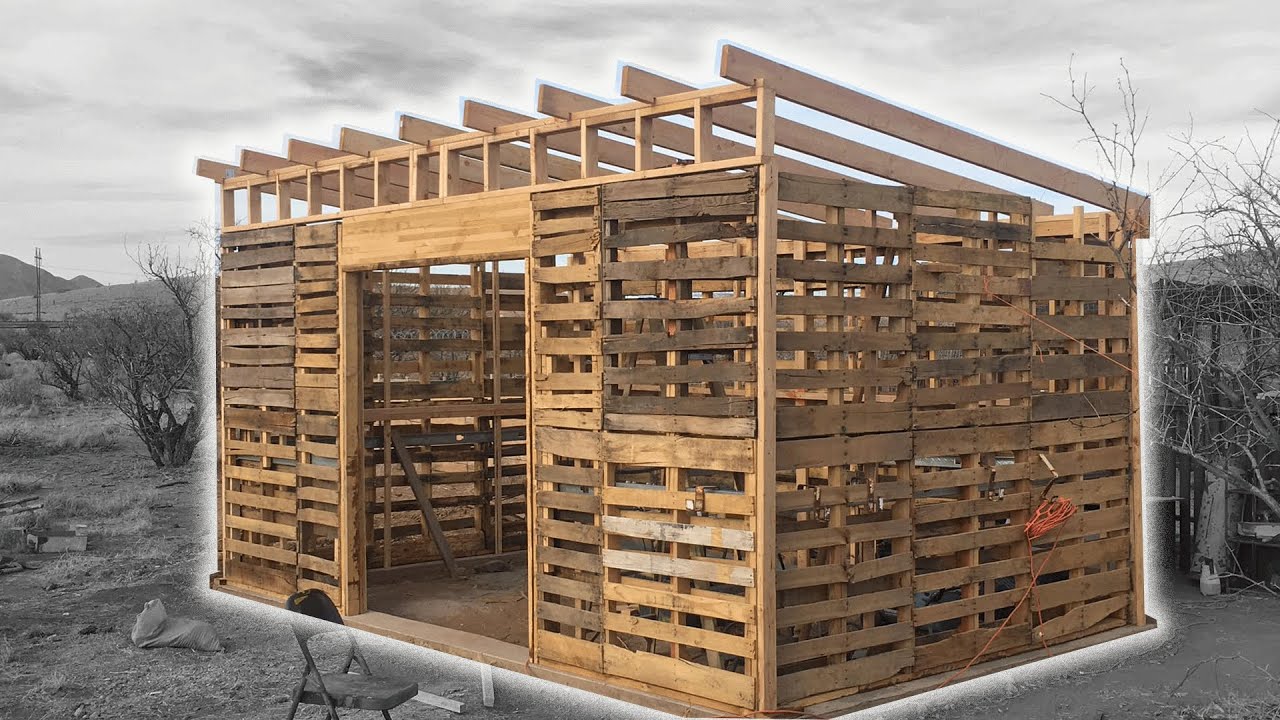
This is where the fun (and possibly slightly overwhelming) part begins! Create a detailed materials list. You'll need lumber (pressure-treated for the base, regular for the framing), roofing materials (shingles, metal, or something else entirely â€" get creative!), fasteners (nails, screws), insulation (if you want a cozy interior), and anything specific to your loft design (loft flooring, railing materials, etc.). For tools, you'll likely need a circular saw, a drill, a level, measuring tape, a hammer, and safety gear (safety glasses, gloves, etc.).

Phase 2: Construction â€" Building the Base and Frame

Now comes the satisfying part â€" putting your plans into action! This stage focuses on constructing the sturdy foundation for your shed.

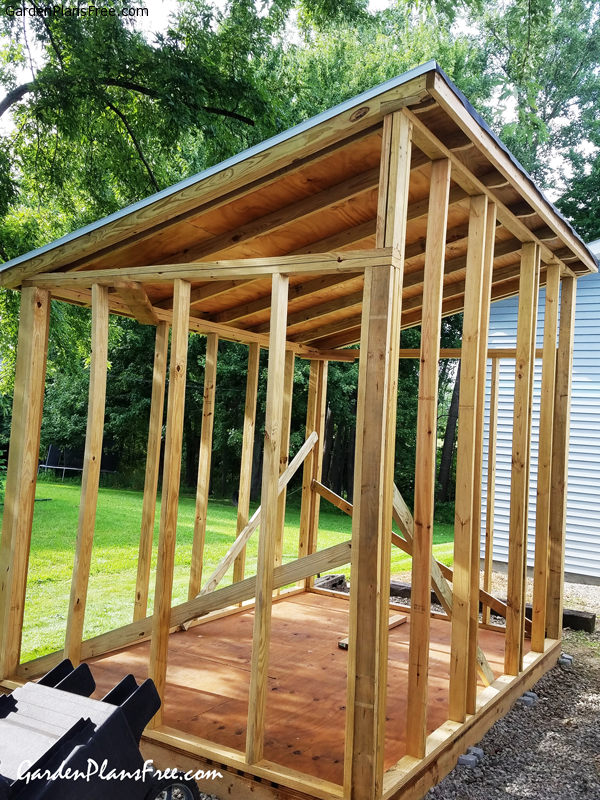
2.1 Creating a Level Foundation

A level foundation is paramount. Use concrete blocks, pressure-treated lumber, or even a concrete slab depending on your budget and the ground conditions. Make sure the base is perfectly level using a spirit level â€" this will prevent problems later on. Don't rush this stage!

2.2 Framing the Walls and Floor

This involves building the skeletal structure of your shed. Use pressure-treated lumber for the floor joists and wall studs, ensuring they're properly spaced and secured. Squareness is important here; use your measuring tape and level frequently. If your loft is going to be a significant part of the shed’s height, plan your frame to support this weight.

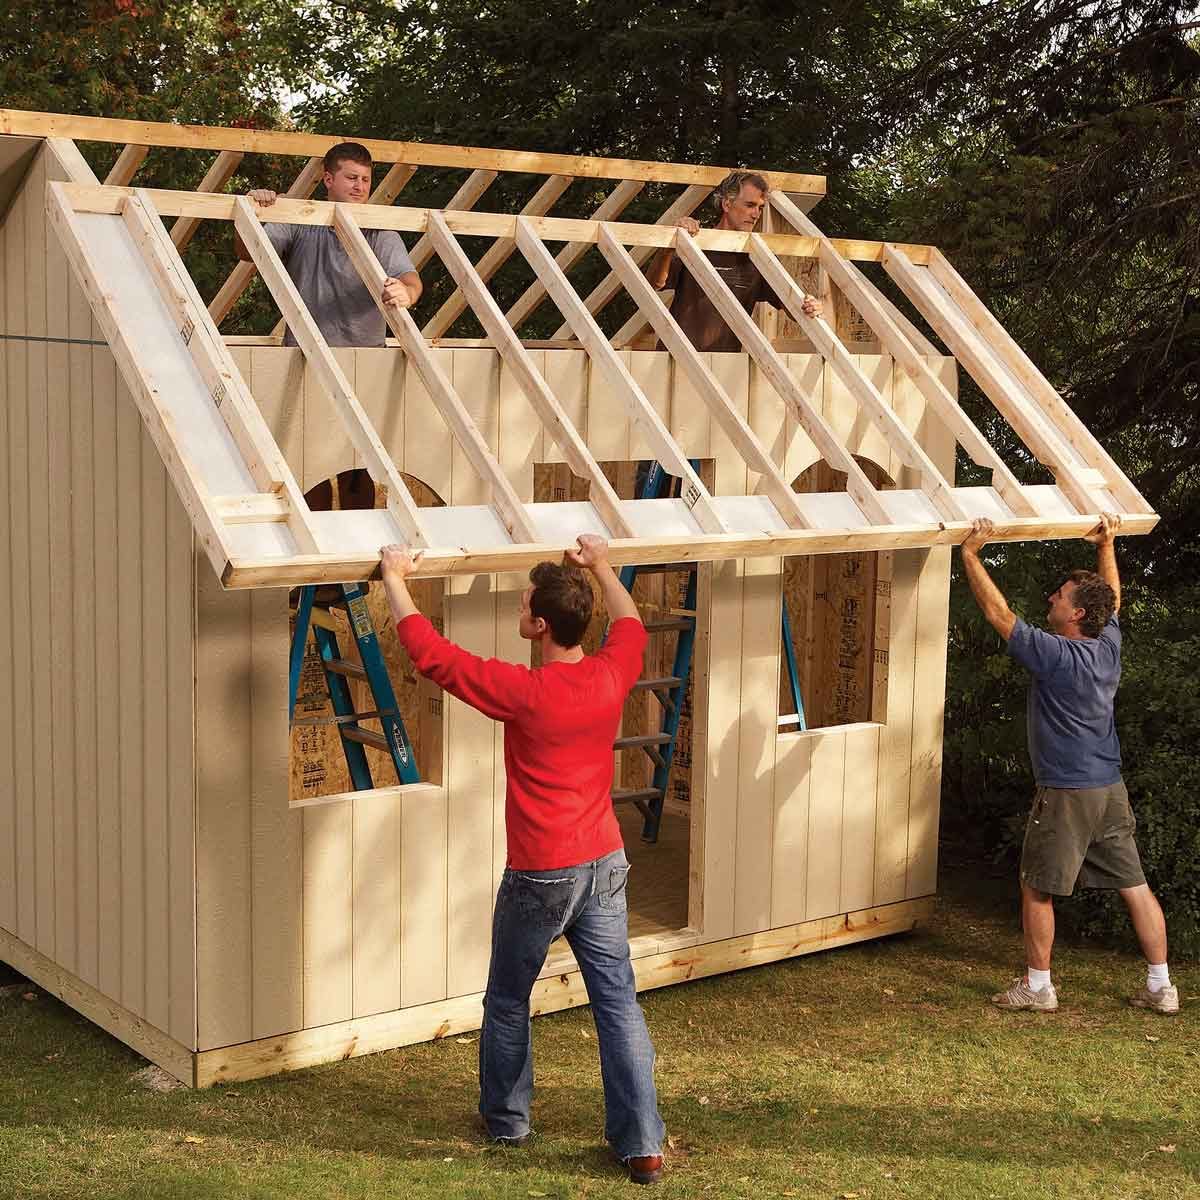
2.3 Installing the Roof

The roof is another critical element, offering protection from the elements. Choose your roofing material (shingles, metal, etc.) and follow the manufacturer's instructions carefully. Ensure the roof has a sufficient slope to allow for proper water drainage. This step might require an extra pair of hands for safety and efficiency.

Phase 3: Building the Loft â€" Adding That Special Touch

Now for the exciting part â€" creating your loft! This section will focus on designing and building the loft area.

3.1 Designing the Loft Structure

Decide on the loft's size and placement within the shed. Consider the weight capacity of the framing you've already installed, ensuring it can support the loft and any items you intend to store there. Sketch out your plans, considering access (stairs or ladder) and safety features (rails).

3.2 Building and Securing the Loft Floor

Using sturdy lumber, build the loft floor, ensuring it's securely attached to the shed's framing. Proper support is essential to prevent sagging. You might need to add extra support beams depending on the size and planned use of your loft.

3.3 Adding Safety Features (Rails and Stairs)

Safety is paramount! Install sturdy rails around the loft to prevent falls. Choose materials that are both durable and aesthetically pleasing. Consider whether you'll use a ladder or build stairs for accessing the loft, planning accordingly for the extra space and structural support required.

Phase 4: Finishing Touches â€" Adding the Finishing Flourishes

You’re in the home stretch! This is where your shed transforms from a structure into a beautiful and functional space.

4.1 Siding and Exterior Finishing

Choose your siding material (wood, vinyl, metal, etc.) and install it, ensuring a clean and weatherproof finish. This is where you can add personal touches to your shed’s exterior.

4.2 Interior Finishing and Insulation

If you want a warm and cozy interior, now’s the time to add insulation. Follow the instructions for your chosen insulation material. You can then add drywall, paint, or other interior finishes to complete the look. This is your chance to make the space truly your own!

4.3 Adding Doors and Windows

Finally, install your doors and windows, ensuring they're properly sealed and secure. Consider adding extra ventilation if needed, especially if you'll be using the shed for activities that generate heat or moisture.

Frequently Asked Questions

Q: How long does it take to build a loft shed?

A: This depends on your experience, the size of the shed, and the complexity of the loft design. It can range from a weekend project for a small simple shed to several weeks for a larger, more complex one.

Q: How much does it cost to build a loft shed?

A: Costs vary significantly based on the size, materials used, and the complexity of the design. Plan for a budget that covers all materials, tools, and any necessary permits.

Q: Do I need any special skills to build a loft shed?

A: Basic carpentry skills are helpful. If you're unsure about any aspect, don't hesitate to seek advice from experienced builders or consult online tutorials.

Q: What about safety precautions?

A: Safety is paramount! Always wear appropriate safety gear (safety glasses, gloves, etc.), use caution when operating power tools, and follow proper lifting techniques. If you are unsure about a step, don't hesitate to seek assistance.

Q: Can I build a loft shed without prior experience?

A: Absolutely! While experience helps, many people successfully build their first loft shed with careful planning, step-by-step instructions, and a willingness to learn. Take your time, don't be afraid to ask for help, and enjoy the process!

Building your own backyard loft shed is a fantastic project. Remember to take your time, enjoy the process, and don’t be afraid to get creative and make it your own. Happy building!

Read More..

DIY outdoor shed projects for beginners

Unlock Your Inner Builder: Easy DIY Outdoor Shed Projects for Beginners

Dreaming of a tidy backyard but lacking the space? A DIY outdoor shed is the perfect solution! This guide provides beginner-friendly projects, transforming your storage woes into a rewarding building experience. Forget expensive contractors and complicated blueprints; we'll equip you with the knowledge and confidence to build your own shed, one step at a time. Let's get started!

Choosing Your Perfect Shed Project

Before grabbing your tools, decide on the type of shed that best suits your needs and skill level. Consider the size â€" a smaller shed requires less material and effort, making it ideal for first-timers. Think about the materials: wood offers a classic, customizable look, while metal sheds provide durability and low maintenance. Assess your budget; factor in the cost of materials, tools, and any potential permits.

Small-Scale Storage Solutions:

For beginners, a compact garden shed or tool storage unit is a great place to start. These projects often involve simpler designs and fewer components, allowing you to master the basics before tackling larger builds. Many online resources offer free plans for these smaller sheds, complete with detailed instructions and material lists.

Pallet Sheds: The Eco-Friendly Option:

Repurpose used shipping pallets to construct a charming and sustainable shed. This eco-friendly approach minimizes your environmental footprint and significantly reduces material costs. However, carefully inspect the pallets for any damage or infestation before starting your project. Ensure that the pallets are treated appropriately for outdoor use.

Essential Tools and Materials

Gather your supplies before you begin! The exact tools and materials depend on your chosen shed design, but some essentials include: a measuring tape, level, saw (circular saw recommended), drill, hammer, screws, nails, wood (if applicable), protective gear (safety glasses and work gloves), and a post hole digger (if installing a shed on a foundation).

Creating a Solid Foundation:

A stable foundation is critical for any shed. For smaller sheds, you might simply use treated lumber for a raised base. Larger projects could benefit from a concrete slab or compacted gravel base. Properly leveling your foundation prevents future issues with sagging or instability.

Gathering Your Materials List:

Carefully review your chosen shed plans to create a detailed materials list. This will prevent costly mid-project trips to the hardware store. Purchase slightly more materials than needed to account for potential errors or unexpected cuts. Don't forget essential fasteners like screws and nails.

Step-by-Step Building Process

Follow your chosen shed plans meticulously, paying close attention to each step. Take your time, and don't rush the process. Accuracy is key to a strong and aesthetically pleasing shed. Start by assembling the frame, ensuring it's square and level at every stage. Gradually work your way up, adding walls, roof, and doors.

Tips for Success:

  • Read the instructions thoroughly before beginning.
  • Check measurements multiple times to avoid mistakes.
  • Use appropriate safety gear throughout the project.
  • Take breaks as needed to prevent fatigue and accidents.
  • Ask for help from a friend or family member if needed.

Finishing Touches and Enjoying Your New Shed!

Once the shed is structurally complete, add the finishing touches. This could include painting or staining the exterior, adding shelving inside, and installing a door handle and lock. Take your time and personalize your shed to reflect your style. Now, step back and admire your handiwork â€" you've successfully built your very own outdoor shed!

Remember, building a shed is a learning experience. Don't be afraid to make mistakes; they're part of the process. With patience, persistence, and the right guidance, you'll enjoy the immense satisfaction of creating something useful and beautiful for your backyard. Happy building!

Read More..

DIY Lean-To Shed: A Fresh Take on Outdoor Storage Solutions

DIY Lean-To Shed: A Fresh Take on Outdoor Storage Solutions

DIY Lean-To Shed: A Fresh Take on Outdoor Storage Solutions

Tired of cluttered garages and overflowing garden sheds? Yearning for a simple, stylish, and affordable solution to your outdoor storage woes? Building your own lean-to shed offers a fantastic opportunity to reclaim valuable space and add a touch of rustic charm to your property. This project empowers you to design a structure tailored to your specific needs, utilizing readily available materials and basic construction skills. Forget expensive pre-fabricated sheds; let's explore the rewarding experience of crafting your perfect lean-to storage solution.

Planning Your Lean-To Shed: Size and Site Selection

Before you grab your tools, careful planning is crucial. First, determine the dimensions of your lean-to. Consider the amount of storage you require and the available space against an existing wall or structure. A smaller lean-to, perhaps 6ft wide by 8ft deep, will suffice for storing gardening tools and equipment. Larger projects demand more materials and construction time. Next, select the ideal location. Ensure the area is level and offers adequate drainage to prevent water accumulation. Check local building codes for any restrictions on shed placement or size. Consider proximity to power outlets if you plan on adding electricity, and always prioritize easy access.

Gathering Materials and Tools: A Detailed Checklist

Building a lean-to shed requires a combination of materials and tools. This isn't a project for the faint of heart, but the rewards outweigh the effort. Your materials list should include: pressure-treated lumber for the frame (4x4 posts, 2x4 rafters, and 2x6 floor joists), plywood or OSB sheeting for the walls and roof, roofing felt or shingles, screws, nails, concrete for post anchors, and weather-resistant paint or stain. On the tools front, you’ll need a post hole digger, level, measuring tape, saw (circular saw recommended), drill, hammer, and safety glasses. Don't forget a shovel for leveling the ground and potentially a wheelbarrow for moving materials!

Essential Tool Checklist:

  • Post hole digger
  • Level
  • Measuring tape
  • Circular saw
  • Drill
  • Hammer
  • Safety glasses
  • Shovel
  • Wheelbarrow (optional)

Construction Process: Step-by-Step Guide

The construction process begins with digging holes for the support posts. These posts should be set in concrete for stability. Next, assemble the frame, using pressure-treated lumber to construct the base and roof structure. Ensure the frame is perfectly square and level throughout the construction process. Once the frame is secure, you can attach the plywood sheeting to the walls and roof. Remember to use appropriate fasteners, and always prioritize safety. Finally, install the roofing material, ensuring proper overlap to prevent leaks. Apply a protective sealant around any potential points of water entry. A final coat of weather-resistant paint or stain adds longevity and aesthetic appeal.

Adding Personal Touches: Enhancements and Upgrades

Once the basic structure is complete, consider adding personal touches to personalize your lean-to. Installing a sturdy door provides enhanced security. Adding windows not only enhances aesthetics but also allows for natural light. Consider using recycled or reclaimed materials for a more eco-friendly approach. Adding shelves inside maximizes storage space. The possibilities are only limited by your imagination and creativity. Remember to always prioritize safety and functionality when adding any enhancements or upgrades.

Building your own lean-to shed offers a deeply satisfying experience. It's a project that allows you to exercise your creativity, hone your DIY skills, and create a valuable addition to your property. So, grab your tools and get started on this rewarding venture! You'll be amazed at the transformation and the added storage you achieve.

Read More..

DIY Pallet Shed Plans for Practical and Low-Cost Backyard Solutions

DIY Pallet Shed Plans for Practical and Low-Cost Backyard Solutions

DIY Pallet Shed Plans for Practical and Low-Cost Backyard Solutions

The allure of a functional yet aesthetically pleasing backyard structure often clashes with budgetary constraints. However, resourceful individuals can overcome this challenge by embracing the versatility of reclaimed materials. This article provides comprehensive DIY pallet shed plans, offering a practical and cost-effective solution for various storage and workspace needs. By carefully planning and executing these plans, homeowners can construct a durable and attractive shed using readily available and affordable pallets.

Assessing Your Needs and Site Preparation

Before embarking on the construction process, meticulous planning is paramount. This initial phase involves defining your requirements and preparing the site to accommodate the structure.

Defining Shed Specifications

Begin by outlining the intended purpose of your pallet shed. Will it serve as a tool shed, a garden storage unit, or a small workshop? This determination directly impacts the dimensions and features of your design. Consider the following factors:

  • Size: Determine the necessary internal dimensions based on the items you plan to store. Allow sufficient space for comfortable movement within the shed.
  • Height: The height should accommodate your tallest items, while also considering ease of access and headroom.
  • Features: Will you need shelves, a workbench, or specialized storage solutions? Integrate these considerations into your preliminary design.
  • Door Placement and Size: Strategically plan the door location and size to ensure easy access and optimal storage arrangements.

Site Selection and Ground Preparation

The chosen location should be level, well-drained, and accessible. Consider proximity to utilities, potential sun exposure, and neighborhood regulations. Proper site preparation is crucial for ensuring the longevity and stability of your shed:

  • Leveling the Ground: Use a spirit level to determine the levelness of the ground. Remove any unevenness by excavating or filling with compacted gravel or concrete.
  • Foundation: A solid foundation is essential. Options include a concrete slab, a compacted gravel base, or pressure-treated wooden blocks. The chosen foundation should be capable of supporting the weight of the shed and its contents.
  • Drainage: Ensure proper drainage to prevent water accumulation around the shed's foundation. This can involve creating a slight slope away from the shed or installing a drainage system.

Material Selection and Pallet Preparation

The success of your DIY project hinges on selecting appropriate pallets and preparing them for construction. Pallets vary significantly in quality and material, so careful selection is vital.

Choosing Suitable Pallets

Prioritize pallets constructed from untreated or pressure-treated lumber. Avoid pallets displaying signs of significant damage, rot, or infestation. Examine each pallet carefully for loose boards, broken slats, and protruding nails. Heat-treated pallets are generally preferred as they are free of chemical treatments.

Cleaning and Repairing Pallets

Once selected, thoroughly clean the pallets to remove dirt, debris, and any potential contaminants. Use a wire brush to remove loose splinters and protruding nails. Repair any damaged boards using wood glue and screws, ensuring structural integrity. Consider sanding the pallets for a smoother finish if desired.

Constructing the Pallet Shed Frame

The frame provides the structural foundation of the shed. This section details the construction process using a step-by-step approach.

Building the Base Frame

Start by creating the base frame using sturdy pallets or lumber. This frame should be sized to match the dimensions of your shed's footprint. Secure the frame together using screws and appropriate joinery techniques. Ensure the frame is level and square.

Erecting the Walls

Position pallets vertically to form the shed's walls. Secure them to the base frame using screws or bolts. Ensure the pallets are aligned and plumb. You may need to cut or adjust some pallets to achieve a seamless fit.

Installing the Roof

The roof construction depends on the chosen design (e.g., gable, shed, or flat). Use appropriate lumber for the roof rafters and supports. Cover the roof with roofing felt, corrugated metal, or other suitable roofing material.

Adding Finishing Touches and Enhancements

Once the basic structure is complete, you can add finishing touches to enhance the shed's functionality and aesthetics.

Installing Doors and Windows

Install a door and any desired windows. Ensure they are securely fastened and weatherproofed to prevent drafts and water damage. Consider adding hinges, latches, and weather stripping for optimal functionality and protection.

Interior Shelving and Workbenches

Construct interior shelving units using additional pallets or lumber to maximize storage space. If you intend to use the shed as a workshop, incorporate a sturdy workbench with adequate work surface area.

Exterior Finishing

To protect the wood and enhance the aesthetics, consider applying a weather-resistant sealant or paint. This will extend the lifespan of the shed and improve its overall appearance. Choose colors that complement your backyard landscape.

Safety Considerations and Best Practices

Throughout the construction process, prioritize safety. Wear appropriate safety gear, including gloves, safety glasses, and work boots. Always use caution when handling power tools and sharp objects.

  • Inspect Pallets Carefully: Check for loose nails, splinters, and any potential hazards before handling.
  • Use Appropriate Fasteners: Employ screws and bolts of sufficient length and strength to ensure structural integrity.
  • Securely Fasten All Components: Avoid any loose or unstable parts that could pose a safety risk.
  • Follow Local Building Codes: Ensure your shed complies with all relevant local building regulations.

By carefully following these DIY pallet shed plans, homeowners can create a practical, cost-effective, and attractive storage solution for their backyard. Remember that thorough planning, attention to detail, and adherence to safety practices are key to a successful project.

Read More..

DIY Lean-To Shed: Create a Sturdy Outdoor Shed with Easy Plans

DIY Lean-To Shed: Create a Sturdy Outdoor Shed with Easy Plans

DIY Lean-To Shed: Create a Sturdy Outdoor Shed with Easy Plans

Tired of garden clutter? Dreaming of a dedicated space for your tools and equipment? Building your own lean-to shed is a surprisingly achievable project, even for novice DIYers. This guide provides detailed instructions and easy-to-follow plans for constructing a sturdy and practical outdoor storage solution. You'll learn how to choose the right materials, lay a solid foundation, and erect a weather-resistant structure that will last for years. Get ready to transform your outdoor space and reclaim order from chaos!

Planning Your Lean-To Shed

Before you grab your tools, meticulous planning is key. First, decide on the dimensions of your shed. Consider the amount of storage space you need, the available area in your yard, and local building regulations. Sketch a basic design, noting the height, width, and depth. This will help determine the quantity of materials you need to purchase. Next, choose a location that offers good drainage to prevent water damage and easy access for loading and unloading your supplies. Factor in sunlight exposure; a partially shaded area will help protect your stored items from harsh weather.

Choosing the Right Materials

Select durable and weather-resistant materials. Pressure-treated lumber is ideal for the frame due to its resistance to rot and insect damage. For roofing, consider using asphalt shingles or metal roofing for longevity and weather protection. Consider using plywood for the walls, ensuring it's treated for exterior use. Don't forget essential hardware like screws, nails, brackets, and a level to ensure accuracy during construction.

Foundation and Framing

Begin by creating a level foundation. A simple gravel base is sufficient for a lean-to shed, providing excellent drainage. Spread a layer of gravel, compact it thoroughly, and level the surface. Next, build the frame. Using your pre-cut lumber, construct the base frame, ensuring perfect square corners using a speed square. Attach vertical posts to the base frame, ensuring they are plumb and evenly spaced. These posts will support the roof structure.

Erecting the Roof

The roof structure is crucial for a weatherproof shed. Construct the rafters, ensuring they are correctly angled to allow for proper water runoff. Securely attach the rafters to the vertical posts and the back wall. Once the rafter system is in place, lay down your chosen roofing material, following the manufacturer's instructions for overlapping and securing. Ensure proper ventilation to prevent moisture buildup.

Adding the Walls and Finishing Touches

With the roof completed, you can attach the plywood sheathing to the frame. Use appropriate fasteners, ensuring a tight fit to prevent drafts and water penetration. For added protection, apply a weather-resistant sealant to all joints. Finish the exterior with a coat of paint or stain to protect the wood from the elements and enhance its appearance. For increased security and protection, consider adding a simple door and lock. Consider adding shelves or other storage solutions inside your new lean-to shed.

Essential Tools

Before you start, gather the necessary tools:

  • Measuring tape
  • Level
  • Saw (circular saw or hand saw)
  • Drill and drill bits
  • Hammer
  • Screwdriver
  • Shovel
  • Safety Glasses and Gloves

Building your own lean-to shed is a rewarding experience that brings both functional storage and a sense of accomplishment. Follow these steps, take your time, and you’ll enjoy the benefits of your newly constructed outdoor haven for years to come.

Read More..

Step-by-Step Lean-To Shed DIY: Build a Practical Storage Solution

Step-by-Step Lean-To Shed DIY: Build a Practical Storage Solution

Step-by-Step Lean-To Shed DIY: Build a Practical Storage Solution

Tired of clutter overflowing your garage or backyard? A lean-to shed offers a simple, cost-effective solution for extra storage space. This guide walks you through building your own, providing a practical and aesthetically pleasing addition to your property. Forget expensive contractors; with a little elbow grease and this detailed plan, you'll have a new shed in no time!

Planning and Preparation: Laying the Foundation for Success

Before you grab a hammer, thorough planning ensures a smooth build. Start by determining the desired dimensions of your lean-to. Consider the space available and the amount of storage you need. Sketch a simple design, noting the height, width, and depth. Next, obtain the necessary building permits from your local authorities. This critical step avoids potential legal issues down the line. Finally, gather your materials. A comprehensive list, including specific measurements, is crucial. Don't forget essential tools like a level, measuring tape, saw, hammer, and drill.

Essential Materials List:

  • Pressure-treated lumber for the frame (4x4 posts, 2x4s for rafters and walls)
  • Plywood or OSB sheeting for the walls and roof
  • Roofing felt or shingles
  • Nails, screws, and other fasteners
  • Concrete mix (for the foundation, if desired)
  • Exterior-grade paint or sealant (optional)

Building the Frame: The Backbone of Your Lean-To

The foundation of your lean-to is the frame. Begin by preparing the ground. If building on concrete, skip this step; otherwise, level the area and create a compacted base. For a simple foundation, you can use pressure-treated 4x4 posts set in concrete. Ensure these posts are plumb and level using a spirit level. Next, construct the main frame using 2x4s, connecting them to the posts with sturdy screws or nails. Remember to reinforce corners for added stability. This frame will support the entire structure, so precision is key.

Securing the Frame:

Utilize metal brackets or strong corner bracing to ensure the frame's rigidity. This step prevents warping and adds significant strength to your lean-to structure. Once the main frame is complete, install the rafters that will support the roof. Space these evenly and secure them firmly to the main frame.

Sheathing and Roofing: Weatherproofing Your New Shed

With the frame complete, it's time to sheathe the walls and roof. Cut and attach plywood or OSB sheeting to the frame, ensuring a tight fit to prevent drafts. Use appropriate nails or screws for secure attachment. For the roof, install roofing felt or shingles, overlapping each layer to guarantee a waterproof seal. Proper roofing is essential for protecting your stored items from the elements. Pay close attention to the seams to ensure no water can penetrate. Remember to add flashing around any edges for extra protection.

Finishing Touches: Adding the Final Details

Once the sheathing and roofing are complete, add a door and any windows you desire. You can also add trim to enhance the aesthetics. Consider painting or sealing the exterior to protect the wood from moisture damage and improve the look of your new shed. A final coat of weather-resistant paint will extend the lifespan of your lean-to shed considerably. Remember to apply a second coat for complete protection.

Congratulations! You've successfully built your own lean-to shed. Enjoy your new, practical, and personalized storage solution. Remember to regularly inspect and maintain your shed to ensure its longevity.

Read More..

Create a Simple Pallet Shed DIY for Your Yard with These Plans

Create a Simple Pallet Shed DIY for Your Yard with These Plans

Build Your Own Pallet Shed: A Simple DIY Guide

Tired of clutter piling up in your yard? Wish you had a dedicated space for storing tools, garden supplies, or outdoor furniture? Building your own pallet shed is a surprisingly achievable project that will save you money and add a rustic charm to your outdoor space. This guide provides a step-by-step approach, even for DIY beginners, showing you how to transform reclaimed pallets into a functional and attractive storage solution. Get ready to reclaim some space and unleash your inner builder!

Planning Your Pallet Shed

Before you even touch a hammer, careful planning is key. First, determine the size of your shed. Consider the space available in your yard and the amount of storage you need. Sketch out a simple plan, noting the dimensions and the placement of the door. Next, gather your materials. You'll need a significant number of reclaimed pallets â€" inspect them carefully for rot or damage, and aim for pallets of consistent size and condition. Supplement with additional lumber for the roof framing and any necessary repairs or reinforcements. You'll also need screws, nails, a level, measuring tape, a saw (circular saw recommended), and safety glasses. Don't forget about securing any necessary permits before beginning construction.

Choosing the Right Pallets

Not all pallets are created equal. Prioritize pallets made from strong, durable wood. Avoid those showing signs of significant damage, pest infestation, or excessive weathering. The size and condition of the pallets will directly impact the final look and structural integrity of your shed. If your pallets are treated, make sure to take precautions to avoid potential health hazards during construction.

Building the Shed Frame

Start by constructing the base frame of your shed using several pallets laid flat to create the desired dimensions. Secure them together using screws, ensuring they’re tightly bound and level. For extra stability, consider using concrete blocks to create a solid foundation. Then, carefully build the walls. You can use the pallets as they are for the walls, creating a rustic look. Alternatively, disassemble the pallets and use the wood to construct more customized walls. Remember to leave space for your door opening. Use additional lumber to reinforce corners and create a sturdy structure. This process requires patience and precision. Take your time, double-check your measurements, and always prioritize safety.

Adding Strength and Stability

To bolster the structural integrity of your shed, consider adding bracing between the pallets and cross-supports. This will prevent warping and ensure that your structure can stand the test of time. Use pressure-treated lumber for any additional structural elements. These extra measures may seem tedious, but they will pay off in a more resilient and long-lasting shed.

Completing Your Pallet Shed

Once the walls are up, build the roof frame using additional lumber. Create a simple gabled or shed roof design depending on your preferences and the size of your shed. Securely attach the roofing material; consider using inexpensive roofing felt or recycled materials for a budget-friendly and environmentally-conscious approach. Remember to add a door. You can repurpose an old door, or build one from additional reclaimed wood. Finally, consider adding a simple latch or lock for security.

Finishing Touches

To enhance the aesthetics and longevity of your pallet shed, consider adding a coat of weather-resistant sealant or paint. This will protect the wood from the elements and give your shed a more polished look. You can also personalize your shed with a few decorative touches such as climbing plants or a small window.

Building your own pallet shed is a rewarding project that combines creativity, practicality, and sustainability. By following these steps and prioritizing safety, you’ll create a valuable addition to your outdoor space for years to come. Enjoy your new, DIY pallet shed!

Read More..
Powered by Blogger.